**Authors:** Scott Zhu, Francois Chollet
|---|---|---|---|
| [View on TensorFlow.org](https://www.tensorflow.org/guide/keras/working_with_rnns) | [Run in Google Colab](https://colab.research.google.com/github/keras-team/keras-io/blob/master/guides/ipynb/working_with_rnns.ipynb) | [View source on GitHub](https://github.com/keras-team/keras-io/blob/master/guides/working_with_rnns.py) | [View on keras.io](https://keras.io/guides/working_with_rnns) |
## Introduction
Recurrent neural networks (RNN) are a class of neural networks that is powerful for
modeling sequence data such as time series or natural language.
Schematically, a RNN layer uses a `for` loop to iterate over the timesteps of a
sequence, while maintaining an internal state that encodes information about the
timesteps it has seen so far.
The Keras RNN API is designed with a focus on:
- **Ease of use** : the built-in [`keras.layers.RNN`](https://www.tensorflow.org/api_docs/python/tf/keras/layers/RNN), [`keras.layers.LSTM`](https://www.tensorflow.org/api_docs/python/tf/keras/layers/LSTM),
[`keras.layers.GRU`](https://www.tensorflow.org/api_docs/python/tf/keras/layers/GRU) layers enable you to quickly build recurrent models without
having to make difficult configuration choices.
- **Ease of customization** : You can also define your own RNN cell layer (the inner
part of the `for` loop) with custom behavior, and use it with the generic
[`keras.layers.RNN`](https://www.tensorflow.org/api_docs/python/tf/keras/layers/RNN) layer (the `for` loop itself). This allows you to quickly
prototype different research ideas in a flexible way with minimal code.
## Setup
import numpy as np
import tensorflow as tf
import keras
from keras import layers
```
2023-11-16 12:10:07.977993: E external/local_xla/xla/stream_executor/cuda/cuda_dnn.cc:9261] Unable to register cuDNN factory: Attempting to register factory for plugin cuDNN when one has already been registered
2023-11-16 12:10:07.978039: E external/local_xla/xla/stream_executor/cuda/cuda_fft.cc:607] Unable to register cuFFT factory: Attempting to register factory for plugin cuFFT when one has already been registered
2023-11-16 12:10:07.979464: E external/local_xla/xla/stream_executor/cuda/cuda_blas.cc:1515] Unable to register cuBLAS factory: Attempting to register factory for plugin cuBLAS when one has already been registered
```
## Built-in RNN layers: a simple example
There are three built-in RNN layers in Keras:
1. [`keras.layers.SimpleRNN`](https://www.tensorflow.org/api_docs/python/tf/keras/layers/SimpleRNN), a fully-connected RNN where the output from previous
timestep is to be fed to next timestep.
2. [`keras.layers.GRU`](https://www.tensorflow.org/api_docs/python/tf/keras/layers/GRU), first proposed in
[Cho et al., 2014](https://arxiv.org/abs/1406.1078).
3. [`keras.layers.LSTM`](https://www.tensorflow.org/api_docs/python/tf/keras/layers/LSTM), first proposed in
[Hochreiter \& Schmidhuber, 1997](https://www.bioinf.jku.at/publications/older/2604.pdf).
In early 2015, Keras had the first reusable open-source Python implementations of LSTM
and GRU.
Here is a simple example of a `Sequential` model that processes sequences of integers,
embeds each integer into a 64-dimensional vector, then processes the sequence of
vectors using a `LSTM` layer.
model = keras.Sequential()
# Add an Embedding layer expecting input vocab of size 1000, and
# output embedding dimension of size 64.
model.add(layers.Embedding(input_dim=1000, output_dim=64))
# Add a LSTM layer with 128 internal units.
model.add(layers.LSTM(128))
# Add a Dense layer with 10 units.
model.add(layers.Dense(10))
model.summary()
```
Model: "sequential"
_________________________________________________________________
Layer (type) Output Shape Param #
=================================================================
embedding (Embedding) (None, None, 64) 64000
lstm (LSTM) (None, 128) 98816
dense (Dense) (None, 10) 1290
=================================================================
Total params: 164106 (641.04 KB)
Trainable params: 164106 (641.04 KB)
Non-trainable params: 0 (0.00 Byte)
_________________________________________________________________
```
Built-in RNNs support a number of useful features:
- Recurrent dropout, via the `dropout` and `recurrent_dropout` arguments
- Ability to process an input sequence in reverse, via the `go_backwards` argument
- Loop unrolling (which can lead to a large speedup when processing short sequences on CPU), via the `unroll` argument
- ...and more.
For more information, see the
[RNN API documentation](https://keras.io/api/layers/recurrent_layers/).
## Outputs and states
By default, the output of a RNN layer contains a single vector per sample. This vector
is the RNN cell output corresponding to the last timestep, containing information
about the entire input sequence. The shape of this output is `(batch_size, units)`
where `units` corresponds to the `units` argument passed to the layer's constructor.
A RNN layer can also return the entire sequence of outputs for each sample (one vector
per timestep per sample), if you set `return_sequences=True`. The shape of this output
is `(batch_size, timesteps, units)`.
model = keras.Sequential()
model.add(layers.Embedding(input_dim=1000, output_dim=64))
# The output of GRU will be a 3D tensor of shape (batch_size, timesteps, 256)
model.add(layers.GRU(256, return_sequences=True))
# The output of SimpleRNN will be a 2D tensor of shape (batch_size, 128)
model.add(layers.SimpleRNN(128))
model.add(layers.Dense(10))
model.summary()
```
Model: "sequential_1"
_________________________________________________________________
Layer (type) Output Shape Param #
=================================================================
embedding_1 (Embedding) (None, None, 64) 64000
gru (GRU) (None, None, 256) 247296
simple_rnn (SimpleRNN) (None, 128) 49280
dense_1 (Dense) (None, 10) 1290
=================================================================
Total params: 361866 (1.38 MB)
Trainable params: 361866 (1.38 MB)
Non-trainable params: 0 (0.00 Byte)
_________________________________________________________________
```
In addition, a RNN layer can return its final internal state(s). The returned states
can be used to resume the RNN execution later, or
[to initialize another RNN](https://arxiv.org/abs/1409.3215).
This setting is commonly used in the
encoder-decoder sequence-to-sequence model, where the encoder final state is used as
the initial state of the decoder.
To configure a RNN layer to return its internal state, set the `return_state` parameter
to `True` when creating the layer. Note that `LSTM` has 2 state tensors, but `GRU`
only has one.
To configure the initial state of the layer, just call the layer with additional
keyword argument `initial_state`.
Note that the shape of the state needs to match the unit size of the layer, like in the
example below.
encoder_vocab = 1000
decoder_vocab = 2000
encoder_input = layers.Input(shape=(None,))
encoder_embedded = layers.Embedding(input_dim=encoder_vocab, output_dim=64)(
encoder_input
)
# Return states in addition to output
output, state_h, state_c = layers.LSTM(64, return_state=True, name="encoder")(
encoder_embedded
)
encoder_state = [state_h, state_c]
decoder_input = layers.Input(shape=(None,))
decoder_embedded = layers.Embedding(input_dim=decoder_vocab, output_dim=64)(
decoder_input
)
# Pass the 2 states to a new LSTM layer, as initial state
decoder_output = layers.LSTM(64, name="decoder")(
decoder_embedded, initial_state=encoder_state
)
output = layers.Dense(10)(decoder_output)
model = keras.Model([encoder_input, decoder_input], output)
model.summary()
```
Model: "model"
__________________________________________________________________________________________________
Layer (type) Output Shape Param # Connected to
==================================================================================================
input_1 (InputLayer) [(None, None)] 0 []
input_2 (InputLayer) [(None, None)] 0 []
embedding_2 (Embedding) (None, None, 64) 64000 ['input_1[0][0]']
embedding_3 (Embedding) (None, None, 64) 128000 ['input_2[0][0]']
encoder (LSTM) [(None, 64), 33024 ['embedding_2[0][0]']
(None, 64),
(None, 64)]
decoder (LSTM) (None, 64) 33024 ['embedding_3[0][0]',
'encoder[0][1]',
'encoder[0][2]']
dense_2 (Dense) (None, 10) 650 ['decoder[0][0]']
==================================================================================================
Total params: 258698 (1010.54 KB)
Trainable params: 258698 (1010.54 KB)
Non-trainable params: 0 (0.00 Byte)
__________________________________________________________________________________________________
```
## RNN layers and RNN cells
In addition to the built-in RNN layers, the RNN API also provides cell-level APIs.
Unlike RNN layers, which processes whole batches of input sequences, the RNN cell only
processes a single timestep.
The cell is the inside of the `for` loop of a RNN layer. Wrapping a cell inside a
[`keras.layers.RNN`](https://www.tensorflow.org/api_docs/python/tf/keras/layers/RNN) layer gives you a layer capable of processing batches of
sequences, e.g. `RNN(LSTMCell(10))`.
Mathematically, `RNN(LSTMCell(10))` produces the same result as `LSTM(10)`. In fact,
the implementation of this layer in TF v1.x was just creating the corresponding RNN
cell and wrapping it in a RNN layer. However using the built-in `GRU` and `LSTM`
layers enable the use of CuDNN and you may see better performance.
There are three built-in RNN cells, each of them corresponding to the matching RNN
layer.
- [`keras.layers.SimpleRNNCell`](https://www.tensorflow.org/api_docs/python/tf/keras/layers/SimpleRNNCell) corresponds to the `SimpleRNN` layer.
- [`keras.layers.GRUCell`](https://www.tensorflow.org/api_docs/python/tf/keras/layers/GRUCell) corresponds to the `GRU` layer.
- [`keras.layers.LSTMCell`](https://www.tensorflow.org/api_docs/python/tf/keras/layers/LSTMCell) corresponds to the `LSTM` layer.
The cell abstraction, together with the generic [`keras.layers.RNN`](https://www.tensorflow.org/api_docs/python/tf/keras/layers/RNN) class, make it
very easy to implement custom RNN architectures for your research.
## Cross-batch statefulness
When processing very long sequences (possibly infinite), you may want to use the
pattern of **cross-batch statefulness**.
Normally, the internal state of a RNN layer is reset every time it sees a new batch
(i.e. every sample seen by the layer is assumed to be independent of the past). The
layer will only maintain a state while processing a given sample.
If you have very long sequences though, it is useful to break them into shorter
sequences, and to feed these shorter sequences sequentially into a RNN layer without
resetting the layer's state. That way, the layer can retain information about the
entirety of the sequence, even though it's only seeing one sub-sequence at a time.
You can do this by setting `stateful=True` in the constructor.
If you have a sequence `s = [t0, t1, ... t1546, t1547]`, you would split it into e.g.
s1 = [t0, t1, ... t100]
s2 = [t101, ... t201]
...
s16 = [t1501, ... t1547]
Then you would process it via:
lstm_layer = layers.LSTM(64, stateful=True)
for s in sub_sequences:
output = lstm_layer(s)
When you want to clear the state, you can use `layer.reset_states()`.
>
> > [!NOTE]
> > **Note:** In this setup, sample `i` in a given batch is assumed to be the continuation of sample `i` in the previous batch. This means that all batches should contain the same number of samples (batch size). E.g. if a batch contains `[sequence_A_from_t0_to_t100,
> > sequence_B_from_t0_to_t100]`, the next batch should contain `[sequence_A_from_t101_to_t200, sequence_B_from_t101_to_t200]`.
>
Here is a complete example:
paragraph1 = np.random.random((20, 10, 50)).astype(np.float32)
paragraph2 = np.random.random((20, 10, 50)).astype(np.float32)
paragraph3 = np.random.random((20, 10, 50)).astype(np.float32)
lstm_layer = layers.LSTM(64, stateful=True)
output = lstm_layer(paragraph1)
output = lstm_layer(paragraph2)
output = lstm_layer(paragraph3)
# reset_states() will reset the cached state to the original initial_state.
# If no initial_state was provided, zero-states will be used by default.
lstm_layer.reset_states()
### RNN State Reuse
The recorded states of the RNN layer are not included in the `layer.weights()`. If you
would like to reuse the state from a RNN layer, you can retrieve the states value by
`layer.states` and use it as the
initial state for a new layer via the Keras functional API like `new_layer(inputs,
initial_state=layer.states)`, or model subclassing.
Please also note that sequential model might not be used in this case since it only
supports layers with single input and output, the extra input of initial state makes
it impossible to use here.
paragraph1 = np.random.random((20, 10, 50)).astype(np.float32)
paragraph2 = np.random.random((20, 10, 50)).astype(np.float32)
paragraph3 = np.random.random((20, 10, 50)).astype(np.float32)
lstm_layer = layers.LSTM(64, stateful=True)
output = lstm_layer(paragraph1)
output = lstm_layer(paragraph2)
existing_state = lstm_layer.states
new_lstm_layer = layers.LSTM(64)
new_output = new_lstm_layer(paragraph3, initial_state=existing_state)
## Bidirectional RNNs
For sequences other than time series (e.g. text), it is often the case that a RNN model
can perform better if it not only processes sequence from start to end, but also
backwards. For example, to predict the next word in a sentence, it is often useful to
have the context around the word, not only just the words that come before it.
Keras provides an easy API for you to build such bidirectional RNNs: the
[`keras.layers.Bidirectional`](https://www.tensorflow.org/api_docs/python/tf/keras/layers/Bidirectional) wrapper.
model = keras.Sequential()
model.add(
layers.Bidirectional(layers.LSTM(64, return_sequences=True), input_shape=(5, 10))
)
model.add(layers.Bidirectional(layers.LSTM(32)))
model.add(layers.Dense(10))
model.summary()
```
Model: "sequential_2"
_________________________________________________________________
Layer (type) Output Shape Param #
=================================================================
bidirectional (Bidirection (None, 5, 128) 38400
al)
bidirectional_1 (Bidirecti (None, 64) 41216
onal)
dense_3 (Dense) (None, 10) 650
=================================================================
Total params: 80266 (313.54 KB)
Trainable params: 80266 (313.54 KB)
Non-trainable params: 0 (0.00 Byte)
_________________________________________________________________
```
Under the hood, `Bidirectional` will copy the RNN layer passed in, and flip the
`go_backwards` field of the newly copied layer, so that it will process the inputs in
reverse order.
The output of the `Bidirectional` RNN will be, by default, the concatenation of the forward layer
output and the backward layer output. If you need a different merging behavior, e.g.
concatenation, change the `merge_mode` parameter in the `Bidirectional` wrapper
constructor. For more details about `Bidirectional`, please check
[the API docs](https://keras.io/api/layers/recurrent_layers/bidirectional/).
## Performance optimization and CuDNN kernels
In TensorFlow 2.0, the built-in LSTM and GRU layers have been updated to leverage CuDNN
kernels by default when a GPU is available. With this change, the prior
`keras.layers.CuDNNLSTM/CuDNNGRU` layers have been deprecated, and you can build your
model without worrying about the hardware it will run on.
Since the CuDNN kernel is built with certain assumptions, this means the layer **will
not be able to use the CuDNN kernel if you change the defaults of the built-in LSTM or
GRU layers**. E.g.:
- Changing the `activation` function from `tanh` to something else.
- Changing the `recurrent_activation` function from `sigmoid` to something else.
- Using `recurrent_dropout` \> 0.
- Setting `unroll` to True, which forces LSTM/GRU to decompose the inner [`tf.while_loop`](https://www.tensorflow.org/api_docs/python/tf/while_loop) into an unrolled `for` loop.
- Setting `use_bias` to False.
- Using masking when the input data is not strictly right padded (if the mask corresponds to strictly right padded data, CuDNN can still be used. This is the most common case).
For the detailed list of constraints, please see the documentation for the
[LSTM](https://keras.io/api/layers/recurrent_layers/lstm/) and
[GRU](https://keras.io/api/layers/recurrent_layers/gru/) layers.
### Using CuDNN kernels when available
Let's build a simple LSTM model to demonstrate the performance difference.
We'll use as input sequences the sequence of rows of MNIST digits (treating each row of
pixels as a timestep), and we'll predict the digit's label.
batch_size = 64
# Each MNIST image batch is a tensor of shape (batch_size, 28, 28).
# Each input sequence will be of size (28, 28) (height is treated like time).
input_dim = 28
units = 64
output_size = 10 # labels are from 0 to 9
# Build the RNN model
def build_model(allow_cudnn_kernel=True):
# CuDNN is only available at the layer level, and not at the cell level.
# This means `LSTM(units)` will use the CuDNN kernel,
# while RNN(LSTMCell(units)) will run on non-CuDNN kernel.
if allow_cudnn_kernel:
# The LSTM layer with default options uses CuDNN.
lstm_layer = keras.layers.LSTM(units, input_shape=(None, input_dim))
else:
# Wrapping a LSTMCell in a RNN layer will not use CuDNN.
lstm_layer = keras.layers.RNN(
keras.layers.LSTMCell(units), input_shape=(None, input_dim)
)
model = keras.models.Sequential(
[
lstm_layer,
keras.layers.BatchNormalization(),
keras.layers.Dense(output_size),
]
)
return model
Let's load the MNIST dataset:
mnist = keras.datasets.mnist
(x_train, y_train), (x_test, y_test) = mnist.load_data()
x_train, x_test = x_train / 255.0, x_test / 255.0
sample, sample_label = x_train[0], y_train[0]
```
Downloading data from https://storage.googleapis.com/tensorflow/tf-keras-datasets/mnist.npz
11490434/11490434 [==============================] - 0s 0us/step
```
Let's create a model instance and train it.
We choose `sparse_categorical_crossentropy` as the loss function for the model. The
output of the model has shape of `[batch_size, 10]`. The target for the model is an
integer vector, each of the integer is in the range of 0 to 9.
model = build_model(allow_cudnn_kernel=True)
model.compile(
loss=keras.losses.SparseCategoricalCrossentropy(from_logits=True),
optimizer="sgd",
metrics=["accuracy"],
)
model.fit(
x_train, y_train, validation_data=(x_test, y_test), batch_size=batch_size, epochs=1
)
```
WARNING: All log messages before absl::InitializeLog() is called are written to STDERR
I0000 00:00:1700136618.250305 9824 device_compiler.h:186] Compiled cluster using XLA! This line is logged at most once for the lifetime of the process.
938/938 [==============================] - 7s 5ms/step - loss: 0.9965 - accuracy: 0.6845 - val_loss: 0.5699 - val_accuracy: 0.8181
```
Now, let's compare to a model that does not use the CuDNN kernel:
noncudnn_model = build_model(allow_cudnn_kernel=False)
noncudnn_model.set_weights(model.get_weights())
noncudnn_model.compile(
loss=keras.losses.SparseCategoricalCrossentropy(from_logits=True),
optimizer="sgd",
metrics=["accuracy"],
)
noncudnn_model.fit(
x_train, y_train, validation_data=(x_test, y_test), batch_size=batch_size, epochs=1
)
```
938/938 [==============================] - 20s 20ms/step - loss: 0.4268 - accuracy: 0.8698 - val_loss: 0.3017 - val_accuracy: 0.9145
```
When running on a machine with a NVIDIA GPU and CuDNN installed,
the model built with CuDNN is much faster to train compared to the
model that uses the regular TensorFlow kernel.
The same CuDNN-enabled model can also be used to run inference in a CPU-only
environment. The [`tf.device`](https://www.tensorflow.org/api_docs/python/tf/device) annotation below is just forcing the device placement.
The model will run on CPU by default if no GPU is available.
You simply don't have to worry about the hardware you're running on anymore. Isn't that
pretty cool?
import matplotlib.pyplot as plt
with tf.device("CPU:0"):
cpu_model = build_model(allow_cudnn_kernel=True)
cpu_model.set_weights(model.get_weights())
result = tf.argmax(cpu_model.predict_on_batch(tf.expand_dims(sample, 0)), axis=1)
print(
"Predicted result is: %s, target result is: %s" % (result.numpy(), sample_label)
)
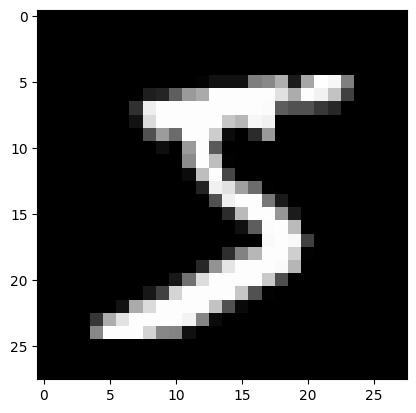
plt.imshow(sample, cmap=plt.get_cmap("gray"))
```
Predicted result is: [3], target result is: 5
```
## RNNs with list/dict inputs, or nested inputs
Nested structures allow implementers to include more information within a single
timestep. For example, a video frame could have audio and video input at the same
time. The data shape in this case could be:
`[batch, timestep, {"video": [height, width, channel], "audio": [frequency]}]`
In another example, handwriting data could have both coordinates x and y for the
current position of the pen, as well as pressure information. So the data
representation could be:
`[batch, timestep, {"location": [x, y], "pressure": [force]}]`
The following code provides an example of how to build a custom RNN cell that accepts
such structured inputs.
### Define a custom cell that supports nested input/output
See [Making new Layers \& Models via subclassing](https://www.tensorflow.org/guide/keras/making_new_layers_and_models_via_subclassing)
for details on writing your own layers.
@keras.saving.register_keras_serializable()
class NestedCell(keras.layers.Layer):
def __init__(self, unit_1, unit_2, unit_3, **kwargs):
self.unit_1 = unit_1
self.unit_2 = unit_2
self.unit_3 = unit_3
self.state_size = [tf.TensorShape([unit_1]), tf.TensorShape([unit_2, unit_3])]
self.output_size = [tf.TensorShape([unit_1]), tf.TensorShape([unit_2, unit_3])]
super().__init__(**kwargs)
def build(self, input_shapes):
# expect input_shape to contain 2 items, [(batch, i1), (batch, i2, i3)]
i1 = input_shapes[0][1]
i2 = input_shapes[1][1]
i3 = input_shapes[1][2]
self.kernel_1 = self.add_weight(
shape=(i1, self.unit_1), initializer="uniform", name="kernel_1"
)
self.kernel_2_3 = self.add_weight(
shape=(i2, i3, self.unit_2, self.unit_3),
initializer="uniform",
name="kernel_2_3",
)
def call(self, inputs, states):
# inputs should be in [(batch, input_1), (batch, input_2, input_3)]
# state should be in shape [(batch, unit_1), (batch, unit_2, unit_3)]
input_1, input_2 = tf.nest.flatten(inputs)
s1, s2 = states
output_1 = tf.matmul(input_1, self.kernel_1)
output_2_3 = tf.einsum("bij,ijkl->bkl", input_2, self.kernel_2_3)
state_1 = s1 + output_1
state_2_3 = s2 + output_2_3
output = (output_1, output_2_3)
new_states = (state_1, state_2_3)
return output, new_states
def get_config(self):
return {"unit_1": self.unit_1, "unit_2": self.unit_2, "unit_3": self.unit_3}
### Build a RNN model with nested input/output
Let's build a Keras model that uses a [`keras.layers.RNN`](https://www.tensorflow.org/api_docs/python/tf/keras/layers/RNN) layer and the custom cell
we just defined.
unit_1 = 10
unit_2 = 20
unit_3 = 30
i1 = 32
i2 = 64
i3 = 32
batch_size = 64
num_batches = 10
timestep = 50
cell = NestedCell(unit_1, unit_2, unit_3)
rnn = keras.layers.RNN(cell)
input_1 = keras.Input((None, i1))
input_2 = keras.Input((None, i2, i3))
outputs = rnn((input_1, input_2))
model = keras.models.Model([input_1, input_2], outputs)
model.compile(optimizer="adam", loss="mse", metrics=["accuracy"])
### Train the model with randomly generated data
Since there isn't a good candidate dataset for this model, we use random Numpy data for
demonstration.
input_1_data = np.random.random((batch_size * num_batches, timestep, i1))
input_2_data = np.random.random((batch_size * num_batches, timestep, i2, i3))
target_1_data = np.random.random((batch_size * num_batches, unit_1))
target_2_data = np.random.random((batch_size * num_batches, unit_2, unit_3))
input_data = [input_1_data, input_2_data]
target_data = [target_1_data, target_2_data]
model.fit(input_data, target_data, batch_size=batch_size)
```
10/10 [==============================] - 1s 27ms/step - loss: 0.7623 - rnn_1_loss: 0.2873 - rnn_1_1_loss: 0.4750 - rnn_1_accuracy: 0.1016 - rnn_1_1_accuracy: 0.0350
```
With the Keras [`keras.layers.RNN`](https://www.tensorflow.org/api_docs/python/tf/keras/layers/RNN) layer, You are only expected to define the math
logic for individual step within the sequence, and the [`keras.layers.RNN`](https://www.tensorflow.org/api_docs/python/tf/keras/layers/RNN) layer
will handle the sequence iteration for you. It's an incredibly powerful way to quickly
prototype new kinds of RNNs (e.g. a LSTM variant).
For more details, please visit the [API docs](https://keras.io/api/layers/recurrent_layers/rnn/).