
Introduction
This tutorial is designed to introduce TensorFlow Extended (TFX) and AIPlatform Pipelines, and help you learn to create your own machine learning pipelines on Google Cloud. It shows integration with TFX, AI Platform Pipelines, and Kubeflow, as well as interaction with TFX in Jupyter notebooks.
At the end of this tutorial, you will have created and run an ML Pipeline, hosted on Google Cloud. You'll be able to visualize the results of each run, and view the lineage of the created artifacts.
You'll follow a typical ML development process, starting by examining the dataset, and ending up with a complete working pipeline. Along the way you'll explore ways to debug and update your pipeline, and measure performance.
Chicago Taxi Dataset

You're using the Taxi Trips dataset released by the City of Chicago.
You can read more about the dataset in Google BigQuery. Explore the full dataset in the BigQuery UI.
Model Goal - Binary classification
Will the customer tip more or less than 20%?
1. Set up a Google Cloud project
1.a Set up your environment on Google Cloud
To get started, you need a Google Cloud Account. If you already have one, skip ahead to Create New Project.
Go to the Google Cloud Console.
Agree to Google Cloud terms and conditions
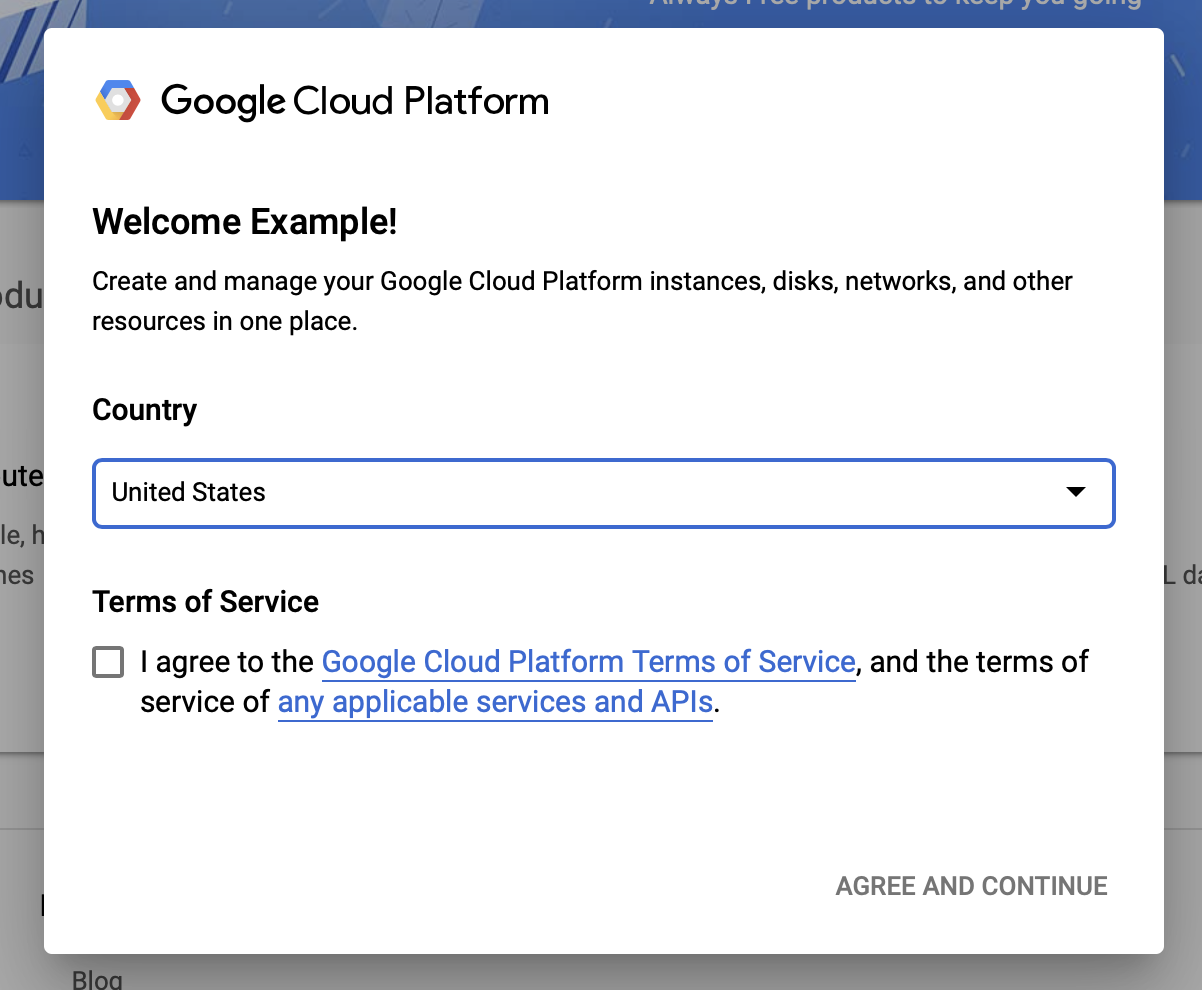
If you would like to start with a free trial account, click on Try For Free (or Get started for free).
Select your country.
Agree to the terms of service.
Enter billing details.
You will not be charged at this point. If you have no other Google Cloud projects, you can complete this tutorial without exceeding the Google Cloud Free Tier limits, which includes a max of 8 cores running at the same time.
1.b Create a new project.
- From the main Google Cloud dashboard, click the project dropdown next to the Google Cloud Platform header, and select New Project.
- Give your project a name and enter other project details
- Once you have created a project, make sure to select it from the project drop-down.
2. Set up and deploy an AI Platform Pipeline on a new Kubernetes cluster
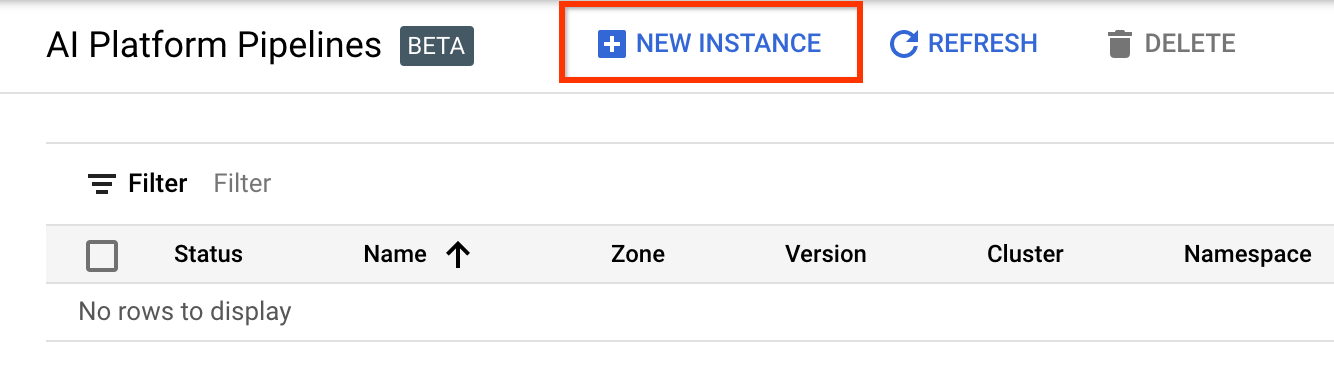
Go to the AI Platform Pipelines Clusters page.
Under the Main Navigation Menu: ≡ > AI Platform > Pipelines
Click + New Instance to create a new cluster.
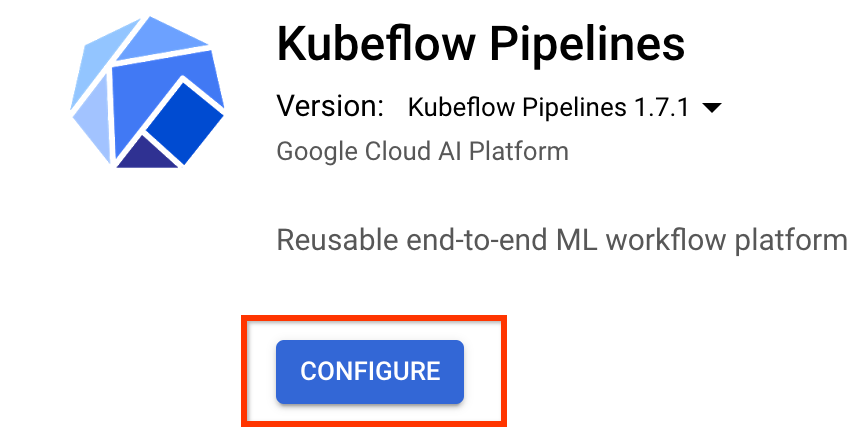
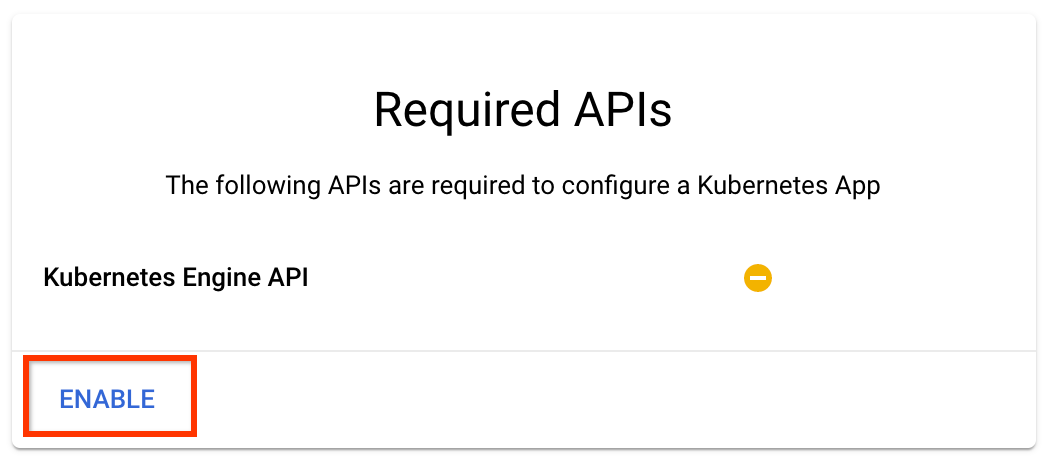
On the Kubeflow Pipelines overview page, click Configure.
Click "Enable" to enable the Kubernetes Engine API
On the Deploy Kubeflow Pipelines page:
Select a zone (or "region") for your cluster. The network and subnetwork can be set, but for the purposes of this tutorial we will leave them as defaults.
IMPORTANT Check the box labeled Allow access to the following cloud APIs. (This is required for this cluster to access the other pieces of your project. If you miss this step, fixing it later is a bit tricky.)
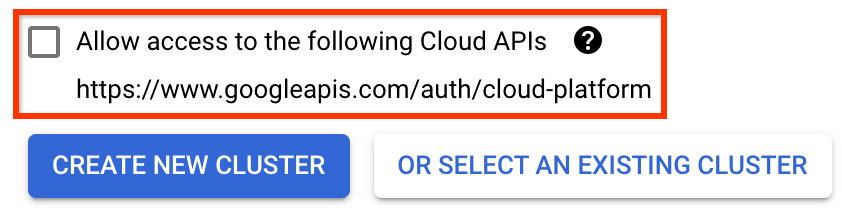
Click Create New Cluster, and wait several minutes until the cluster has been created. This will take a few minutes. When it completes you will see a message like:
Cluster "cluster-1" successfully created in zone "us-central1-a".
Select a namespace and instance name (using the defaults is fine). For the purposes of this tutorial do not check executor.emissary or managedstorage.enabled.
Click Deploy, and wait several moments until the pipeline has been deployed. By deploying Kubeflow Pipelines, you accept the Terms of Service.
3. Set up Cloud AI Platform Notebook instance.
Go to the Vertex AI Workbench page. The first time you run Workbench you will need to enable the Notebooks API.
Under the Main Navigation Menu: ≡ -> Vertex AI -> Workbench
If prompted, enable the Compute Engine API.
Create a New Notebook with TensorFlow Enterprise 2.7 (or above) installed.
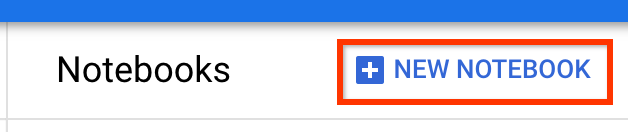
New Notebook -> TensorFlow Enterprise 2.7 -> Without GPU
Select a region and zone, and give the notebook instance a name.
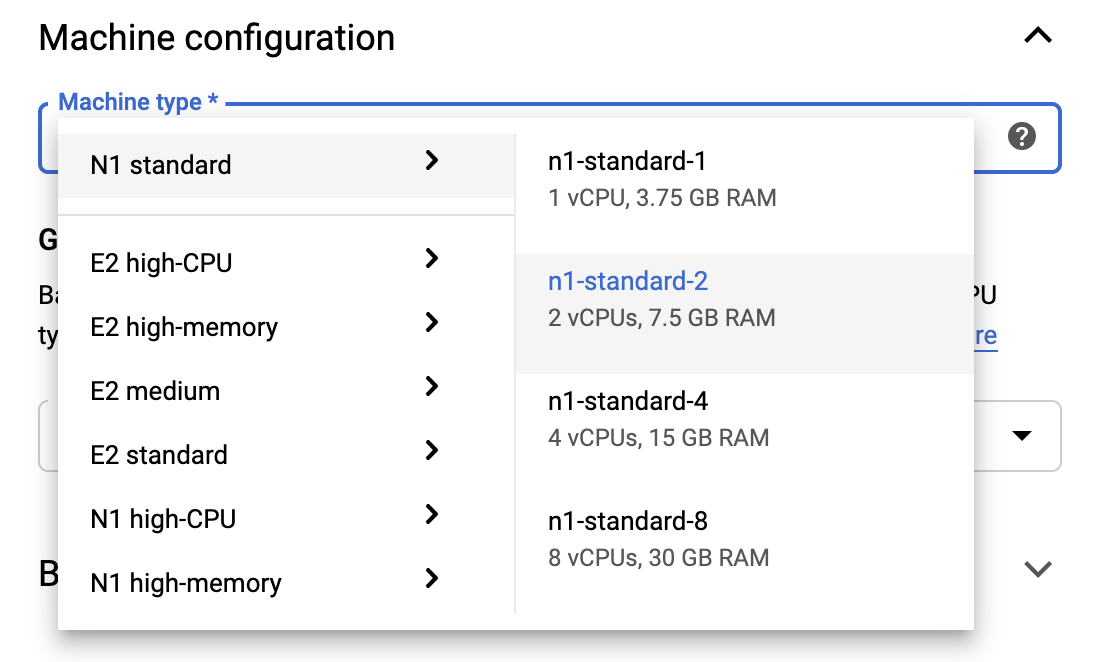
To stay within the Free Tier limits, you may need to change the default settings here to reduce the number of vCPUs available to this instance from 4 to 2:
- Select Advanced Options at the bottom of the New notebook form.
Under Machine configuration you may want to select a configuration with 1 or 2 vCPUs if you need to stay in the free tier.
Wait for the new notebook to be created, and then click Enable Notebooks API
4. Launch the Getting Started Notebook
Go to the AI Platform Pipelines Clusters page.
Under the Main Navigation Menu: ≡ -> AI Platform -> Pipelines
On the line for the cluster you are using in this tutorial, click Open Pipelines Dashboard.

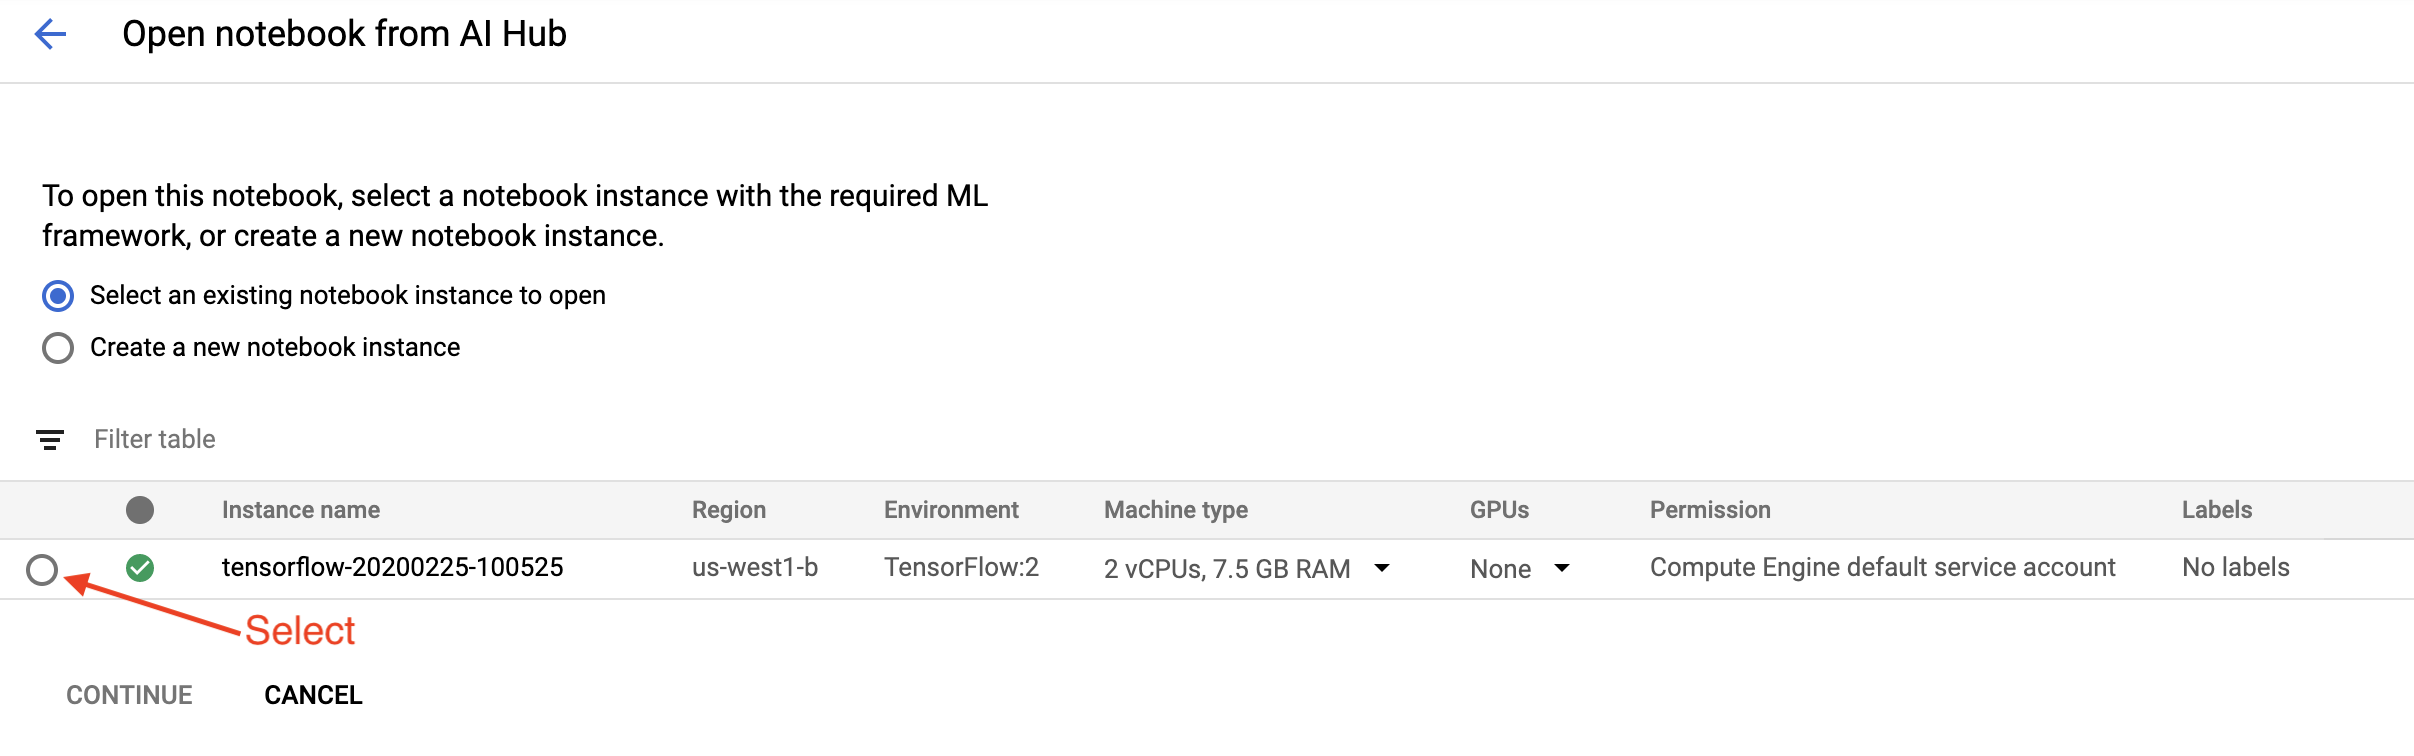
On the Getting Started page, click Open a Cloud AI Platform Notebook on Google Cloud.

Select the Notebook instance you are using for this tutorial and Continue, and then Confirm.
5. Continue working in the Notebook
Install
The Getting Started Notebook starts by installing TFX and Kubeflow Pipelines (KFP) into the VM which Jupyter Lab is running in.
It then checks which version of TFX is installed, does an import, and sets and prints the Project ID:

Connect with your Google Cloud services
The pipeline configuration needs your project ID, which you can get through the notebook and set as an environmental variable.
# Read GCP project id from env.
shell_output=!gcloud config list --format 'value(core.project)' 2>/dev/null
GCP_PROJECT_ID=shell_output[0]
print("GCP project ID:" + GCP_PROJECT_ID)
Now set your KFP cluster endpoint.
This can be found from the URL of the Pipelines dashboard. Go to the Kubeflow
Pipeline dashboard and look at the URL. The endpoint is everything in the URL
starting with the https://, up to, and including, googleusercontent.com.
ENDPOINT='' # Enter YOUR ENDPOINT here.
The notebook then sets a unique name for the custom Docker image:
# Docker image name for the pipeline image
CUSTOM_TFX_IMAGE='gcr.io/' + GCP_PROJECT_ID + '/tfx-pipeline'
6. Copy a template into your project directory
Edit the next notebook cell to set a name for your pipeline. In this tutorial we
will use my_pipeline.
PIPELINE_NAME="my_pipeline"
PROJECT_DIR=os.path.join(os.path.expanduser("~"),"imported",PIPELINE_NAME)
The notebook then uses the tfx CLI to copy the pipeline template. This
tutorial uses the Chicago Taxi dataset to perform binary classification, so the
template sets the model to taxi:
!tfx template copy \
  --pipeline-name={PIPELINE_NAME} \
  --destination-path={PROJECT_DIR} \
  --model=taxi
The notebook then changes its CWD context to the project directory:
%cd {PROJECT_DIR}
Browse the pipeline files
On the left-hand side of the Cloud AI Platform Notebook, you should see a file
browser. There should be a directory with your pipeline name (my_pipeline).
Open it and view the files. (You'll be able to open them and edit from the
notebook environment as well.)
# You can also list the files from the shellls
The tfx template copy command above created a basic scaffold of files that
build a pipeline. These include Python source codes, sample data, and Jupyter
notebooks. These are meant for this particular example. For your own pipelines
these would be the supporting files that your pipeline requires.
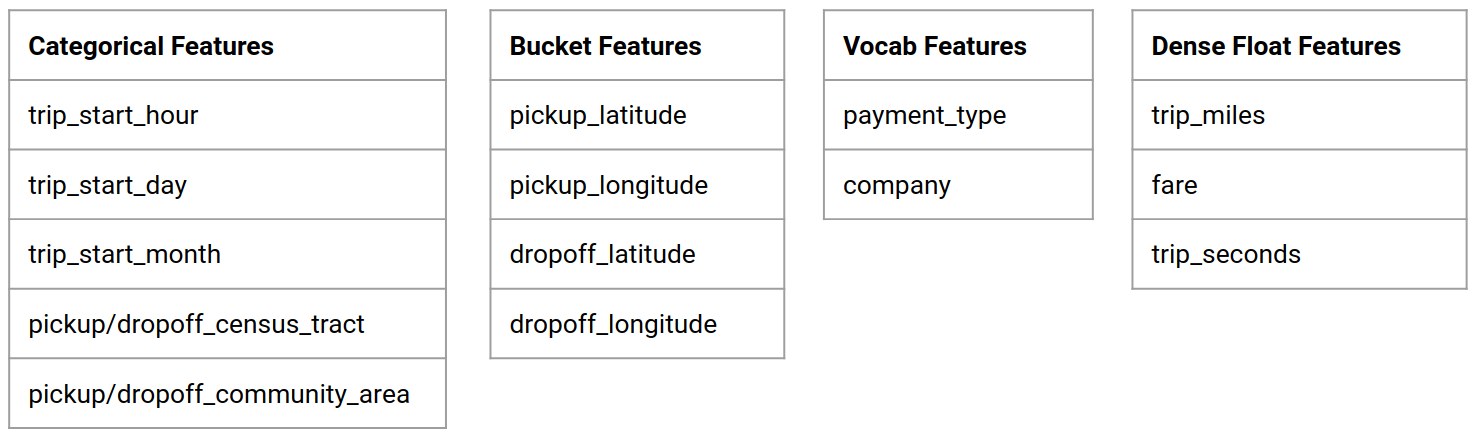
Here is brief description of the Python files.
pipeline- This directory contains the definition of the pipelineconfigs.py— defines common constants for pipeline runnerspipeline.py— defines TFX components and a pipeline
models- This directory contains ML model definitions.features.pyfeatures_test.py— defines features for the modelpreprocessing.py/preprocessing_test.py— defines preprocessing jobs usingtf::Transformestimator- This directory contains an Estimator based model.constants.py— defines constants of the modelmodel.py/model_test.py— defines DNN model using TF estimator
keras- This directory contains a Keras based model.constants.py— defines constants of the modelmodel.py/model_test.py— defines DNN model using Keras
beam_runner.py/kubeflow_runner.py— define runners for each orchestration engine
7. Run your first TFX pipeline on Kubeflow
The notebook will run the pipeline using the tfx run CLI command.
Connect to storage
Running pipelines create artifacts which have to be stored in
ML-Metadata. Artifacts refer to
payloads, which are files that must be stored in a file system or block storage.
For this tutorial, we'll use GCS to store our metadata payloads, using the
bucket that was created automatically during setup.
Its name will be <your-project-id>-kubeflowpipelines-default.
Create the pipeline
The notebook will upload our sample data to GCS bucket so that we can use it in our pipeline later.
gsutil cp data/data.csv gs://{GOOGLE_CLOUD_PROJECT}-kubeflowpipelines-default/tfx-template/data/taxi/data.csvThe notebook then uses the tfx pipeline create command to create the pipeline.
!tfx pipeline create  \
--pipeline-path=kubeflow_runner.py \
--endpoint={ENDPOINT} \
--build-image
While creating a pipeline, Dockerfile will be generated to build a Docker
image. Don't forget to add these files to your source control system (for
example, git) along with other source files.
Run the pipeline
The notebook then uses the tfx run create command to start an execution run of
your pipeline. You will also see this run listed under Experiments in the
Kubeflow Pipelines Dashboard.
tfx run create --pipeline-name={PIPELINE_NAME} --endpoint={ENDPOINT}You can view your pipeline from the Kubeflow Pipelines Dashboard.
8. Validate your data
The first task in any data science or ML project is to understand and clean the data.
- Understand the data types for each feature
- Look for anomalies and missing values
- Understand the distributions for each feature
Components


- ExampleGen ingests and splits the input dataset.
- StatisticsGen calculates statistics for the dataset.
- SchemaGen SchemaGen examines the statistics and creates a data schema.
- ExampleValidator looks for anomalies and missing values in the dataset.
In Jupyter lab file editor:
In pipeline/pipeline.py, uncomment the lines which append these components
to your pipeline:
# components.append(statistics_gen)
# components.append(schema_gen)
# components.append(example_validator)
(ExampleGen was already enabled when the template files were copied.)
Update the pipeline and re-run it
# Update the pipeline
! tfx pipeline update \
  --pipeline-path=kubeflow_runner.py \
  --endpoint={ENDPOINT}

! tfx run create --pipeline-name "{PIPELINE_NAME}"
Check the pipeline
For Kubeflow Orchestrator, visit KFP dashboard and find pipeline outputs in the page for your pipeline run. Click "Experiments" tab on the left, and "All runs" in the Experiments page. You should be able to find the run with the name of your pipeline.
More advanced example
The example presented here is really only meant to get you started. For a more advanced example see the TensorFlow Data Validation Colab.
For more information on using TFDV to explore and validate a dataset, see the examples on tensorflow.org.
9. Feature engineering
You can increase the predictive quality of your data and/or reduce dimensionality with feature engineering.
- Feature crosses
- Vocabularies
- Embeddings
- PCA
- Categorical encoding
One of the benefits of using TFX is that you will write your transformation code once, and the resulting transforms will be consistent between training and serving.
Components

- Transform performs feature engineering on the dataset.
In Jupyter lab file editor:
In pipeline/pipeline.py, find and uncomment the line which appends
Transform to the pipeline.
# components.append(transform)
Update the pipeline and re-run it
# Update the pipeline
! tfx pipeline update \
  --pipeline-path=kubeflow_runner.py \
  --endpoint={ENDPOINT}

! tfx run create --pipeline-name "{PIPELINE_NAME}"
Check pipeline outputs
For Kubeflow Orchestrator, visit KFP dashboard and find pipeline outputs in the page for your pipeline run. Click "Experiments" tab on the left, and "All runs" in the Experiments page. You should be able to find the run with the name of your pipeline.
More advanced example
The example presented here is really only meant to get you started. For a more advanced example see the TensorFlow Transform Colab.
10. Training
Train a TensorFlow model with your nice, clean, transformed data.
- Include the transformations from the previous step so that they are applied consistently
- Save the results as a SavedModel for production
- Visualize and explore the training process using TensorBoard
- Also save an EvalSavedModel for analysis of model performance
Components
- Trainer trains a TensorFlow model.
In Jupyter lab file editor:
In pipeline/pipeline.py, find and uncomment the which appends Trainer to the
pipeline:
# components.append(trainer)
Update the pipeline and re-run it
# Update the pipeline
! tfx pipeline update \
  --pipeline-path=kubeflow_runner.py \
  --endpoint={ENDPOINT}

! tfx run create --pipeline-name "{PIPELINE_NAME}"
Check pipeline outputs
For Kubeflow Orchestrator, visit KFP dashboard and find pipeline outputs in the page for your pipeline run. Click "Experiments" tab on the left, and "All runs" in the Experiments page. You should be able to find the run with the name of your pipeline.
More advanced example
The example presented here is really only meant to get you started. For a more advanced example see the TensorBoard Tutorial.
11. Analyzing model performance
Understanding more than just the top level metrics.
- Users experience model performance for their queries only
- Poor performance on slices of data can be hidden by top level metrics
- Model fairness is important
- Often key subsets of users or data are very important, and may be small
- Performance in critical but unusual conditions
- Performance for key audiences such as influencers
- If you’re replacing a model that is currently in production, first make sure that the new one is better
Components
- Evaluator performs deep analysis of the training results.
In Jupyter lab file editor:
In pipeline/pipeline.py, find and uncomment the line which appends Evaluator
to the pipeline:
components.append(evaluator)
Update the pipeline and re-run it
# Update the pipeline
! tfx pipeline update \
  --pipeline-path=kubeflow_runner.py \
  --endpoint={ENDPOINT}

! tfx run create --pipeline-name "{PIPELINE_NAME}"
Check pipeline outputs
For Kubeflow Orchestrator, visit KFP dashboard and find pipeline outputs in the page for your pipeline run. Click "Experiments" tab on the left, and "All runs" in the Experiments page. You should be able to find the run with the name of your pipeline.
12. Serving the model
If the new model is ready, make it so.
- Pusher deploys SavedModels to well-known locations
Deployment targets receive new models from well-known locations
- TensorFlow Serving
- TensorFlow Lite
- TensorFlow JS
- TensorFlow Hub
Components
- Pusher deploys the model to a serving infrastructure.
In Jupyter lab file editor:
In pipeline/pipeline.py, find and uncomment the line that appends Pusher to
the pipeline:
# components.append(pusher)
Check pipeline outputs
For Kubeflow Orchestrator, visit KFP dashboard and find pipeline outputs in the page for your pipeline run. Click "Experiments" tab on the left, and "All runs" in the Experiments page. You should be able to find the run with the name of your pipeline.
Available deployment targets
You have now trained and validated your model, and your model is now ready for production. You can now deploy your model to any of the TensorFlow deployment targets, including:
- TensorFlow Serving, for serving your model on a server or server farm and processing REST and/or gRPC inference requests.
- TensorFlow Lite, for including your model in an Android or iOS native mobile application, or in a Raspberry Pi, IoT, or microcontroller application.
- TensorFlow.js, for running your model in a web browser or Node.JS application.
More advanced examples
The example presented above is really only meant to get you started. Below are some examples of integration with other Cloud services.
Kubeflow Pipelines resource considerations
Depending on the requirements of your workload, the default configuration for
your Kubeflow Pipelines deployment may or may not meet your needs. You can
customize your resource configurations using pipeline_operator_funcs in your
call to KubeflowDagRunnerConfig.
pipeline_operator_funcs is a list of OpFunc items, which transforms all the
generated ContainerOp instances in the KFP pipeline spec which is compiled
from KubeflowDagRunner.
For example, to configure memory we can use
set_memory_request
to declare the amount of memory needed. A typical way to do that is to create a
wrapper for set_memory_request and use it to add to to the list of pipeline
OpFuncs:
def request_more_memory():
  def _set_memory_spec(container_op):
    container_op.set_memory_request('32G')
  return _set_memory_spec

# Then use this opfunc in KubeflowDagRunner
pipeline_op_funcs = kubeflow_dag_runner.get_default_pipeline_operator_funcs()
pipeline_op_funcs.append(request_more_memory())
config = KubeflowDagRunnerConfig(
    pipeline_operator_funcs=pipeline_op_funcs,
    ...
)
kubeflow_dag_runner.KubeflowDagRunner(config=config).run(pipeline)
Similar resource configuration functions include:
set_memory_limitset_cpu_requestset_cpu_limitset_gpu_limit
Try BigQueryExampleGen
BigQuery is a serverless, highly scalable,
and cost-effective cloud data warehouse. BigQuery can be used as a source for
training examples in TFX. In this step, we will add BigQueryExampleGen to the
pipeline.
In Jupyter lab file editor:
Double-click to open pipeline.py. Comment out CsvExampleGen and
uncomment the line which creates an instance of BigQueryExampleGen. You also
need to uncomment the query argument of the create_pipeline function.
We need to specify which GCP project to use for BigQuery, and this is done by
setting --project in beam_pipeline_args when creating a pipeline.
Double-click to open configs.py. Uncomment the definition of
BIG_QUERY_WITH_DIRECT_RUNNER_BEAM_PIPELINE_ARGS and BIG_QUERY_QUERY. You
should replace the project id and the region value in this file with the correct
values for your GCP project.
Change directory one level up. Click the name of the directory above the
file list. The name of the directory is the name of the pipeline which is
my_pipeline if you didn't change the pipeline name.
Double-click to open kubeflow_runner.py. Uncomment two arguments, query
and beam_pipeline_args, for the create_pipeline function.
Now the pipeline is ready to use BigQuery as an example source. Update the pipeline as before and create a new execution run as we did in step 5 and 6.
Update the pipeline and re-run it
# Update the pipeline
!tfx pipeline update \
  --pipeline-path=kubeflow_runner.py \
  --endpoint={ENDPOINT}

!tfx run create --pipeline-name {PIPELINE_NAME} --endpoint={ENDPOINT}
Try Dataflow
Several TFX Components use Apache Beam to implement data-parallel pipelines, and it means that you can distribute data processing workloads using Google Cloud Dataflow. In this step, we will set the Kubeflow orchestrator to use Dataflow as the data processing back-end for Apache Beam.
# Select your project:
gcloud config set project YOUR_PROJECT_ID

# Get a list of services that you can enable in your project:
gcloud services list --available | grep Dataflow

# If you don't see dataflow.googleapis.com listed, that means you haven't been
# granted access to enable the Dataflow API.  See your account adminstrator.

# Enable the Dataflow service:

gcloud services enable dataflow.googleapis.com
Double-click pipeline to change directory, and double-click to open
configs.py. Uncomment the definition of GOOGLE_CLOUD_REGION, and
DATAFLOW_BEAM_PIPELINE_ARGS.
Change directory one level up. Click the name of the directory above the
file list. The name of the directory is the name of the pipeline which is
my_pipeline if you didn't change.
Double-click to open kubeflow_runner.py. Uncomment beam_pipeline_args.
(Also make sure to comment out current beam_pipeline_args that you added in
Step 7.)
Update the pipeline and re-run it
# Update the pipeline
!tfx pipeline update \
  --pipeline-path=kubeflow_runner.py \
  --endpoint={ENDPOINT}

!tfx run create --pipeline-name {PIPELINE_NAME} --endpoint={ENDPOINT}
You can find your Dataflow jobs in Dataflow in Cloud Console.
Try Cloud AI Platform Training and Prediction with KFP
TFX interoperates with several managed GCP services, such as
Cloud AI Platform for Training and Prediction.
You can set your Trainer component to use Cloud AI Platform Training, a
managed service for training ML models. Moreover, when your model is built and
ready to be served, you can push your model to Cloud AI Platform Prediction
for serving. In this step, we will set our Trainer and Pusher component to
use Cloud AI Platform services.
Before editing files, you might first have to enable AI Platform Training & Prediction API.
Double-click pipeline to change directory, and double-click to open
configs.py. Uncomment the definition of GOOGLE_CLOUD_REGION,
GCP_AI_PLATFORM_TRAINING_ARGS and GCP_AI_PLATFORM_SERVING_ARGS. We will use
our custom built container image to train a model in Cloud AI Platform Training,
so we should set masterConfig.imageUri in GCP_AI_PLATFORM_TRAINING_ARGS to
the same value as CUSTOM_TFX_IMAGE above.
Change directory one level up, and double-click to open
kubeflow_runner.py. Uncomment ai_platform_training_args and
ai_platform_serving_args.
Update the pipeline and re-run it
# Update the pipeline
!tfx pipeline update \
  --pipeline-path=kubeflow_runner.py \
  --endpoint={ENDPOINT}

!tfx run create --pipeline-name {PIPELINE_NAME} --endpoint={ENDPOINT}
You can find your training jobs in Cloud AI Platform Jobs. If your pipeline completed successfully, you can find your model in Cloud AI Platform Models.
14. Use your own data
In this tutorial, you made a pipeline for a model using the Chicago Taxi dataset. Now try putting your own data into the pipeline. Your data can be stored anywhere the pipeline can access it, including Google Cloud Storage, BigQuery, or CSV files.
You need to modify the pipeline definition to accommodate your data.
If your data is stored in files
- Modify
DATA_PATHinkubeflow_runner.py, indicating the location.
If your data is stored in BigQuery
- Modify
BIG_QUERY_QUERYin configs.py to your query statement. - Add features in
models/features.py. - Modify
models/preprocessing.pyto transform input data for training. - Modify
models/keras/model.pyandmodels/keras/constants.pyto describe your ML model.
Learn more about Trainer
See Trainer component guide for more details on Training pipelines.
Cleaning up
To clean up all Google Cloud resources used in this project, you can delete the Google Cloud project you used for the tutorial.
Alternatively, you can clean up individual resources by visiting each consoles: - Google Cloud Storage - Google Container Registry - Google Kubernetes Engine