
| | |  مشاهده منبع در GitHub مشاهده منبع در GitHub | |
بررسی اجمالی
TensorFlow زیرمجموعه ای از NumPy API را پیاده سازی می کند که به عنوان tf.experimental.numpy موجود است. این اجازه می دهد تا کد NumPy را اجرا کنید که توسط TensorFlow تسریع می شود، در حالی که امکان دسترسی به تمام API های TensorFlow را نیز فراهم می کند.
برپایی
import matplotlib.pyplot as plt
import numpy as np
import tensorflow as tf
import tensorflow.experimental.numpy as tnp
import timeit

print("Using TensorFlow version %s" % tf.__version__)
Using TensorFlow version 2.6.0
فعال کردن رفتار NumPy
برای استفاده از tnp به عنوان NumPy، رفتار NumPy را برای TensorFlow فعال کنید:
tnp.experimental_enable_numpy_behavior()
این فراخوانی ارتقای نوع را در TensorFlow فعال میکند و همچنین استنتاج نوع را در هنگام تبدیل حروف به تانسور تغییر میدهد تا با دقت بیشتری از استاندارد NumPy پیروی کند.
آرایه TensorFlow NumPy ND
نمونهای از tf.experimental.numpy.ndarray ، به نام آرایه ND ، یک آرایه متراکم چند بعدی از یک dtype معین را نشان میدهد که روی یک دستگاه خاص قرار گرفته است. این نام مستعار tf.Tensor است. کلاس آرایه ND را برای روش های مفیدی مانند ndarray.T ، ndarray.reshape ، ndarray.ravel و موارد دیگر بررسی کنید.
ابتدا یک شی آرایه ND ایجاد کنید و سپس روش های مختلف را فراخوانی کنید.
# Create an ND array and check out different attributes.
ones = tnp.ones([5, 3], dtype=tnp.float32)
print("Created ND array with shape = %s, rank = %s, "
      "dtype = %s on device = %s\n" % (
          ones.shape, ones.ndim, ones.dtype, ones.device))

# `ndarray` is just an alias to `tf.Tensor`.
print("Is `ones` an instance of tf.Tensor: %s\n" % isinstance(ones, tf.Tensor))

# Try commonly used member functions.
print("ndarray.T has shape %s" % str(ones.T.shape))
print("narray.reshape(-1) has shape %s" % ones.reshape(-1).shape)
Created ND array with shape = (5, 3), rank = 2, dtype = <dtype: 'float32'> on device = /job:localhost/replica:0/task:0/device:GPU:0

Is `ones` an instance of tf.Tensor: True

ndarray.T has shape (3, 5)
narray.reshape(-1) has shape (15,)
تبلیغ را تایپ کنید
API های TensorFlow NumPy دارای معنایی کاملاً تعریف شده برای تبدیل حرف به آرایه ND، و همچنین برای انجام ارتقای نوع در ورودی های آرایه ND هستند. لطفاً برای جزئیات بیشتر به np.result_type مراجعه کنید.
APIهای tf.Tensor ورودیهای tf.Tensor را بدون تغییر میگذارند و تبلیغات نوع را روی آنها انجام نمیدهند، در حالی که APIهای TensorFlow NumPy همه ورودیها را طبق قوانین تبلیغ نوع NumPy ارتقا میدهند. در مثال بعدی، ارتقای نوع را انجام خواهید داد. ابتدا جمع را روی ورودی های آرایه ND از انواع مختلف اجرا کنید و انواع خروجی را یادداشت کنید. هیچ یک از این نوع تبلیغات توسط API های TensorFlow مجاز نخواهد بود.
print("Type promotion for operations")
values = [tnp.asarray(1, dtype=d) for d in
          (tnp.int32, tnp.int64, tnp.float32, tnp.float64)]
for i, v1 in enumerate(values):
  for v2 in values[i + 1:]:
    print("%s + %s => %s" %
          (v1.dtype.name, v2.dtype.name, (v1 + v2).dtype.name))
Type promotion for operations
int32 + int64 => int64
int32 + float32 => float64
int32 + float64 => float64
int64 + float32 => float64
int64 + float64 => float64
float32 + float64 => float64
در نهایت با استفاده از ndarray.asarray ها را به آرایه ND تبدیل کنید و نوع حاصل را یادداشت کنید.
print("Type inference during array creation")
print("tnp.asarray(1).dtype == tnp.%s" % tnp.asarray(1).dtype.name)
print("tnp.asarray(1.).dtype == tnp.%s\n" % tnp.asarray(1.).dtype.name)
Type inference during array creation
tnp.asarray(1).dtype == tnp.int64
tnp.asarray(1.).dtype == tnp.float64
هنگام تبدیل literals به آرایه ND، NumPy انواع گسترده مانند tnp.int64 و tnp.float64 را ترجیح می دهد. در مقابل، tf.convert_to_tensor انواع tf.int32 و tf.float32 برای تبدیل ثابت ها به tf.Tensor ترجیح می دهد. API های TensorFlow NumPy به رفتار NumPy برای اعداد صحیح پایبند هستند. در مورد float ها، آرگومان prefer_float32 experimental_enable_numpy_behavior به شما امکان می دهد کنترل کنید که آیا tf.float32 را به tf.float32 ترجیح tf.float64 (پیش فرض به False ). مثلا:
tnp.experimental_enable_numpy_behavior(prefer_float32=True)
print("When prefer_float32 is True:")
print("tnp.asarray(1.).dtype == tnp.%s" % tnp.asarray(1.).dtype.name)
print("tnp.add(1., 2.).dtype == tnp.%s" % tnp.add(1., 2.).dtype.name)

tnp.experimental_enable_numpy_behavior(prefer_float32=False)
print("When prefer_float32 is False:")
print("tnp.asarray(1.).dtype == tnp.%s" % tnp.asarray(1.).dtype.name)
print("tnp.add(1., 2.).dtype == tnp.%s" % tnp.add(1., 2.).dtype.name)
When prefer_float32 is True:
tnp.asarray(1.).dtype == tnp.float32
tnp.add(1., 2.).dtype == tnp.float32
When prefer_float32 is False:
tnp.asarray(1.).dtype == tnp.float64
tnp.add(1., 2.).dtype == tnp.float64
صدا و سیما
مشابه TensorFlow، NumPy معنایی غنی را برای مقادیر "پخش" تعریف می کند. برای اطلاعات بیشتر می توانید راهنمای پخش NumPy را بررسی کنید و آن را با معنایی پخش TensorFlow مقایسه کنید.
x = tnp.ones([2, 3])
y = tnp.ones([3])
z = tnp.ones([1, 2, 1])
print("Broadcasting shapes %s, %s and %s gives shape %s" % (
    x.shape, y.shape, z.shape, (x + y + z).shape))
Broadcasting shapes (2, 3), (3,) and (1, 2, 1) gives shape (1, 2, 3)
نمایه سازی
NumPy قوانین نمایه سازی بسیار پیچیده ای را تعریف می کند. راهنمای نمایه سازی NumPy را ببینید. به استفاده از آرایه های ND به عنوان شاخص های زیر توجه کنید.
x = tnp.arange(24).reshape(2, 3, 4)

print("Basic indexing")
print(x[1, tnp.newaxis, 1:3, ...], "\n")

print("Boolean indexing")
print(x[:, (True, False, True)], "\n")

print("Advanced indexing")
print(x[1, (0, 0, 1), tnp.asarray([0, 1, 1])])
Basic indexing
tf.Tensor(
[[[16 17 18 19]
  [20 21 22 23]]], shape=(1, 2, 4), dtype=int64)

Boolean indexing
tf.Tensor(
[[[ 0  1  2  3]
  [ 8  9 10 11]]

 [[12 13 14 15]
  [20 21 22 23]]], shape=(2, 2, 4), dtype=int64)

Advanced indexing
tf.Tensor([12 13 17], shape=(3,), dtype=int64)
# Mutation is currently not supported
try:
  tnp.arange(6)[1] = -1
except TypeError:
  print("Currently, TensorFlow NumPy does not support mutation.")
Currently, TensorFlow NumPy does not support mutation.
نمونه مدل
در مرحله بعد، می توانید نحوه ایجاد یک مدل و اجرای استنتاج بر روی آن را مشاهده کنید. این مدل ساده یک لایه relu و به دنبال آن یک طرح خطی اعمال می کند. بخشهای بعدی نحوه محاسبه گرادیانها را برای این مدل با استفاده از GradientTape TensorFlow نشان میدهد.
class Model(object):
  """Model with a dense and a linear layer."""

  def __init__(self):
    self.weights = None

  def predict(self, inputs):
    if self.weights is None:
      size = inputs.shape[1]
      # Note that type `tnp.float32` is used for performance.
      stddev = tnp.sqrt(size).astype(tnp.float32)
      w1 = tnp.random.randn(size, 64).astype(tnp.float32) / stddev
      bias = tnp.random.randn(64).astype(tnp.float32)
      w2 = tnp.random.randn(64, 2).astype(tnp.float32) / 8
      self.weights = (w1, bias, w2)
    else:
      w1, bias, w2 = self.weights
    y = tnp.matmul(inputs, w1) + bias
    y = tnp.maximum(y, 0)  # Relu
    return tnp.matmul(y, w2)  # Linear projection

model = Model()
# Create input data and compute predictions.
print(model.predict(tnp.ones([2, 32], dtype=tnp.float32)))
tf.Tensor(
[[-1.7706785  1.1137733]
 [-1.7706785  1.1137733]], shape=(2, 2), dtype=float32)
TensorFlow NumPy و NumPy
TensorFlow NumPy زیر مجموعه ای از مشخصات کامل NumPy را پیاده سازی می کند. در حالی که نمادهای بیشتری در طول زمان اضافه خواهند شد، ویژگی های سیستماتیکی وجود دارد که در آینده نزدیک پشتیبانی نمی شوند. اینها شامل پشتیبانی NumPy C API، ادغام Swig، ترتیب ذخیره سازی Fortran، views و stride_tricks و برخی dtype s (مانند np.recarray و np.object ) می شود. برای جزئیات بیشتر، لطفاً به اسناد TensorFlow NumPy API مراجعه کنید.
قابلیت همکاری NumPy
آرایه های TensorFlow ND می توانند با توابع NumPy تعامل داشته باشند. این اشیا رابط __array__ را پیاده سازی می کنند. NumPy از این رابط برای تبدیل آرگومان های تابع به مقادیر np.ndarray قبل از پردازش آنها استفاده می کند.
به طور مشابه، توابع TensorFlow NumPy می توانند ورودی های انواع مختلفی از جمله np.ndarray . این ورودی ها با فراخوانی ndarray.asarray روی آنها به آرایه ND تبدیل می شوند.
تبدیل آرایه ND به و از np.ndarray ممکن است کپی های داده واقعی را ایجاد کند. لطفاً برای جزئیات بیشتر به بخش کپیهای بافر مراجعه کنید.
# ND array passed into NumPy function.
np_sum = np.sum(tnp.ones([2, 3]))
print("sum = %s. Class: %s" % (float(np_sum), np_sum.__class__))

# `np.ndarray` passed into TensorFlow NumPy function.
tnp_sum = tnp.sum(np.ones([2, 3]))
print("sum = %s. Class: %s" % (float(tnp_sum), tnp_sum.__class__))
sum = 6.0. Class: <class 'numpy.float64'>
sum = 6.0. Class: <class 'tensorflow.python.framework.ops.EagerTensor'>
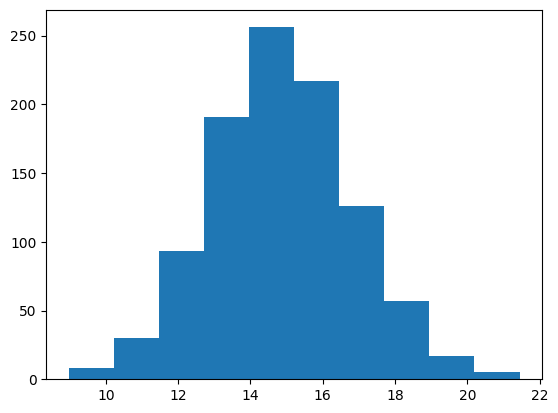
# It is easy to plot ND arrays, given the __array__ interface.
labels = 15 + 2 * tnp.random.randn(1, 1000)
_ = plt.hist(labels)
کپی های بافر
اختلاط TensorFlow NumPy با کد NumPy ممکن است باعث ایجاد کپی های داده شود. این به این دلیل است که TensorFlow NumPy نسبت به NumPy الزامات سخت گیرانه تری در تراز حافظه دارد.
هنگامی که یک np.ndarray به TensorFlow NumPy ارسال می شود، الزامات تراز را بررسی می کند و در صورت نیاز یک کپی را راه اندازی می کند. هنگام ارسال بافر CPU آرایه ND به NumPy، معمولاً بافر الزامات تراز را برآورده می کند و NumPy نیازی به ایجاد یک کپی ندارد.
آرایههای ND میتوانند به بافرهایی اشاره کنند که روی دستگاههایی غیر از حافظه محلی CPU قرار میگیرند. در چنین مواردی، فراخوانی یک تابع NumPy در صورت نیاز، کپیهایی را در سراسر شبکه یا دستگاه ایجاد میکند.
با توجه به این موضوع، اختلاط با فراخوانهای NumPy API معمولاً باید با احتیاط انجام شود و کاربر باید مراقب هزینههای کپی داده باشد. به هم پیوستن تماسهای TensorFlow NumPy با تماسهای TensorFlow عموماً ایمن است و از کپی کردن دادهها جلوگیری میکند. برای جزئیات بیشتر به بخش قابلیت همکاری TensorFlow مراجعه کنید.
تقدم اپراتور
TensorFlow NumPy یک __array_priority__ را بالاتر از NumPy تعریف می کند. این بدان معناست که برای عملگرهایی که هم آرایه ND و np.ndarray را درگیر می کنند، اولی اولویت دارد، یعنی ورودی np.ndarray به یک آرایه ND تبدیل می شود و اجرای TensorFlow NumPy از اپراتور فراخوانی می شود.
x = tnp.ones([2]) + np.ones([2])
print("x = %s\nclass = %s" % (x, x.__class__))
x = tf.Tensor([2. 2.], shape=(2,), dtype=float64)
class = <class 'tensorflow.python.framework.ops.EagerTensor'>
TF NumPy و TensorFlow
TensorFlow NumPy بر روی TensorFlow ساخته شده است و از این رو به طور یکپارچه با TensorFlow کار می کند.
tf.Tensor و آرایه ND
آرایه ND نام مستعار tf.Tensor است، بنابراین بدیهی است که میتوان آنها را بدون ایجاد کپی دادههای واقعی با هم ترکیب کرد.
x = tf.constant([1, 2])
print(x)

# `asarray` and `convert_to_tensor` here are no-ops.
tnp_x = tnp.asarray(x)
print(tnp_x)
print(tf.convert_to_tensor(tnp_x))

# Note that tf.Tensor.numpy() will continue to return `np.ndarray`.
print(x.numpy(), x.numpy().__class__)
tf.Tensor([1 2], shape=(2,), dtype=int32)
tf.Tensor([1 2], shape=(2,), dtype=int32)
tf.Tensor([1 2], shape=(2,), dtype=int32)
[1 2] <class 'numpy.ndarray'>
قابلیت همکاری تنسورفلو
یک آرایه ND را می توان به API های TensorFlow ارسال کرد، زیرا آرایه ND فقط نام مستعار tf.Tensor است. همانطور که قبلا ذکر شد، چنین عملیاتی کپی داده را انجام نمی دهد، حتی برای داده هایی که روی شتاب دهنده ها یا دستگاه های راه دور قرار می گیرند.
برعکس، اشیاء tf.Tensor را می توان به tf.experimental.numpy APIها بدون انجام کپی داده ارسال کرد.
# ND array passed into TensorFlow function.
tf_sum = tf.reduce_sum(tnp.ones([2, 3], tnp.float32))
print("Output = %s" % tf_sum)

# `tf.Tensor` passed into TensorFlow NumPy function.
tnp_sum = tnp.sum(tf.ones([2, 3]))
print("Output = %s" % tnp_sum)
Output = tf.Tensor(6.0, shape=(), dtype=float32)
Output = tf.Tensor(6.0, shape=(), dtype=float32)
Gradients و Jacobians: tf.GradientTape
GradientTape TensorFlow را می توان برای انتشار پس از طریق کد TensorFlow و TensorFlow NumPy استفاده کرد.
از مدل ایجاد شده در بخش Example Model استفاده کنید و گرادیان و ژاکوبین ها را محاسبه کنید.
def create_batch(batch_size=32):
  """Creates a batch of input and labels."""
  return (tnp.random.randn(batch_size, 32).astype(tnp.float32),
          tnp.random.randn(batch_size, 2).astype(tnp.float32))

def compute_gradients(model, inputs, labels):
  """Computes gradients of squared loss between model prediction and labels."""
  with tf.GradientTape() as tape:
    assert model.weights is not None
    # Note that `model.weights` need to be explicitly watched since they
    # are not tf.Variables.
    tape.watch(model.weights)
    # Compute prediction and loss
    prediction = model.predict(inputs)
    loss = tnp.sum(tnp.square(prediction - labels))
  # This call computes the gradient through the computation above.
  return tape.gradient(loss, model.weights)

inputs, labels = create_batch()
gradients = compute_gradients(model, inputs, labels)

# Inspect the shapes of returned gradients to verify they match the
# parameter shapes.
print("Parameter shapes:", [w.shape for w in model.weights])
print("Gradient shapes:", [g.shape for g in gradients])
# Verify that gradients are of type ND array.
assert isinstance(gradients[0], tnp.ndarray)
Parameter shapes: [TensorShape([32, 64]), TensorShape([64]), TensorShape([64, 2])]
Gradient shapes: [TensorShape([32, 64]), TensorShape([64]), TensorShape([64, 2])]
# Computes a batch of jacobians. Each row is the jacobian of an element in the
# batch of outputs w.r.t. the corresponding input batch element.
def prediction_batch_jacobian(inputs):
  with tf.GradientTape() as tape:
    tape.watch(inputs)
    prediction = model.predict(inputs)
  return prediction, tape.batch_jacobian(prediction, inputs)

inp_batch = tnp.ones([16, 32], tnp.float32)
output, batch_jacobian = prediction_batch_jacobian(inp_batch)
# Note how the batch jacobian shape relates to the input and output shapes.
print("Output shape: %s, input shape: %s" % (output.shape, inp_batch.shape))
print("Batch jacobian shape:", batch_jacobian.shape)
Output shape: (16, 2), input shape: (16, 32)
Batch jacobian shape: (16, 2, 32)
کامپایل ردیابی: tf.function
tf.function با "تریس کامپایل" کد و سپس بهینه سازی این ردیابی ها برای عملکرد بسیار سریعتر کار می کند. به مقدمه نمودارها و توابع مراجعه کنید.
tf.function می توان برای بهینه سازی کد TensorFlow NumPy نیز استفاده کرد. در اینجا یک مثال ساده برای نشان دادن افزایش سرعت آورده شده است. توجه داشته باشید که متن کد tf.function شامل تماسهایی با APIهای TensorFlow NumPy است.
inputs, labels = create_batch(512)
print("Eager performance")
compute_gradients(model, inputs, labels)
print(timeit.timeit(lambda: compute_gradients(model, inputs, labels),
                    number=10) * 100, "ms")

print("\ntf.function compiled performance")
compiled_compute_gradients = tf.function(compute_gradients)
compiled_compute_gradients(model, inputs, labels)  # warmup
print(timeit.timeit(lambda: compiled_compute_gradients(model, inputs, labels),
                    number=10) * 100, "ms")
Eager performance
1.291419400013183 ms

tf.function compiled performance
0.5561202000080812 ms
برداری: tf.vectorized_map
TensorFlow دارای پشتیبانی داخلی برای بردار کردن حلقه های موازی است که امکان افزایش سرعت یک تا دو مرتبه بزرگی را فراهم می کند. این افزایشها از طریق tf.vectorized_map API قابل دسترسی هستند و برای کد TensorFlow NumPy نیز اعمال میشوند.
گاهی اوقات محاسبه گرادیان هر خروجی در یک دسته با عنصر دسته ای ورودی مربوطه مفید است. چنین محاسباتی را می توان به طور موثر با استفاده از tf.vectorized_map مطابق شکل زیر انجام داد.
@tf.function
def vectorized_per_example_gradients(inputs, labels):
  def single_example_gradient(arg):
    inp, label = arg
    return compute_gradients(model,
                             tnp.expand_dims(inp, 0),
                             tnp.expand_dims(label, 0))
  # Note that a call to `tf.vectorized_map` semantically maps
  # `single_example_gradient` over each row of `inputs` and `labels`.
  # The interface is similar to `tf.map_fn`.
  # The underlying machinery vectorizes away this map loop which gives
  # nice speedups.
  return tf.vectorized_map(single_example_gradient, (inputs, labels))

batch_size = 128
inputs, labels = create_batch(batch_size)

per_example_gradients = vectorized_per_example_gradients(inputs, labels)
for w, p in zip(model.weights, per_example_gradients):
  print("Weight shape: %s, batch size: %s, per example gradient shape: %s " % (
      w.shape, batch_size, p.shape))
Weight shape: (32, 64), batch size: 128, per example gradient shape: (128, 32, 64)
Weight shape: (64,), batch size: 128, per example gradient shape: (128, 64)
Weight shape: (64, 2), batch size: 128, per example gradient shape: (128, 64, 2)
# Benchmark the vectorized computation above and compare with
# unvectorized sequential computation using `tf.map_fn`.
@tf.function
def unvectorized_per_example_gradients(inputs, labels):
  def single_example_gradient(arg):
    inp, label = arg
    return compute_gradients(model,
                             tnp.expand_dims(inp, 0),
                             tnp.expand_dims(label, 0))

  return tf.map_fn(single_example_gradient, (inputs, labels),
                   fn_output_signature=(tf.float32, tf.float32, tf.float32))

print("Running vectorized computation")
print(timeit.timeit(lambda: vectorized_per_example_gradients(inputs, labels),
                    number=10) * 100, "ms")

print("\nRunning unvectorized computation")
per_example_gradients = unvectorized_per_example_gradients(inputs, labels)
print(timeit.timeit(lambda: unvectorized_per_example_gradients(inputs, labels),
                    number=10) * 100, "ms")
Running vectorized computation
0.5265710999992734 ms

Running unvectorized computation
40.35122630002661 ms
قرار دادن دستگاه
TensorFlow NumPy میتواند عملیات را روی CPU، GPU، TPU و دستگاههای راه دور انجام دهد. از مکانیسم های استاندارد TensorFlow برای قرار دادن دستگاه استفاده می کند. در زیر یک مثال ساده نشان می دهد که چگونه می توان همه دستگاه ها را فهرست کرد و سپس مقداری محاسبات را روی یک دستگاه خاص قرار داد.
TensorFlow همچنین دارای APIهایی برای تکثیر محاسبات در سراسر دستگاه ها و انجام کاهش های جمعی است که در اینجا پوشش داده نخواهد شد.
دستگاه ها را فهرست کنید
tf.config.list_logical_devices و tf.config.list_physical_devices می توان برای یافتن دستگاه هایی که باید استفاده کرد استفاده کرد.
print("All logical devices:", tf.config.list_logical_devices())
print("All physical devices:", tf.config.list_physical_devices())

# Try to get the GPU device. If unavailable, fallback to CPU.
try:
  device = tf.config.list_logical_devices(device_type="GPU")[0]
except IndexError:
  device = "/device:CPU:0"
All logical devices: [LogicalDevice(name='/device:CPU:0', device_type='CPU'), LogicalDevice(name='/device:GPU:0', device_type='GPU')]
All physical devices: [PhysicalDevice(name='/physical_device:CPU:0', device_type='CPU'), PhysicalDevice(name='/physical_device:GPU:0', device_type='GPU')]
عملیات قرار دادن: tf.device
عملیات را می توان با فراخوانی دستگاه در محدوده tf.device داد.
print("Using device: %s" % str(device))
# Run operations in the `tf.device` scope.
# If a GPU is available, these operations execute on the GPU and outputs are
# placed on the GPU memory.
with tf.device(device):
  prediction = model.predict(create_batch(5)[0])

print("prediction is placed on %s" % prediction.device)
Using device: LogicalDevice(name='/device:GPU:0', device_type='GPU')
prediction is placed on /job:localhost/replica:0/task:0/device:GPU:0
کپی کردن آرایه های ND در دستگاه ها: tnp.copy
تماس با tnp.copy ، که در محدوده دستگاه خاصی قرار می گیرد، داده ها را در آن دستگاه کپی می کند، مگر اینکه داده ها از قبل در آن دستگاه باشند.
with tf.device("/device:CPU:0"):
  prediction_cpu = tnp.copy(prediction)
print(prediction.device)
print(prediction_cpu.device)
/job:localhost/replica:0/task:0/device:GPU:0
/job:localhost/replica:0/task:0/device:CPU:0
مقایسه عملکرد
TensorFlow NumPy از هسته های TensorFlow بسیار بهینه شده استفاده می کند که می توانند روی CPU ها، GPU ها و TPU ها ارسال شوند. TensorFlow همچنین بسیاری از بهینه سازی های کامپایلر را انجام می دهد، مانند عملیات fusion، که به بهبود عملکرد و حافظه تبدیل می شود. برای کسب اطلاعات بیشتر به بهینه سازی نمودار TensorFlow با Grappler مراجعه کنید.
با این حال، TensorFlow در مقایسه با NumPy، هزینه های سربار بالاتری برای عملیات دیسپاچینگ دارد. برای بارهای کاری متشکل از عملیات کوچک (کمتر از حدود 10 میکروثانیه)، این سربارها می توانند بر زمان اجرا غالب شوند و NumPy می تواند عملکرد بهتری ارائه دهد. برای موارد دیگر، TensorFlow به طور کلی باید عملکرد بهتری ارائه دهد.
معیار زیر را برای مقایسه عملکرد NumPy و TensorFlow NumPy برای اندازههای ورودی مختلف اجرا کنید.
def benchmark(f, inputs, number=30, force_gpu_sync=False):
  """Utility to benchmark `f` on each value in `inputs`."""
  times = []
  for inp in inputs:
    def _g():
      if force_gpu_sync:
        one = tnp.asarray(1)
      f(inp)
      if force_gpu_sync:
        with tf.device("CPU:0"):
          tnp.copy(one)  # Force a sync for GPU case

    _g()  # warmup
    t = timeit.timeit(_g, number=number)
    times.append(t * 1000. / number)
  return times


def plot(np_times, tnp_times, compiled_tnp_times, has_gpu, tnp_times_gpu):
  """Plot the different runtimes."""
  plt.xlabel("size")
  plt.ylabel("time (ms)")
  plt.title("Sigmoid benchmark: TF NumPy vs NumPy")
  plt.plot(sizes, np_times, label="NumPy")
  plt.plot(sizes, tnp_times, label="TF NumPy (CPU)")
  plt.plot(sizes, compiled_tnp_times, label="Compiled TF NumPy (CPU)")
  if has_gpu:
    plt.plot(sizes, tnp_times_gpu, label="TF NumPy (GPU)")
  plt.legend()
# Define a simple implementation of `sigmoid`, and benchmark it using
# NumPy and TensorFlow NumPy for different input sizes.

def np_sigmoid(y):
  return 1. / (1. + np.exp(-y))

def tnp_sigmoid(y):
  return 1. / (1. + tnp.exp(-y))

@tf.function
def compiled_tnp_sigmoid(y):
  return tnp_sigmoid(y)

sizes = (2 ** 0, 2 ** 5, 2 ** 10, 2 ** 15, 2 ** 20)
np_inputs = [np.random.randn(size).astype(np.float32) for size in sizes]
np_times = benchmark(np_sigmoid, np_inputs)

with tf.device("/device:CPU:0"):
  tnp_inputs = [tnp.random.randn(size).astype(np.float32) for size in sizes]
  tnp_times = benchmark(tnp_sigmoid, tnp_inputs)
  compiled_tnp_times = benchmark(compiled_tnp_sigmoid, tnp_inputs)

has_gpu = len(tf.config.list_logical_devices("GPU"))
if has_gpu:
  with tf.device("/device:GPU:0"):
    tnp_inputs = [tnp.random.randn(size).astype(np.float32) for size in sizes]
    tnp_times_gpu = benchmark(compiled_tnp_sigmoid, tnp_inputs, 100, True)
else:
  tnp_times_gpu = None
plot(np_times, tnp_times, compiled_tnp_times, has_gpu, tnp_times_gpu)
