
 在 GitHub 上查看 在 GitHub 上查看 |
概述
本教程演示了数据增强:一种通过应用随机(但真实)的变换(例如图像旋转)来增加训练集多样性的技术。
您将学习如何通过两种方式应用数据增强:
- 使用 Keras 预处理层,例如
tf.keras.layers.Resizing、tf.keras.layers.Rescaling、tf.keras.layers.RandomFlip和tf.keras.layers.RandomRotation。 - 使用
tf.image方法,例如tf.image.flip_left_right、tf.image.rgb_to_grayscale、tf.image.adjust_brightness、tf.image.central_crop和tf.image.stateless_random*。
设置
import matplotlib.pyplot as plt
import numpy as np
import tensorflow as tf
import tensorflow_datasets as tfds

from tensorflow.keras import layers
2023-11-07 23:01:12.896693: E external/local_xla/xla/stream_executor/cuda/cuda_dnn.cc:9261] Unable to register cuDNN factory: Attempting to register factory for plugin cuDNN when one has already been registered
2023-11-07 23:01:12.896747: E external/local_xla/xla/stream_executor/cuda/cuda_fft.cc:607] Unable to register cuFFT factory: Attempting to register factory for plugin cuFFT when one has already been registered
2023-11-07 23:01:12.898397: E external/local_xla/xla/stream_executor/cuda/cuda_blas.cc:1515] Unable to register cuBLAS factory: Attempting to register factory for plugin cuBLAS when one has already been registered
下载数据集
本教程使用 tf_flowers 数据集。为了方便起见,请使用 TensorFlow Datasets 下载数据集。如果您想了解导入数据的其他方式,请参阅加载图像教程。
(train_ds, val_ds, test_ds), metadata = tfds.load(
    'tf_flowers',
    split=['train[:80%]', 'train[80%:90%]', 'train[90%:]'],
    with_info=True,
    as_supervised=True,
)
花卉数据集有五个类。
num_classes = metadata.features['label'].num_classes
print(num_classes)
5
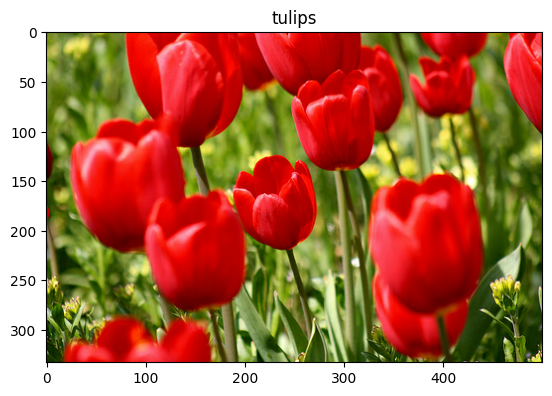
我们从数据集中检索一个图像,然后使用它来演示数据增强。
get_label_name = metadata.features['label'].int2str

image, label = next(iter(train_ds))
_ = plt.imshow(image)
_ = plt.title(get_label_name(label))
2023-11-07 23:01:19.803176: W tensorflow/core/kernels/data/cache_dataset_ops.cc:858] The calling iterator did not fully read the dataset being cached. In order to avoid unexpected truncation of the dataset, the partially cached contents of the dataset will be discarded. This can happen if you have an input pipeline similar to `dataset.cache().take(k).repeat()`. You should use `dataset.take(k).cache().repeat()` instead.
使用 Keras 预处理层
调整大小和重新缩放
您可以使用 Keras 预处理层将图像大小调整为一致的形状(使用 tf.keras.layers.Resizing),并重新调整像素值(使用 tf.keras.layers.Rescaling)。
IMG_SIZE = 180

resize_and_rescale = tf.keras.Sequential([
  layers.Resizing(IMG_SIZE, IMG_SIZE),
  layers.Rescaling(1./255)
])
注:上面的重新缩放层将像素值标准化到 [0,1] 范围。如果想要 [-1,1],可以编写 tf.keras.layers.Rescaling(1./127.5, offset=-1)。
您可以看到将这些层应用于图像的结果。
result = resize_and_rescale(image)
_ = plt.imshow(result)
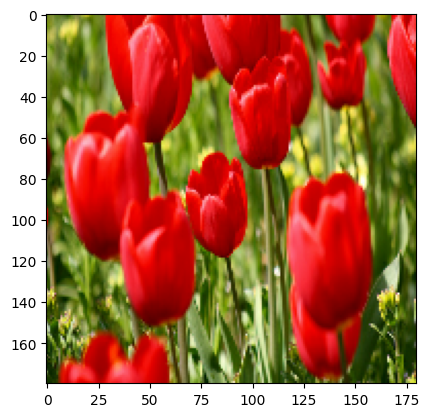
验证像素是否在 [0, 1] 范围内:
print("Min and max pixel values:", result.numpy().min(), result.numpy().max())
Min and max pixel values: 0.0 1.0
数据增强
您也可以使用 Keras 预处理层进行数据增强,例如 tf.keras.layers.RandomFlip 和 tf.keras.layers.RandomRotation。
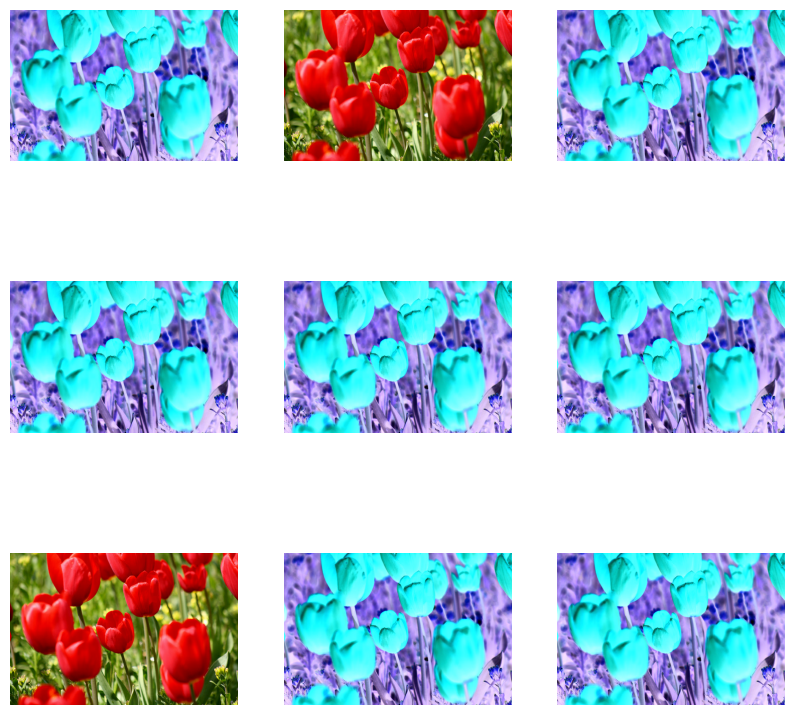
我们来创建一些预处理层,然后将它们重复应用于同一图像。
data_augmentation = tf.keras.Sequential([
  layers.RandomFlip("horizontal_and_vertical"),
  layers.RandomRotation(0.2),
])
# Add the image to a batch.
image = tf.cast(tf.expand_dims(image, 0), tf.float32)
plt.figure(figsize=(10, 10))
for i in range(9):
  augmented_image = data_augmentation(image)
  ax = plt.subplot(3, 3, i + 1)
  plt.imshow(augmented_image[0])
  plt.axis("off")
WARNING:matplotlib.image:Clipping input data to the valid range for imshow with RGB data ([0..1] for floats or [0..255] for integers).
WARNING:matplotlib.image:Clipping input data to the valid range for imshow with RGB data ([0..1] for floats or [0..255] for integers).
WARNING:matplotlib.image:Clipping input data to the valid range for imshow with RGB data ([0..1] for floats or [0..255] for integers).
WARNING:matplotlib.image:Clipping input data to the valid range for imshow with RGB data ([0..1] for floats or [0..255] for integers).
WARNING:matplotlib.image:Clipping input data to the valid range for imshow with RGB data ([0..1] for floats or [0..255] for integers).
WARNING:matplotlib.image:Clipping input data to the valid range for imshow with RGB data ([0..1] for floats or [0..255] for integers).
WARNING:matplotlib.image:Clipping input data to the valid range for imshow with RGB data ([0..1] for floats or [0..255] for integers).
WARNING:matplotlib.image:Clipping input data to the valid range for imshow with RGB data ([0..1] for floats or [0..255] for integers).
WARNING:matplotlib.image:Clipping input data to the valid range for imshow with RGB data ([0..1] for floats or [0..255] for integers).
有多种预处理层可用于数据增强,包括 tf.keras.layers.RandomContrast、tf.keras.layers.RandomCrop、tf.keras.layers.RandomZoom 等。
使用 Keras 预处理层的两个选项
您可以通过两种方式使用这些预处理层,但需进行重要的权衡。
选项 1:使预处理层成为模型的一部分
model = tf.keras.Sequential([
  # Add the preprocessing layers you created earlier.
  resize_and_rescale,
  data_augmentation,
  layers.Conv2D(16, 3, padding='same', activation='relu'),
  layers.MaxPooling2D(),
  # Rest of your model.
])
在这种情况下,需要注意两个要点:
数据增强将与其他层在设备端同步运行,并受益于 GPU 加速。
当您使用
model.save导出模型时,预处理层将与模型的其他部分一起保存。如果您稍后部署此模型,它将自动标准化图像(根据您的层配置)。这可以省去在服务器端重新实现该逻辑的工作。
注:数据增强在测试时处于停用状态,因此只有在调用 Model.fit(而非 Model.evaluate 或 Model.predict)期间才会对输入图像进行增强。
选项 2:将预处理层应用于数据集
aug_ds = train_ds.map(
  lambda x, y: (resize_and_rescale(x, training=True), y))
通过这种方式,您可以使用 Dataset.map 创建产生增强图像批次的数据集。在本例中:
- 数据增强将在 CPU 上异步进行,且为非阻塞性。您可以使用
Dataset.prefetch将 GPU 上的模型训练与数据数据预处理重叠,如下所示。 - 在本例中,当您调用
Model.save时,预处理层将不会随模型一起导出。在保存模型或在服务器端重新实现它们之前,您需要将它们附加到模型上。训练后,您可以在导出之前附加预处理层。
您可以在图像分类教程中找到第一个选项的示例。我们在这里演示一下第二个选项。
将预处理层应用于数据集
使用上面创建的 Keras 预处理层配置训练数据集、验证数据集和测试数据集。您还将配置数据集以提高性能,具体方式是使用并行读取和缓冲预提取从磁盘产生批次,这样不会阻塞 I/O。(您可以通过使用 tf.data API 提高性能指南详细了解数据集性能)。
注:应仅对训练集应用数据增强。
batch_size = 32
AUTOTUNE = tf.data.AUTOTUNE

def prepare(ds, shuffle=False, augment=False):
  # Resize and rescale all datasets.
  ds = ds.map(lambda x, y: (resize_and_rescale(x), y),
              num_parallel_calls=AUTOTUNE)

  if shuffle:
    ds = ds.shuffle(1000)

  # Batch all datasets.
  ds = ds.batch(batch_size)

  # Use data augmentation only on the training set.
  if augment:
    ds = ds.map(lambda x, y: (data_augmentation(x, training=True), y),
                num_parallel_calls=AUTOTUNE)

  # Use buffered prefetching on all datasets.
  return ds.prefetch(buffer_size=AUTOTUNE)
train_ds = prepare(train_ds, shuffle=True, augment=True)
val_ds = prepare(val_ds)
test_ds = prepare(test_ds)
训练模型
为了完整起见,您现在将使用刚刚准备的数据集训练模型。
序贯模型由三个卷积块 (tf.keras.layers.Conv2D) 组成,每个卷积块都有一个最大池化层 (tf.keras.layers.MaxPooling2D)。有一个全连接层 (tf.keras.layers.Dense),上面有 128 个单元,由 ReLU 激活函数 ('relu') 激活。此模型尚未针对准确率进行调整(目标是展示机制)。
model = tf.keras.Sequential([
  layers.Conv2D(16, 3, padding='same', activation='relu'),
  layers.MaxPooling2D(),
  layers.Conv2D(32, 3, padding='same', activation='relu'),
  layers.MaxPooling2D(),
  layers.Conv2D(64, 3, padding='same', activation='relu'),
  layers.MaxPooling2D(),
  layers.Flatten(),
  layers.Dense(128, activation='relu'),
  layers.Dense(num_classes)
])
选择 tf.keras.optimizers.Adam 优化器和 tf.keras.losses.SparseCategoricalCrossentropy 损失函数。要查看每个训练周期的训练和验证准确率,请将 metrics 参数传递给 Model.compile。
model.compile(optimizer='adam',
              loss=tf.keras.losses.SparseCategoricalCrossentropy(from_logits=True),
              metrics=['accuracy'])
训练几个周期:
epochs=5
history = model.fit(
  train_ds,
  validation_data=val_ds,
  epochs=epochs
)
Epoch 1/5
WARNING: All log messages before absl::InitializeLog() is called are written to STDERR
I0000 00:00:1699398085.777697  499426 device_compiler.h:186] Compiled cluster using XLA!  This line is logged at most once for the lifetime of the process.
92/92 [==============================] - 9s 43ms/step - loss: 1.4885 - accuracy: 0.3440 - val_loss: 1.2572 - val_accuracy: 0.4659
Epoch 2/5
92/92 [==============================] - 2s 21ms/step - loss: 1.1319 - accuracy: 0.5317 - val_loss: 1.0627 - val_accuracy: 0.5777
Epoch 3/5
92/92 [==============================] - 2s 21ms/step - loss: 1.0089 - accuracy: 0.5899 - val_loss: 0.9472 - val_accuracy: 0.6240
Epoch 4/5
92/92 [==============================] - 2s 22ms/step - loss: 0.9438 - accuracy: 0.6182 - val_loss: 1.0004 - val_accuracy: 0.6267
Epoch 5/5
92/92 [==============================] - 2s 20ms/step - loss: 0.8879 - accuracy: 0.6543 - val_loss: 0.9095 - val_accuracy: 0.6458
loss, acc = model.evaluate(test_ds)
print("Accuracy", acc)
12/12 [==============================] - 2s 9ms/step - loss: 0.8093 - accuracy: 0.6866
Accuracy 0.6866484880447388
自定义数据增强
您还可以创建自定义数据增强层。
教程的这一部分展示了两种操作方式:
- 首先,您将创建一个
tf.keras.layers.Lambda层。这是编写简洁代码的好方式。 - 接下来,您将通过子类化编写一个新层,这会给您更多的控制。
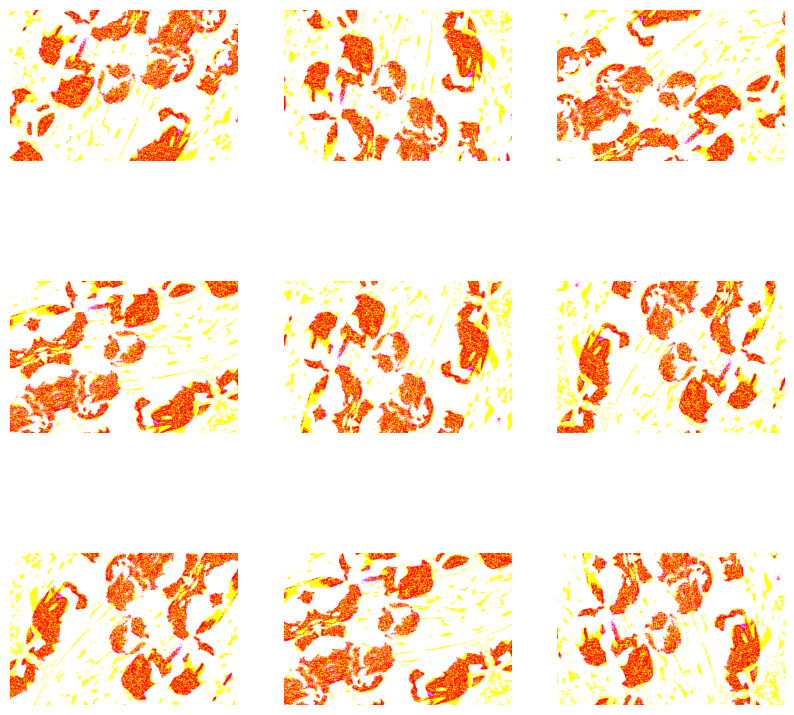
两个层都会根据某种概率随机反转图像中的颜色。
def random_invert_img(x, p=0.5):
  if  tf.random.uniform([]) < p:
    x = (255-x)
  else:
    x
  return x
def random_invert(factor=0.5):
  return layers.Lambda(lambda x: random_invert_img(x, factor))

random_invert = random_invert()
plt.figure(figsize=(10, 10))
for i in range(9):
  augmented_image = random_invert(image)
  ax = plt.subplot(3, 3, i + 1)
  plt.imshow(augmented_image[0].numpy().astype("uint8"))
  plt.axis("off")
接下来,通过子类化实现自定义层:
class RandomInvert(layers.Layer):
  def __init__(self, factor=0.5, **kwargs):
    super().__init__(**kwargs)
    self.factor = factor

  def call(self, x):
    return random_invert_img(x)
_ = plt.imshow(RandomInvert()(image)[0])
WARNING:matplotlib.image:Clipping input data to the valid range for imshow with RGB data ([0..1] for floats or [0..255] for integers).
可以按照上述选项 1 和 2 中的描述使用这两个层。
使用 tf.image
上述 Keras 预训练实用工具十分方便。但为了更精细的控制,您可以使用 tf.data 和 tf.image 编写自己的数据增强流水线或数据增强层。您还可以查看 TensorFlow Addons 图像:运算和 TensorFlow I/O:色彩空间转换。
由于花卉数据集之前已经配置了数据增强,因此我们将其重新导入以重新开始。
(train_ds, val_ds, test_ds), metadata = tfds.load(
    'tf_flowers',
    split=['train[:80%]', 'train[80%:90%]', 'train[90%:]'],
    with_info=True,
    as_supervised=True,
)
检索一个图像以供使用:
image, label = next(iter(train_ds))
_ = plt.imshow(image)
_ = plt.title(get_label_name(label))
2023-11-07 23:01:45.778129: W tensorflow/core/kernels/data/cache_dataset_ops.cc:858] The calling iterator did not fully read the dataset being cached. In order to avoid unexpected truncation of the dataset, the partially cached contents of the dataset will be discarded. This can happen if you have an input pipeline similar to `dataset.cache().take(k).repeat()`. You should use `dataset.take(k).cache().repeat()` instead.

我们来使用以下函数呈现原始图像和增强图像,然后并排比较。
def visualize(original, augmented):
  fig = plt.figure()
  plt.subplot(1,2,1)
  plt.title('Original image')
  plt.imshow(original)

  plt.subplot(1,2,2)
  plt.title('Augmented image')
  plt.imshow(augmented)
数据增强
翻转图像
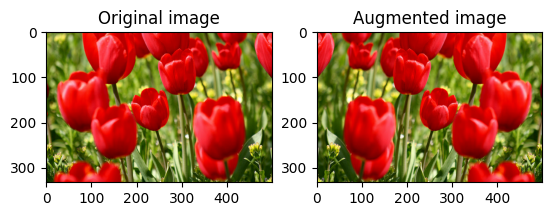
使用 tf.image.flip_left_right 垂直或水平翻转图像:
flipped = tf.image.flip_left_right(image)
visualize(image, flipped)
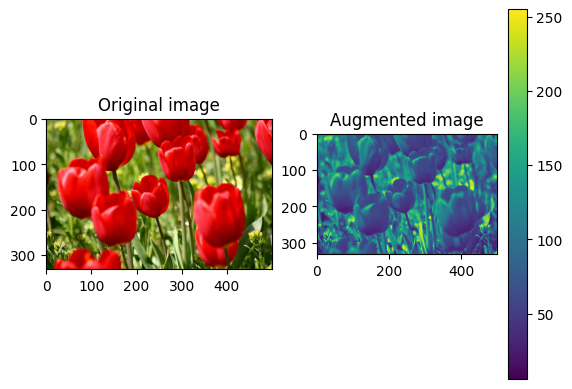
对图像进行灰度处理
您可以使用 tf.image.rgb_to_grayscale 对图像进行灰度处理:
grayscaled = tf.image.rgb_to_grayscale(image)
visualize(image, tf.squeeze(grayscaled))
_ = plt.colorbar()
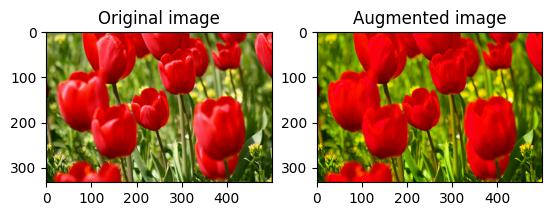
调整图像饱和度
使用 tf.image.adjust_saturation,通过提供饱和度系数来调整图像饱和度:
saturated = tf.image.adjust_saturation(image, 3)
visualize(image, saturated)
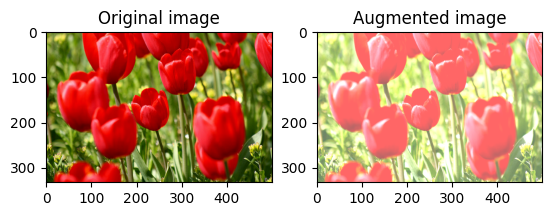
更改图像亮度
使用 tf.image.adjust_brightness,通过提供亮度系数来更改图像的亮度:
bright = tf.image.adjust_brightness(image, 0.4)
visualize(image, bright)
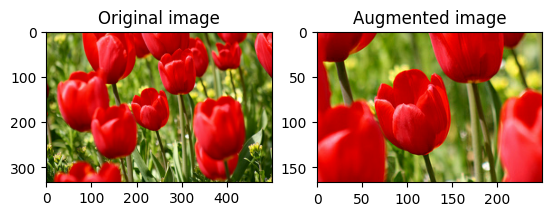
对图像进行中心裁剪
使用 tf.image.central_crop 将图像从中心裁剪到所需部分:
cropped = tf.image.central_crop(image, central_fraction=0.5)
visualize(image, cropped)
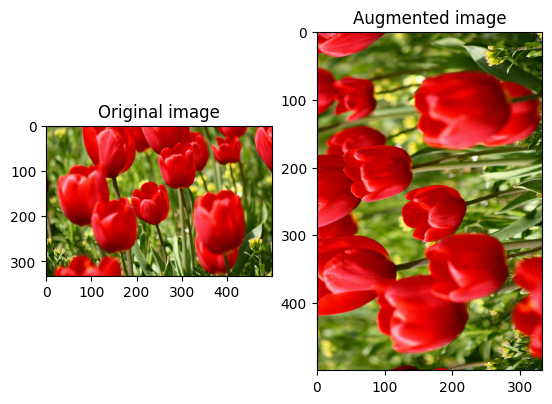
旋转图像
使用 tf.image.rot90 将图像旋转 90 度:
rotated = tf.image.rot90(image)
visualize(image, rotated)
随机变换
警告:有两组随机图像运算:tf.image.random* 和 tf.image.stateless_random*。强烈不建议使用 tf.image.random* 运算,因为它们使用的是 TF 1.x 中的旧 RNG。请改用本教程中介绍的随机图像运算。有关详情,请参阅随机数生成。
对图像应用随机变换可以进一步帮助泛化和扩展数据集。当前的 tf.image API 提供了 8 个这样的随机图像运算 (op):
tf.image.stateless_random_brightnesstf.image.stateless_random_contrasttf.image.stateless_random_croptf.image.stateless_random_flip_left_righttf.image.stateless_random_flip_up_downtf.image.stateless_random_huetf.image.stateless_random_jpeg_qualitytf.image.stateless_random_saturation
这些随机图像运算纯粹是功能性的:输出仅取决于输入。这使得它们易于在高性能、确定性的输入流水线中使用。它们要求每一步都输入一个 seed 值。给定相同的 seed,无论被调用多少次,它们都会返回相同的结果。
注:seed 是形状为 (2,) 的 Tensor,其值为任意整数。
在以下部分中,您将:
- 回顾使用随机图像运算来变换图像的示例。
- 演示如何将随机变换应用于训练数据集。
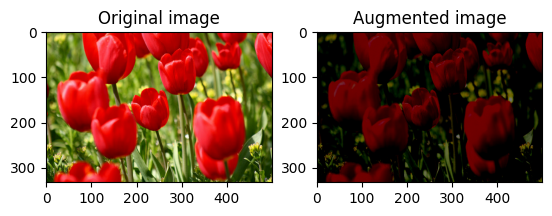
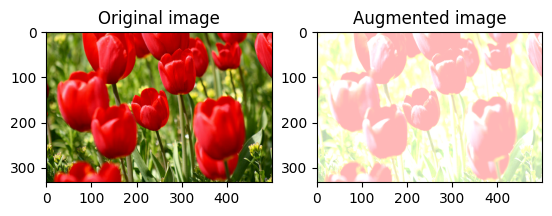
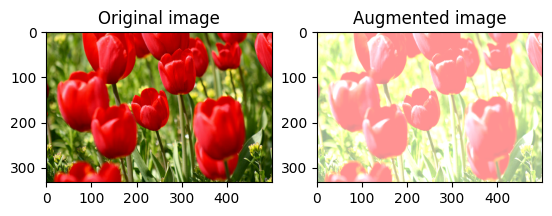
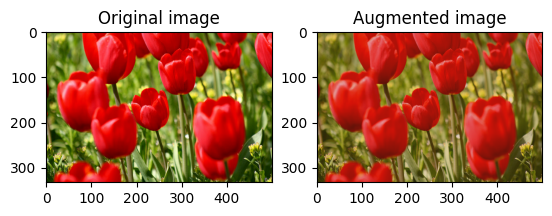
随机更改图像亮度
通过提供亮度系数和 seed,使用 tf.image.stateless_random_brightness 随机更改 image 的亮度。亮度系数在 [-max_delta, max_delta) 范围内随机选择,并与给定的 seed 相关联。
for i in range(3):
  seed = (i, 0)  # tuple of size (2,)
  stateless_random_brightness = tf.image.stateless_random_brightness(
      image, max_delta=0.95, seed=seed)
  visualize(image, stateless_random_brightness)
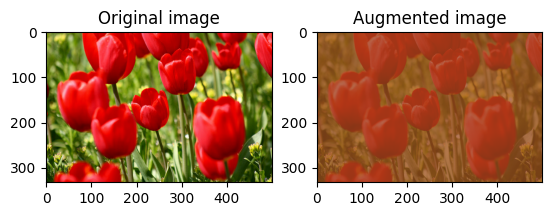
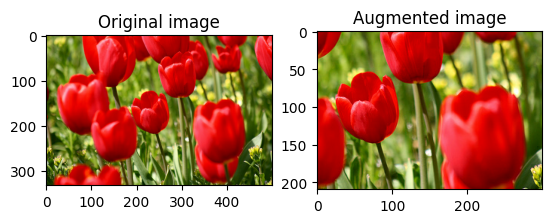
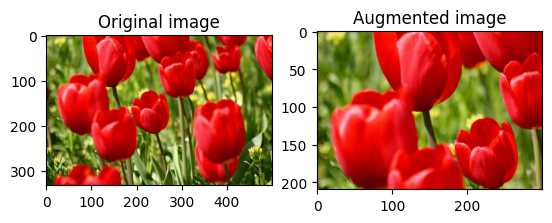
随机更改图像对比度
通过提供对比度范围和 seed,使用 tf.image.stateless_random_contrast 随机更改 image 的对比度。对比度范围在区间 [lower, upper] 中随机选择,并与给定的 seed 相关联。
for i in range(3):
  seed = (i, 0)  # tuple of size (2,)
  stateless_random_contrast = tf.image.stateless_random_contrast(
      image, lower=0.1, upper=0.9, seed=seed)
  visualize(image, stateless_random_contrast)
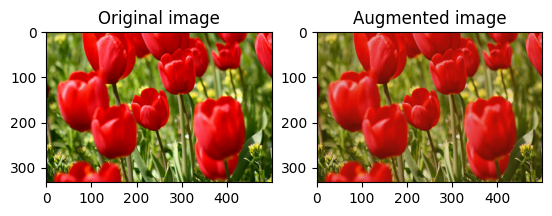
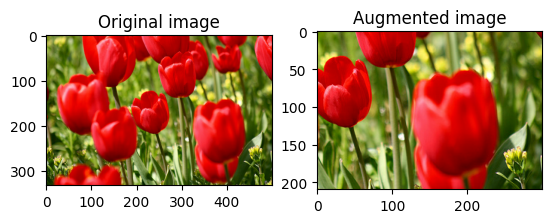
随机裁剪图像
通过提供目标 size 和 seed,使用 tf.image.stateless_random_crop 随机裁剪 image。从 image 中裁剪出来的部分位于随机选择的偏移处,并与给定的 seed 相关联。
for i in range(3):
  seed = (i, 0)  # tuple of size (2,)
  stateless_random_crop = tf.image.stateless_random_crop(
      image, size=[210, 300, 3], seed=seed)
  visualize(image, stateless_random_crop)
对数据集应用增强
我们首先再次下载图像数据集,以防它们在之前的部分中被修改。
(train_datasets, val_ds, test_ds), metadata = tfds.load(
    'tf_flowers',
    split=['train[:80%]', 'train[80%:90%]', 'train[90%:]'],
    with_info=True,
    as_supervised=True,
)
接下来,定义一个用于调整图像大小和重新缩放图像的效用函数。此函数将用于统一数据集中图像的大小和比例:
def resize_and_rescale(image, label):
  image = tf.cast(image, tf.float32)
  image = tf.image.resize(image, [IMG_SIZE, IMG_SIZE])
  image = (image / 255.0)
  return image, label
我们同时定义 augment 函数,该函数可以将随机变换应用于图像。此函数将在下一步中用于数据集。
def augment(image_label, seed):
  image, label = image_label
  image, label = resize_and_rescale(image, label)
  image = tf.image.resize_with_crop_or_pad(image, IMG_SIZE + 6, IMG_SIZE + 6)
  # Make a new seed.
  new_seed = tf.random.split(seed, num=1)[0, :]
  # Random crop back to the original size.
  image = tf.image.stateless_random_crop(
      image, size=[IMG_SIZE, IMG_SIZE, 3], seed=seed)
  # Random brightness.
  image = tf.image.stateless_random_brightness(
      image, max_delta=0.5, seed=new_seed)
  image = tf.clip_by_value(image, 0, 1)
  return image, label
选项 1:使用 tf.data.experimental.Counter
创建一个 tf.data.experimental.Counter() 对象(我们称之为 counter),并使用 (counter, counter) Dataset.zip 数据集。这将确保数据集中的每个图像都与一个基于 counter 的唯一值(形状为 (2,))相关联,稍后可以将其传递到 augment 函数,作为随机变换的 seed 值。
# Create a `Counter` object and `Dataset.zip` it together with the training set.
counter = tf.data.experimental.Counter()
train_ds = tf.data.Dataset.zip((train_datasets, (counter, counter)))
WARNING:tensorflow:From /tmpfs/tmp/ipykernel_499252/587852618.py:2: CounterV2 (from tensorflow.python.data.experimental.ops.counter) is deprecated and will be removed in a future version.
Instructions for updating:
Use `tf.data.Dataset.counter(...)` instead.
WARNING:tensorflow:From /tmpfs/tmp/ipykernel_499252/587852618.py:2: CounterV2 (from tensorflow.python.data.experimental.ops.counter) is deprecated and will be removed in a future version.
Instructions for updating:
Use `tf.data.Dataset.counter(...)` instead.
将 augment 函数映射到训练数据集:
train_ds = (
    train_ds
    .shuffle(1000)
    .map(augment, num_parallel_calls=AUTOTUNE)
    .batch(batch_size)
    .prefetch(AUTOTUNE)
)
val_ds = (
    val_ds
    .map(resize_and_rescale, num_parallel_calls=AUTOTUNE)
    .batch(batch_size)
    .prefetch(AUTOTUNE)
)
test_ds = (
    test_ds
    .map(resize_and_rescale, num_parallel_calls=AUTOTUNE)
    .batch(batch_size)
    .prefetch(AUTOTUNE)
)
选项 2:使用 tf.random.Generator
- 创建一个具有初始
seed值的tf.random.Generator对象。在同一个生成器对象上调用make_seeds函数会始终返回一个新的、唯一的seed值。 - 定义一个封装容器函数:1) 调用
make_seeds函数;2) 将新生成的seed值传递给augment函数进行随机变换。
注:tf.random.Generator 对象会将 RNG 状态存储在 tf.Variable 中,这意味着它可以保存为检查点或以 SavedModel 格式保存。有关详情,请参阅随机数生成。
# Create a generator.
rng = tf.random.Generator.from_seed(123, alg='philox')
# Create a wrapper function for updating seeds.
def f(x, y):
  seed = rng.make_seeds(2)[0]
  image, label = augment((x, y), seed)
  return image, label
将封装容器函数 f 映射到训练数据集,并将 resize_and_rescale 函数映射到验证集和测试集:
train_ds = (
    train_datasets
    .shuffle(1000)
    .map(f, num_parallel_calls=AUTOTUNE)
    .batch(batch_size)
    .prefetch(AUTOTUNE)
)
val_ds = (
    val_ds
    .map(resize_and_rescale, num_parallel_calls=AUTOTUNE)
    .batch(batch_size)
    .prefetch(AUTOTUNE)
)
test_ds = (
    test_ds
    .map(resize_and_rescale, num_parallel_calls=AUTOTUNE)
    .batch(batch_size)
    .prefetch(AUTOTUNE)
)
这些数据集现在可以用于训练模型了,如前文所述。
后续步骤
本教程演示了使用 Keras 预处理层和 tf.image 进行数据增强。