GitHub에서소스 보기 GitHub에서소스 보기 |
개요
컴퓨터 비전에서 선택한 색 공간은 모델의 성능에 상당한 영향을 미칠 수 있습니다. RGB가 가장 일반적인 색 공간이지만 많은 상황에서 YUV, YCbCr, XYZ (CIE) 등과 같은 대체 색 공간으로 전환할 때 모델이 더 잘 동작합니다.
tensorflow-io 패키지는 이미지 데이터를 준비하고 보강하는 데 사용할 수 있는 일련의 색 공간 변환 API를 제공합니다.
설정
필수 패키지를 설치하고 런타임 다시 시작하기
pip install -q tensorflow-io샘플 이미지 다운로드하기
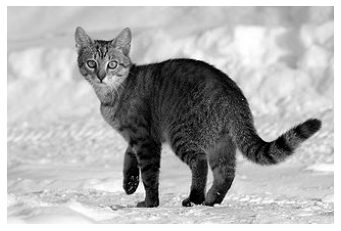
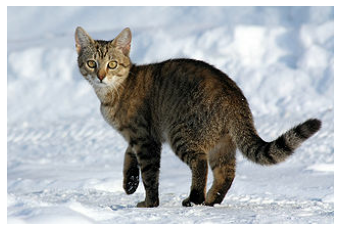
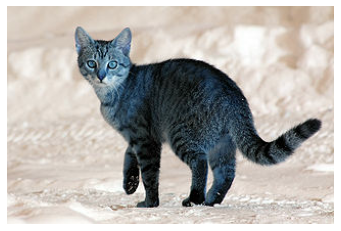
이 튜토리얼에 사용된 이미지 예는 눈 속의 고양이이지만 어떤 JPEG 이미지로든 대체할 수 있습니다.
다음을 이용해 이미지를 다운로드하고 로컬 디스크에 sample.jpg로 저장합니다.
curl -o sample.jpg -L https://storage.googleapis.com/download.tensorflow.org/example_images/320px-Felis_catus-cat_on_snow.jpgls -ls sample.jpg
% Total    % Received % Xferd  Average Speed   Time    Time     Time  Current
                                 Dload  Upload   Total   Spent    Left  Speed
100 17858  100 17858    0     0  94486      0 --:--:-- --:--:-- --:--:-- 94486
20 -rw-rw-r-- 1 kbuilder kokoro 17858 Nov 12 02:20 sample.jpg
사용법
이미지 파일 읽기
이미지를 읽고 형상 (213, 320, 3)의 uint8 텐서로 디코딩합니다.
import tensorflow as tf
import tensorflow_io as tfio

image = tf.image.decode_jpeg(tf.io.read_file('sample.jpg'))

print(image.shape, image.dtype)
(213, 320, 3) <dtype: 'uint8'>
다음을 이용해 이미지를 표시할 수 있습니다.
import matplotlib.pyplot as plt

plt.figure()
plt.imshow(image)
plt.axis('off')
plt.show()
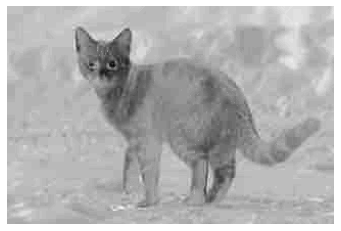
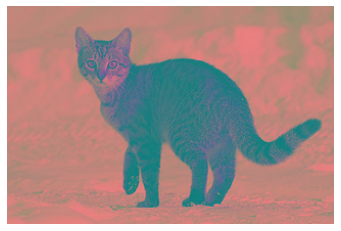
RGB를 그레이스케일로 변환하기
tfio.experimental.color.rgb_to_grayscale를 이용해 RGB 이미지를 Grayscale로 변환하여 채널을 3개에서 1개로 줄일 수 있습니다.
grayscale = tfio.experimental.color.rgb_to_grayscale(image)

print(grayscale.shape, grayscale.dtype)

# use tf.squeeze to remove last channel for plt.imshow to display:
plt.figure()
plt.imshow(tf.squeeze(grayscale, axis=-1), cmap='gray')
plt.axis('off')
plt.show()
(213, 320, 1) <dtype: 'uint8'>

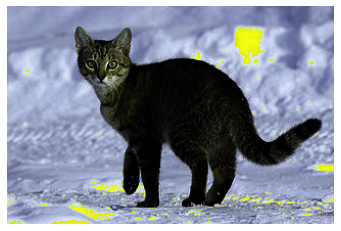
RGB를 BGR로 변환하기
일부 이미지 소프트웨어 및 카메라 제조업체는 tfio.experimental.color.rgb_to_bgr을 통해 얻을 수 있는 BGR을 선호할 수 있습니다.
bgr = tfio.experimental.color.rgb_to_bgr(image)

print(bgr.shape, bgr.dtype)

plt.figure()
plt.imshow(bgr)
plt.axis('off')
plt.show()
(213, 320, 3) <dtype: 'uint8'>
RGB를 CIE XYZ로 변환하기
CIE XYZ(또는 CIE 1931 XYZ)는 많은 이미지 처리 프로그램에서 사용되는 일반적인 색 공간입니다. 다음은 tfio.experimental.color.rgb_to_xyz를 이용해 RGB에서 CIE XYZ로 변환하는 작업입니다. tfio.experimental.color.rgb_to_xyz는 [0, 1] 범위에서 부동 소수점 입력을 가정하므로 추가적인 전처리가 필요합니다.
# convert to float32
image_float32 = tf.cast(image, tf.float32) / 255.0

xyz_float32 = tfio.experimental.color.rgb_to_xyz(image_float32)

# convert back uint8
xyz = tf.cast(xyz_float32 * 255.0, tf.uint8)

print(xyz.shape, xyz.dtype)

plt.figure()
plt.imshow(xyz)
plt.axis('off')
plt.show()
(213, 320, 3) <dtype: 'uint8'>
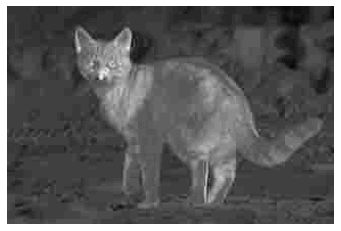
RGB를 YCbCr로 변환하기
마지막으로, YCbCr은 많은 비디오 시스템에서 사용되는 기본 색 공간입니다. tfio.experimental.color.rgb_to_ycbcr을 이용해 YCbCr로 변환할 수 있습니다.
ycbcr = tfio.experimental.color.rgb_to_ycbcr(image)

print(ycbcr.shape, ycbcr.dtype)

plt.figure()
plt.imshow(ycbcr, cmap='gray')
plt.axis('off')
plt.show()
(213, 320, 3) <dtype: 'uint8'>
하지만 더 흥미로운 점은 YCbCr을 Y'(루마), Cb(청색 차이 채도) 및 Cr(적색 차이 채도) 성분으로 분해할 수 있다는 것입니다. 각 성분은 지각적으로 의미 있는 정보를 전달합니다.
y, cb, cr = ycbcr[:,:,0], ycbcr[:,:,1], ycbcr[:,:,2]

# Y' component
plt.figure()
plt.imshow(y, cmap='gray')
plt.axis('off')
plt.show()

# Cb component
plt.figure()
plt.imshow(cb, cmap='gray')
plt.axis('off')
plt.show()

# Cr component
plt.figure()
plt.imshow(cr, cmap='gray')
plt.axis('off')
plt.show()