
| | |  Xem nguồn trên GitHub Xem nguồn trên GitHub |
API tf.data cho phép bạn xây dựng các đường ống đầu vào phức tạp từ các mảnh đơn giản, có thể tái sử dụng. Ví dụ: đường dẫn cho một mô hình hình ảnh có thể tổng hợp dữ liệu từ các tệp trong hệ thống tệp phân tán, áp dụng nhiễu ngẫu nhiên cho mỗi hình ảnh và hợp nhất các hình ảnh được chọn ngẫu nhiên thành một lô để đào tạo. Quy trình cho mô hình văn bản có thể liên quan đến việc trích xuất các ký hiệu từ dữ liệu văn bản thô, chuyển đổi chúng để nhúng các số nhận dạng với một bảng tra cứu và kết hợp các chuỗi có độ dài khác nhau lại với nhau. API tf.data giúp nó có thể xử lý lượng lớn dữ liệu, đọc từ các định dạng dữ liệu khác nhau và thực hiện các phép biến đổi phức tạp.
API tf.data giới thiệu một trừu tượng tf.data.Dataset đại diện cho một chuỗi các phần tử, trong đó mỗi phần tử bao gồm một hoặc nhiều thành phần. Ví dụ: trong một đường ống hình ảnh, một phần tử có thể là một ví dụ huấn luyện đơn lẻ, với một cặp thành phần tensor đại diện cho hình ảnh và nhãn của nó.
Có hai cách riêng biệt để tạo tập dữ liệu:
Nguồn dữ liệu xây dựng
Datasettừ dữ liệu được lưu trữ trong bộ nhớ hoặc trong một hoặc nhiều tệp.Một phép biến đổi dữ liệu xây dựng một tập dữ liệu từ một hoặc nhiều đối tượng
tf.data.Dataset.
import tensorflow as tf
import pathlib
import os
import matplotlib.pyplot as plt
import pandas as pd
import numpy as np

np.set_printoptions(precision=4)
Cơ học cơ bản
Để tạo một đường dẫn đầu vào, bạn phải bắt đầu với một nguồn dữ liệu. Ví dụ: để tạo Dataset từ dữ liệu trong bộ nhớ, bạn có thể sử dụng tf.data.Dataset.from_tensors() hoặc tf.data.Dataset.from_tensor_slices() . Ngoài ra, nếu dữ liệu đầu vào của bạn được lưu trữ trong tệp ở định dạng TFRecord được khuyến nghị, bạn có thể sử dụng tf.data.TFRecordDataset() .
Khi bạn có một đối tượng Dataset , bạn có thể biến đổi nó thành một Dataset mới bằng cách chuỗi các cuộc gọi phương thức trên đối tượng tf.data.Dataset . Ví dụ: bạn có thể áp dụng các phép biến đổi cho mỗi phần tử như Dataset.map() và các phép biến đổi nhiều phần tử như Dataset.batch() . Xem tài liệu về tf.data.Dataset để biết danh sách đầy đủ các phép biến đổi.
Đối tượng Dataset là một Python có thể lặp lại. Điều này làm cho nó có thể sử dụng các phần tử của nó bằng cách sử dụng vòng lặp for:
dataset = tf.data.Dataset.from_tensor_slices([8, 3, 0, 8, 2, 1])
dataset
<TensorSliceDataset element_spec=TensorSpec(shape=(), dtype=tf.int32, name=None)>
for elem in dataset:
  print(elem.numpy())
8
3
0
8
2
1
Hoặc bằng cách tạo một trình lặp Python một cách rõ ràng bằng cách sử dụng iter và sử dụng các phần tử của nó bằng cách sử dụng next :
it = iter(dataset)

print(next(it).numpy())
8
Ngoài ra, các phần tử của tập dữ liệu có thể được sử dụng bằng cách sử dụng phép biến đổi reduce , làm giảm tất cả các phần tử để tạo ra một kết quả duy nhất. Ví dụ sau minh họa cách sử dụng phép biến đổi reduce để tính tổng của một tập dữ liệu gồm các số nguyên.
print(dataset.reduce(0, lambda state, value: state + value).numpy())
22
Cấu trúc tập dữ liệu
Tập dữ liệu tạo ra một chuỗi các phần tử , trong đó mỗi phần tử là cấu trúc các thành phần giống nhau (lồng nhau). Các thành phần riêng lẻ của cấu trúc có thể thuộc bất kỳ kiểu nào mà tf.TypeSpec có thể đại diện, bao gồm tf.Tensor , tf.sparse.SparseTensor , tf.RaggedTensor , tf.TensorArray hoặc tf.data.Dataset .
Các cấu trúc Python có thể được sử dụng để thể hiện cấu trúc (lồng nhau) của các phần tử bao gồm tuple , dict , NamedTuple và OrderedDict . Đặc biệt, list không phải là một cấu trúc hợp lệ để thể hiện cấu trúc của các phần tử tập dữ liệu. Điều này là do người dùng tf.data ban đầu cảm thấy mạnh mẽ về việc đầu vào list (ví dụ: được chuyển đến tf.data.Dataset.from_tensors ) được tự động đóng gói dưới dạng tensors và đầu ra list (ví dụ: giá trị trả về của các chức năng do người dùng xác định) được ép buộc thành một tuple . Do đó, nếu bạn muốn đầu vào list được coi như một cấu trúc, bạn cần chuyển đổi nó thành tuple và nếu bạn muốn đầu ra list là một thành phần duy nhất, thì bạn cần phải đóng gói nó một cách rõ ràng bằng tf.stack .
Thuộc tính Dataset.element_spec cho phép bạn kiểm tra kiểu của từng thành phần phần tử. Thuộc tính trả về một cấu trúc lồng nhau của các đối tượng tf.TypeSpec , khớp với cấu trúc của phần tử, có thể là một thành phần đơn lẻ, một bộ thành phần hoặc một bộ thành phần lồng nhau. Ví dụ:
dataset1 = tf.data.Dataset.from_tensor_slices(tf.random.uniform([4, 10]))

dataset1.element_spec
TensorSpec(shape=(10,), dtype=tf.float32, name=None)
dataset2 = tf.data.Dataset.from_tensor_slices(
   (tf.random.uniform([4]),
    tf.random.uniform([4, 100], maxval=100, dtype=tf.int32)))

dataset2.element_spec
(TensorSpec(shape=(), dtype=tf.float32, name=None),
 TensorSpec(shape=(100,), dtype=tf.int32, name=None))
dataset3 = tf.data.Dataset.zip((dataset1, dataset2))

dataset3.element_spec
(TensorSpec(shape=(10,), dtype=tf.float32, name=None),
 (TensorSpec(shape=(), dtype=tf.float32, name=None),
  TensorSpec(shape=(100,), dtype=tf.int32, name=None)))
# Dataset containing a sparse tensor.
dataset4 = tf.data.Dataset.from_tensors(tf.SparseTensor(indices=[[0, 0], [1, 2]], values=[1, 2], dense_shape=[3, 4]))

dataset4.element_spec
SparseTensorSpec(TensorShape([3, 4]), tf.int32)
# Use value_type to see the type of value represented by the element spec
dataset4.element_spec.value_type
tensorflow.python.framework.sparse_tensor.SparseTensor
Các phép biến đổi Dataset hỗ trợ các tập dữ liệu của bất kỳ cấu trúc nào. Khi sử dụng các phép biến đổi Dataset.map() và Dataset.filter() , áp dụng một hàm cho mỗi phần tử, cấu trúc phần tử sẽ xác định các đối số của hàm:
dataset1 = tf.data.Dataset.from_tensor_slices(
    tf.random.uniform([4, 10], minval=1, maxval=10, dtype=tf.int32))

dataset1
<TensorSliceDataset element_spec=TensorSpec(shape=(10,), dtype=tf.int32, name=None)>
for z in dataset1:
  print(z.numpy())
[3 3 7 5 9 8 4 2 3 7]
[8 9 6 7 5 6 1 6 2 3]
[9 8 4 4 8 7 1 5 6 7]
[5 9 5 4 2 5 7 8 8 8]
dataset2 = tf.data.Dataset.from_tensor_slices(
   (tf.random.uniform([4]),
    tf.random.uniform([4, 100], maxval=100, dtype=tf.int32)))

dataset2
<TensorSliceDataset element_spec=(TensorSpec(shape=(), dtype=tf.float32, name=None), TensorSpec(shape=(100,), dtype=tf.int32, name=None))>
dataset3 = tf.data.Dataset.zip((dataset1, dataset2))

dataset3
<ZipDataset element_spec=(TensorSpec(shape=(10,), dtype=tf.int32, name=None), (TensorSpec(shape=(), dtype=tf.float32, name=None), TensorSpec(shape=(100,), dtype=tf.int32, name=None)))>
for a, (b,c) in dataset3:
  print('shapes: {a.shape}, {b.shape}, {c.shape}'.format(a=a, b=b, c=c))
shapes: (10,), (), (100,)
shapes: (10,), (), (100,)
shapes: (10,), (), (100,)
shapes: (10,), (), (100,)
Đọc dữ liệu đầu vào
Tiêu thụ mảng NumPy
Xem Tải mảng NumPy để biết thêm ví dụ.
Nếu tất cả dữ liệu đầu vào của bạn phù hợp với bộ nhớ, cách đơn giản nhất để tạo Dataset từ chúng là chuyển đổi chúng thành đối tượng tf.Tensor và sử dụng Dataset.from_tensor_slices() .
train, test = tf.keras.datasets.fashion_mnist.load_data()
Downloading data from https://storage.googleapis.com/tensorflow/tf-keras-datasets/train-labels-idx1-ubyte.gz
32768/29515 [=================================] - 0s 0us/step
40960/29515 [=========================================] - 0s 0us/step
Downloading data from https://storage.googleapis.com/tensorflow/tf-keras-datasets/train-images-idx3-ubyte.gz
26427392/26421880 [==============================] - 0s 0us/step
26435584/26421880 [==============================] - 0s 0us/step
Downloading data from https://storage.googleapis.com/tensorflow/tf-keras-datasets/t10k-labels-idx1-ubyte.gz
16384/5148 [===============================================================================================] - 0s 0us/step
Downloading data from https://storage.googleapis.com/tensorflow/tf-keras-datasets/t10k-images-idx3-ubyte.gz
4423680/4422102 [==============================] - 0s 0us/step
4431872/4422102 [==============================] - 0s 0us/step
images, labels = train
images = images/255

dataset = tf.data.Dataset.from_tensor_slices((images, labels))
dataset
<TensorSliceDataset element_spec=(TensorSpec(shape=(28, 28), dtype=tf.float64, name=None), TensorSpec(shape=(), dtype=tf.uint8, name=None))>
Sử dụng trình tạo Python
Một nguồn dữ liệu phổ biến khác có thể dễ dàng được nhập dưới dạng tf.data.Dataset là trình tạo python.
def count(stop):
  i = 0
  while i<stop:
    yield i
    i += 1
for n in count(5):
  print(n)
0
1
2
3
4
Phương thức khởi tạo Dataset.from_generator chuyển đổi trình tạo python thành tf.data.Dataset đầy đủ chức năng.
Hàm tạo nhận một đầu vào có thể gọi được, không phải là một trình lặp. Điều này cho phép nó khởi động lại máy phát khi kết thúc. Nó nhận một đối số args tùy chọn, được truyền làm đối số của có thể gọi.
Đối số output_types là bắt buộc vì tf.data xây dựng một tf.Graph bên trong và các cạnh biểu đồ yêu cầu một tf.dtype .
ds_counter = tf.data.Dataset.from_generator(count, args=[25], output_types=tf.int32, output_shapes = (), )
for count_batch in ds_counter.repeat().batch(10).take(10):
  print(count_batch.numpy())
[0 1 2 3 4 5 6 7 8 9]
[10 11 12 13 14 15 16 17 18 19]
[20 21 22 23 24  0  1  2  3  4]
[ 5  6  7  8  9 10 11 12 13 14]
[15 16 17 18 19 20 21 22 23 24]
[0 1 2 3 4 5 6 7 8 9]
[10 11 12 13 14 15 16 17 18 19]
[20 21 22 23 24  0  1  2  3  4]
[ 5  6  7  8  9 10 11 12 13 14]
[15 16 17 18 19 20 21 22 23 24]
Đối số output_shapes không bắt buộc nhưng rất được khuyến khích vì nhiều phép toán TensorFlow không hỗ trợ các tensor có thứ hạng không xác định. Nếu độ dài của một trục cụ thể là không xác định hoặc có thể thay đổi, hãy đặt nó là None trong output_shapes .
Điều quan trọng cần lưu ý là output_shapes và output_types tuân theo các quy tắc lồng ghép giống như các phương thức tập dữ liệu khác.
Đây là một trình tạo ví dụ minh họa cả hai khía cạnh, nó trả về các bộ giá trị của mảng, trong đó mảng thứ hai là một vectơ có độ dài chưa biết.
def gen_series():
  i = 0
  while True:
    size = np.random.randint(0, 10)
    yield i, np.random.normal(size=(size,))
    i += 1
for i, series in gen_series():
  print(i, ":", str(series))
  if i > 5:
    break
0 : [0.3939]
1 : [ 0.9282 -0.0158  1.0096  0.7155  0.0491  0.6697 -0.2565  0.487 ]
2 : [-0.4831  0.37   -1.3918 -0.4786  0.7425 -0.3299]
3 : [ 0.1427 -1.0438  0.821  -0.8766 -0.8369  0.4168]
4 : [-1.4984 -1.8424  0.0337  0.0941  1.3286 -1.4938]
5 : [-1.3158 -1.2102  2.6887 -1.2809]
6 : []
Đầu ra đầu tiên là int32 , đầu ra thứ hai là float32 .
Mục đầu tiên là một đại lượng vô hướng, hình dạng () và mục thứ hai là một vectơ có độ dài không xác định, hình dạng (None,)
ds_series = tf.data.Dataset.from_generator(
    gen_series,
    output_types=(tf.int32, tf.float32),
    output_shapes=((), (None,)))

ds_series
<FlatMapDataset element_spec=(TensorSpec(shape=(), dtype=tf.int32, name=None), TensorSpec(shape=(None,), dtype=tf.float32, name=None))>
Bây giờ nó có thể được sử dụng như một tf.data.Dataset thông thường. Lưu ý rằng khi nhóm một tập dữ liệu có hình dạng thay đổi, bạn cần sử dụng Dataset.padded_batch .
ds_series_batch = ds_series.shuffle(20).padded_batch(10)

ids, sequence_batch = next(iter(ds_series_batch))
print(ids.numpy())
print()
print(sequence_batch.numpy())
[ 8 10 18  1  5 19 22 17 21 25]

[[-0.6098  0.1366 -2.15   -0.9329  0.      0.    ]
 [ 1.0295 -0.033  -0.0388  0.      0.      0.    ]
 [-0.1137  0.3552  0.4363 -0.2487 -1.1329  0.    ]
 [ 0.      0.      0.      0.      0.      0.    ]
 [-1.0466  0.624  -1.7705  1.4214  0.9143 -0.62  ]
 [-0.9502  1.7256  0.5895  0.7237  1.5397  0.    ]
 [ 0.3747  1.2967  0.      0.      0.      0.    ]
 [-0.4839  0.292  -0.7909 -0.7535  0.4591 -1.3952]
 [-0.0468  0.0039 -1.1185 -1.294   0.      0.    ]
 [-0.1679 -0.3375  0.      0.      0.      0.    ]]
Để có một ví dụ thực tế hơn, hãy thử gói preprocessing.image.ImageDataGenerator dưới dạng tf.data.Dataset .
Đầu tiên tải xuống dữ liệu:
flowers = tf.keras.utils.get_file(
    'flower_photos',
    'https://storage.googleapis.com/download.tensorflow.org/example_images/flower_photos.tgz',
    untar=True)
Downloading data from https://storage.googleapis.com/download.tensorflow.org/example_images/flower_photos.tgz
228818944/228813984 [==============================] - 10s 0us/step
228827136/228813984 [==============================] - 10s 0us/step
Tạo hình image.ImageDataGenerator
img_gen = tf.keras.preprocessing.image.ImageDataGenerator(rescale=1./255, rotation_range=20)
images, labels = next(img_gen.flow_from_directory(flowers))
Found 3670 images belonging to 5 classes.
print(images.dtype, images.shape)
print(labels.dtype, labels.shape)
float32 (32, 256, 256, 3)
float32 (32, 5)
ds = tf.data.Dataset.from_generator(
    lambda: img_gen.flow_from_directory(flowers),
    output_types=(tf.float32, tf.float32),
    output_shapes=([32,256,256,3], [32,5])
)

ds.element_spec
(TensorSpec(shape=(32, 256, 256, 3), dtype=tf.float32, name=None),
 TensorSpec(shape=(32, 5), dtype=tf.float32, name=None))
for images, label in ds.take(1):
  print('images.shape: ', images.shape)
  print('labels.shape: ', labels.shape)
Found 3670 images belonging to 5 classes.
images.shape:  (32, 256, 256, 3)
labels.shape:  (32, 5)
Sử dụng dữ liệu TFRecord
Xem phần Tải TFRecords để biết ví dụ từ đầu đến cuối.
API tf.data hỗ trợ nhiều định dạng tệp khác nhau để bạn có thể xử lý các tập dữ liệu lớn không vừa với bộ nhớ. Ví dụ: định dạng tệp TFRecord là một định dạng nhị phân hướng bản ghi đơn giản mà nhiều ứng dụng TensorFlow sử dụng cho dữ liệu đào tạo. Lớp tf.data.TFRecordDataset cho phép bạn truyền trực tuyến nội dung của một hoặc nhiều tệp TFRecord như một phần của đường dẫn đầu vào.
Đây là một ví dụ bằng cách sử dụng tệp thử nghiệm từ Bảng hiệu Tên đường của Pháp (FSNS).
# Creates a dataset that reads all of the examples from two files.
fsns_test_file = tf.keras.utils.get_file("fsns.tfrec", "https://storage.googleapis.com/download.tensorflow.org/data/fsns-20160927/testdata/fsns-00000-of-00001")
Downloading data from https://storage.googleapis.com/download.tensorflow.org/data/fsns-20160927/testdata/fsns-00000-of-00001
7905280/7904079 [==============================] - 1s 0us/step
7913472/7904079 [==============================] - 1s 0us/step
Đối số filenames cho bộ khởi tạo TFRecordDataset có thể là một chuỗi, một danh sách các chuỗi hoặc một tf.Tensor của các chuỗi. Do đó, nếu bạn có hai bộ tệp cho mục đích đào tạo và xác thực, bạn có thể tạo một phương thức gốc tạo ra tập dữ liệu, lấy tên tệp làm đối số đầu vào:
dataset = tf.data.TFRecordDataset(filenames = [fsns_test_file])
dataset
<TFRecordDatasetV2 element_spec=TensorSpec(shape=(), dtype=tf.string, name=None)>
Nhiều dự án TensorFlow sử dụng các bản ghi tf.train.Example được tuần tự hóa trong các tệp TFRecord của họ. Chúng cần được giải mã trước khi có thể được kiểm tra:
raw_example = next(iter(dataset))
parsed = tf.train.Example.FromString(raw_example.numpy())

parsed.features.feature['image/text']
bytes_list {
  value: "Rue Perreyon"
}
Sử dụng dữ liệu văn bản
Xem phần Tải văn bản để biết ví dụ kết thúc.
Nhiều bộ dữ liệu được phân phối dưới dạng một hoặc nhiều tệp văn bản. tf.data.TextLineDataset cung cấp một cách dễ dàng để trích xuất các dòng từ một hoặc nhiều tệp văn bản. Cho một hoặc nhiều tên tệp, một TextLineDataset sẽ tạo ra một phần tử có giá trị chuỗi trên mỗi dòng của các tệp đó.
directory_url = 'https://storage.googleapis.com/download.tensorflow.org/data/illiad/'
file_names = ['cowper.txt', 'derby.txt', 'butler.txt']

file_paths = [
    tf.keras.utils.get_file(file_name, directory_url + file_name)
    for file_name in file_names
]
Downloading data from https://storage.googleapis.com/download.tensorflow.org/data/illiad/cowper.txt
819200/815980 [==============================] - 0s 0us/step
827392/815980 [==============================] - 0s 0us/step
Downloading data from https://storage.googleapis.com/download.tensorflow.org/data/illiad/derby.txt
811008/809730 [==============================] - 0s 0us/step
819200/809730 [==============================] - 0s 0us/step
Downloading data from https://storage.googleapis.com/download.tensorflow.org/data/illiad/butler.txt
811008/807992 [==============================] - 0s 0us/step
819200/807992 [==============================] - 0s 0us/step
dataset = tf.data.TextLineDataset(file_paths)
Đây là vài dòng đầu tiên của tệp đầu tiên:
for line in dataset.take(5):
  print(line.numpy())
b"\xef\xbb\xbfAchilles sing, O Goddess! Peleus' son;"
b'His wrath pernicious, who ten thousand woes'
b"Caused to Achaia's host, sent many a soul"
b'Illustrious into Ades premature,'
b'And Heroes gave (so stood the will of Jove)'
Để thay thế các dòng giữa các tệp, hãy sử dụng Dataset.interleave . Điều này giúp việc trộn các tệp với nhau dễ dàng hơn. Đây là dòng đầu tiên, thứ hai và thứ ba từ mỗi bản dịch:
files_ds = tf.data.Dataset.from_tensor_slices(file_paths)
lines_ds = files_ds.interleave(tf.data.TextLineDataset, cycle_length=3)

for i, line in enumerate(lines_ds.take(9)):
  if i % 3 == 0:
    print()
  print(line.numpy())
b"\xef\xbb\xbfAchilles sing, O Goddess! Peleus' son;"
b"\xef\xbb\xbfOf Peleus' son, Achilles, sing, O Muse,"
b'\xef\xbb\xbfSing, O goddess, the anger of Achilles son of Peleus, that brought'

b'His wrath pernicious, who ten thousand woes'
b'The vengeance, deep and deadly; whence to Greece'
b'countless ills upon the Achaeans. Many a brave soul did it send'

b"Caused to Achaia's host, sent many a soul"
b'Unnumbered ills arose; which many a soul'
b'hurrying down to Hades, and many a hero did it yield a prey to dogs and'
Theo mặc định, TextLineDataset tạo ra mọi dòng của mỗi tệp, điều này có thể không mong muốn, ví dụ: nếu tệp bắt đầu bằng dòng tiêu đề hoặc chứa các chú thích. Các dòng này có thể được loại bỏ bằng cách sử dụng các phép biến đổi Dataset.skip() hoặc Dataset.filter() . Tại đây, bạn bỏ qua dòng đầu tiên, sau đó lọc để chỉ tìm những người sống sót.
titanic_file = tf.keras.utils.get_file("train.csv", "https://storage.googleapis.com/tf-datasets/titanic/train.csv")
titanic_lines = tf.data.TextLineDataset(titanic_file)
Downloading data from https://storage.googleapis.com/tf-datasets/titanic/train.csv
32768/30874 [===============================] - 0s 0us/step
40960/30874 [=======================================] - 0s 0us/step
for line in titanic_lines.take(10):
  print(line.numpy())
b'survived,sex,age,n_siblings_spouses,parch,fare,class,deck,embark_town,alone'
b'0,male,22.0,1,0,7.25,Third,unknown,Southampton,n'
b'1,female,38.0,1,0,71.2833,First,C,Cherbourg,n'
b'1,female,26.0,0,0,7.925,Third,unknown,Southampton,y'
b'1,female,35.0,1,0,53.1,First,C,Southampton,n'
b'0,male,28.0,0,0,8.4583,Third,unknown,Queenstown,y'
b'0,male,2.0,3,1,21.075,Third,unknown,Southampton,n'
b'1,female,27.0,0,2,11.1333,Third,unknown,Southampton,n'
b'1,female,14.0,1,0,30.0708,Second,unknown,Cherbourg,n'
b'1,female,4.0,1,1,16.7,Third,G,Southampton,n'
def survived(line):
  return tf.not_equal(tf.strings.substr(line, 0, 1), "0")

survivors = titanic_lines.skip(1).filter(survived)
for line in survivors.take(10):
  print(line.numpy())
b'1,female,38.0,1,0,71.2833,First,C,Cherbourg,n'
b'1,female,26.0,0,0,7.925,Third,unknown,Southampton,y'
b'1,female,35.0,1,0,53.1,First,C,Southampton,n'
b'1,female,27.0,0,2,11.1333,Third,unknown,Southampton,n'
b'1,female,14.0,1,0,30.0708,Second,unknown,Cherbourg,n'
b'1,female,4.0,1,1,16.7,Third,G,Southampton,n'
b'1,male,28.0,0,0,13.0,Second,unknown,Southampton,y'
b'1,female,28.0,0,0,7.225,Third,unknown,Cherbourg,y'
b'1,male,28.0,0,0,35.5,First,A,Southampton,y'
b'1,female,38.0,1,5,31.3875,Third,unknown,Southampton,n'
Sử dụng dữ liệu CSV
Xem Tải tệp CSV và Tải dữ liệu gấu trúc để biết thêm ví dụ.
Định dạng tệp CSV là một định dạng phổ biến để lưu trữ dữ liệu dạng bảng ở dạng văn bản thuần túy.
Ví dụ:
titanic_file = tf.keras.utils.get_file("train.csv", "https://storage.googleapis.com/tf-datasets/titanic/train.csv")
df = pd.read_csv(titanic_file)
df.head()
Nếu dữ liệu của bạn vừa trong bộ nhớ thì phương thức Dataset.from_tensor_slices tương tự hoạt động trên từ điển, cho phép dễ dàng nhập dữ liệu này:
titanic_slices = tf.data.Dataset.from_tensor_slices(dict(df))

for feature_batch in titanic_slices.take(1):
  for key, value in feature_batch.items():
    print("  {!r:20s}: {}".format(key, value))
'survived'          : 0
  'sex'               : b'male'
  'age'               : 22.0
  'n_siblings_spouses': 1
  'parch'             : 0
  'fare'              : 7.25
  'class'             : b'Third'
  'deck'              : b'unknown'
  'embark_town'       : b'Southampton'
  'alone'             : b'n'
Một cách tiếp cận có thể mở rộng hơn là tải từ đĩa khi cần thiết.
Mô-đun tf.data cung cấp các phương pháp để trích xuất bản ghi từ một hoặc nhiều tệp CSV tuân thủ RFC 4180 .
Hàm experimental.make_csv_dataset là giao diện cấp cao để đọc bộ tệp csv. Nó hỗ trợ suy luận kiểu cột và nhiều tính năng khác, như chia lô và xáo trộn, để làm cho việc sử dụng trở nên đơn giản.
titanic_batches = tf.data.experimental.make_csv_dataset(
    titanic_file, batch_size=4,
    label_name="survived")
for feature_batch, label_batch in titanic_batches.take(1):
  print("'survived': {}".format(label_batch))
  print("features:")
  for key, value in feature_batch.items():
    print("  {!r:20s}: {}".format(key, value))
'survived': [1 0 0 0]
features:
  'sex'               : [b'female' b'female' b'male' b'male']
  'age'               : [32. 28. 37. 50.]
  'n_siblings_spouses': [0 3 0 0]
  'parch'             : [0 1 1 0]
  'fare'              : [13.     25.4667 29.7    13.    ]
  'class'             : [b'Second' b'Third' b'First' b'Second']
  'deck'              : [b'unknown' b'unknown' b'C' b'unknown']
  'embark_town'       : [b'Southampton' b'Southampton' b'Cherbourg' b'Southampton']
  'alone'             : [b'y' b'n' b'n' b'y']
Bạn có thể sử dụng đối số select_columns nếu bạn chỉ cần một tập hợp con các cột.
titanic_batches = tf.data.experimental.make_csv_dataset(
    titanic_file, batch_size=4,
    label_name="survived", select_columns=['class', 'fare', 'survived'])
for feature_batch, label_batch in titanic_batches.take(1):
  print("'survived': {}".format(label_batch))
  for key, value in feature_batch.items():
    print("  {!r:20s}: {}".format(key, value))
'survived': [0 1 1 0]
  'fare'              : [ 7.05 15.5  26.25  8.05]
  'class'             : [b'Third' b'Third' b'Second' b'Third']
Ngoài ra còn có một lớp.CsvDataset experimental.CsvDataset cấp thấp hơn cung cấp khả năng kiểm soát chi tiết hơn. Nó không hỗ trợ suy luận kiểu cột. Thay vào đó, bạn phải chỉ định loại của mỗi cột.
titanic_types  = [tf.int32, tf.string, tf.float32, tf.int32, tf.int32, tf.float32, tf.string, tf.string, tf.string, tf.string]
dataset = tf.data.experimental.CsvDataset(titanic_file, titanic_types , header=True)

for line in dataset.take(10):
  print([item.numpy() for item in line])
[0, b'male', 22.0, 1, 0, 7.25, b'Third', b'unknown', b'Southampton', b'n']
[1, b'female', 38.0, 1, 0, 71.2833, b'First', b'C', b'Cherbourg', b'n']
[1, b'female', 26.0, 0, 0, 7.925, b'Third', b'unknown', b'Southampton', b'y']
[1, b'female', 35.0, 1, 0, 53.1, b'First', b'C', b'Southampton', b'n']
[0, b'male', 28.0, 0, 0, 8.4583, b'Third', b'unknown', b'Queenstown', b'y']
[0, b'male', 2.0, 3, 1, 21.075, b'Third', b'unknown', b'Southampton', b'n']
[1, b'female', 27.0, 0, 2, 11.1333, b'Third', b'unknown', b'Southampton', b'n']
[1, b'female', 14.0, 1, 0, 30.0708, b'Second', b'unknown', b'Cherbourg', b'n']
[1, b'female', 4.0, 1, 1, 16.7, b'Third', b'G', b'Southampton', b'n']
[0, b'male', 20.0, 0, 0, 8.05, b'Third', b'unknown', b'Southampton', b'y']
Nếu một số cột trống, giao diện cấp thấp này cho phép bạn cung cấp các giá trị mặc định thay vì các loại cột.
%%writefile missing.csv
1,2,3,4
,2,3,4
1,,3,4
1,2,,4
1,2,3,
,,,
Writing missing.csv
# Creates a dataset that reads all of the records from two CSV files, each with
# four float columns which may have missing values.

record_defaults = [999,999,999,999]
dataset = tf.data.experimental.CsvDataset("missing.csv", record_defaults)
dataset = dataset.map(lambda *items: tf.stack(items))
dataset
<MapDataset element_spec=TensorSpec(shape=(4,), dtype=tf.int32, name=None)>
for line in dataset:
  print(line.numpy())
[1 2 3 4]
[999   2   3   4]
[  1 999   3   4]
[  1   2 999   4]
[  1   2   3 999]
[999 999 999 999]
Theo mặc định, CsvDataset tạo ra mọi cột của mọi dòng của tệp, điều này có thể không được mong muốn, ví dụ: nếu tệp bắt đầu bằng dòng tiêu đề cần được bỏ qua hoặc nếu một số cột không được yêu cầu trong đầu vào. Có thể xóa các dòng và trường này bằng các đối số header và select_cols tương ứng.
# Creates a dataset that reads all of the records from two CSV files with
# headers, extracting float data from columns 2 and 4.
record_defaults = [999, 999] # Only provide defaults for the selected columns
dataset = tf.data.experimental.CsvDataset("missing.csv", record_defaults, select_cols=[1, 3])
dataset = dataset.map(lambda *items: tf.stack(items))
dataset
<MapDataset element_spec=TensorSpec(shape=(2,), dtype=tf.int32, name=None)>
for line in dataset:
  print(line.numpy())
[2 4]
[2 4]
[999   4]
[2 4]
[  2 999]
[999 999]
Tiêu thụ bộ tệp
Có nhiều tập dữ liệu được phân phối dưới dạng một tập hợp các tệp, trong đó mỗi tệp là một ví dụ.
flowers_root = tf.keras.utils.get_file(
    'flower_photos',
    'https://storage.googleapis.com/download.tensorflow.org/example_images/flower_photos.tgz',
    untar=True)
flowers_root = pathlib.Path(flowers_root)
Thư mục gốc chứa một thư mục cho mỗi lớp:
for item in flowers_root.glob("*"):
  print(item.name)
sunflowers
daisy
LICENSE.txt
roses
tulips
dandelion
Các tệp trong mỗi thư mục lớp là ví dụ:
list_ds = tf.data.Dataset.list_files(str(flowers_root/'*/*'))

for f in list_ds.take(5):
  print(f.numpy())
b'/home/kbuilder/.keras/datasets/flower_photos/sunflowers/5018120483_cc0421b176_m.jpg'
b'/home/kbuilder/.keras/datasets/flower_photos/dandelion/8642679391_0805b147cb_m.jpg'
b'/home/kbuilder/.keras/datasets/flower_photos/sunflowers/8266310743_02095e782d_m.jpg'
b'/home/kbuilder/.keras/datasets/flower_photos/tulips/13176521023_4d7cc74856_m.jpg'
b'/home/kbuilder/.keras/datasets/flower_photos/dandelion/19437578578_6ab1b3c984.jpg'
Đọc dữ liệu bằng cách sử dụng hàm tf.io.read_file và trích xuất nhãn từ đường dẫn, trả về các cặp (image, label) :
def process_path(file_path):
  label = tf.strings.split(file_path, os.sep)[-2]
  return tf.io.read_file(file_path), label

labeled_ds = list_ds.map(process_path)
for image_raw, label_text in labeled_ds.take(1):
  print(repr(image_raw.numpy()[:100]))
  print()
  print(label_text.numpy())
b'\xff\xd8\xff\xe0\x00\x10JFIF\x00\x01\x01\x00\x00\x01\x00\x01\x00\x00\xff\xe2\x0cXICC_PROFILE\x00\x01\x01\x00\x00\x0cHLino\x02\x10\x00\x00mntrRGB XYZ \x07\xce\x00\x02\x00\t\x00\x06\x001\x00\x00acspMSFT\x00\x00\x00\x00IEC sRGB\x00\x00\x00\x00\x00\x00'

b'daisy'
Kết hợp các phần tử tập dữ liệu
Lô đơn giản
Dạng đơn giản nhất của việc phân lô xếp n phần tử liên tiếp của một tập dữ liệu thành một phần tử duy nhất. Phép biến đổi Dataset.batch() thực hiện chính xác điều này, với các ràng buộc tương tự như toán tử tf.stack() , được áp dụng cho từng thành phần của các phần tử: nghĩa là đối với mỗi thành phần i , tất cả các phần tử phải có một tensor có cùng hình dạng chính xác.
inc_dataset = tf.data.Dataset.range(100)
dec_dataset = tf.data.Dataset.range(0, -100, -1)
dataset = tf.data.Dataset.zip((inc_dataset, dec_dataset))
batched_dataset = dataset.batch(4)

for batch in batched_dataset.take(4):
  print([arr.numpy() for arr in batch])
[array([0, 1, 2, 3]), array([ 0, -1, -2, -3])]
[array([4, 5, 6, 7]), array([-4, -5, -6, -7])]
[array([ 8,  9, 10, 11]), array([ -8,  -9, -10, -11])]
[array([12, 13, 14, 15]), array([-12, -13, -14, -15])]
Trong khi tf.data cố gắng truyền tải thông tin hình dạng, cài đặt mặc định của Dataset.batch dẫn đến kích thước lô không xác định vì lô cuối cùng có thể không đầy. Lưu ý None s trong hình dạng:
batched_dataset
<BatchDataset element_spec=(TensorSpec(shape=(None,), dtype=tf.int64, name=None), TensorSpec(shape=(None,), dtype=tf.int64, name=None))>
Sử dụng đối số drop_remainder để bỏ qua lô cuối cùng đó và nhận được sự truyền bá hình dạng đầy đủ:
batched_dataset = dataset.batch(7, drop_remainder=True)
batched_dataset
<BatchDataset element_spec=(TensorSpec(shape=(7,), dtype=tf.int64, name=None), TensorSpec(shape=(7,), dtype=tf.int64, name=None))>
Kết hợp các máy căng với lớp đệm
Công thức trên áp dụng cho các tenxơ có cùng kích thước. Tuy nhiên, nhiều mô hình (ví dụ: mô hình trình tự) làm việc với dữ liệu đầu vào có thể có kích thước khác nhau (ví dụ: chuỗi có độ dài khác nhau). Để xử lý trường hợp này, phép chuyển đổi Dataset.padded_batch cho phép bạn ghép hàng loạt các bộ căng có hình dạng khác nhau bằng cách chỉ định một hoặc nhiều kích thước mà chúng có thể được đệm.
dataset = tf.data.Dataset.range(100)
dataset = dataset.map(lambda x: tf.fill([tf.cast(x, tf.int32)], x))
dataset = dataset.padded_batch(4, padded_shapes=(None,))

for batch in dataset.take(2):
  print(batch.numpy())
  print()
[[0 0 0]
 [1 0 0]
 [2 2 0]
 [3 3 3]]

[[4 4 4 4 0 0 0]
 [5 5 5 5 5 0 0]
 [6 6 6 6 6 6 0]
 [7 7 7 7 7 7 7]]
Phép biến đổi Dataset.padded_batch cho phép bạn đặt các vùng đệm khác nhau cho từng thứ nguyên của từng thành phần và nó có thể có độ dài thay đổi (được ký hiệu bằng None trong ví dụ trên) hoặc độ dài không đổi. Cũng có thể ghi đè giá trị đệm, giá trị này được mặc định là 0.
Quy trình đào tạo
Xử lý nhiều kỷ nguyên
API tf.data cung cấp hai cách chính để xử lý nhiều kỷ nguyên của cùng một dữ liệu.
Cách đơn giản nhất để lặp qua tập dữ liệu trong nhiều kỷ nguyên là sử dụng phép biến đổi Dataset.repeat() . Đầu tiên, hãy tạo một tập dữ liệu về dữ liệu titanic:
titanic_file = tf.keras.utils.get_file("train.csv", "https://storage.googleapis.com/tf-datasets/titanic/train.csv")
titanic_lines = tf.data.TextLineDataset(titanic_file)
def plot_batch_sizes(ds):
  batch_sizes = [batch.shape[0] for batch in ds]
  plt.bar(range(len(batch_sizes)), batch_sizes)
  plt.xlabel('Batch number')
  plt.ylabel('Batch size')
Việc áp dụng phép biến đổi Dataset.repeat() không có đối số sẽ lặp lại đầu vào vô thời hạn.
Phép biến đổi Dataset.repeat nối các đối số của nó mà không báo hiệu sự kết thúc của một kỷ nguyên và sự bắt đầu của kỷ nguyên tiếp theo. Do đó, một Dataset.batch được áp dụng sau Dataset.repeat sẽ mang lại các lô phân chia ranh giới kỷ nguyên:
titanic_batches = titanic_lines.repeat(3).batch(128)
plot_batch_sizes(titanic_batches)

Nếu bạn cần phân tách kỷ nguyên rõ ràng, hãy đặt Dataset.batch trước khi lặp lại:
titanic_batches = titanic_lines.batch(128).repeat(3)

plot_batch_sizes(titanic_batches)

Nếu bạn muốn thực hiện một phép tính tùy chỉnh (ví dụ: để thu thập số liệu thống kê) vào cuối mỗi kỷ nguyên thì cách đơn giản nhất là khởi động lại quá trình lặp lại tập dữ liệu trên mỗi kỷ nguyên:
epochs = 3
dataset = titanic_lines.batch(128)

for epoch in range(epochs):
  for batch in dataset:
    print(batch.shape)
  print("End of epoch: ", epoch)
(128,)
(128,)
(128,)
(128,)
(116,)
End of epoch:  0
(128,)
(128,)
(128,)
(128,)
(116,)
End of epoch:  1
(128,)
(128,)
(128,)
(128,)
(116,)
End of epoch:  2
Ngẫu nhiên trộn dữ liệu đầu vào
Phép biến đổi Dataset.shuffle() duy trì một bộ đệm có kích thước cố định và chọn ngẫu nhiên phần tử tiếp theo một cách đồng nhất từ bộ đệm đó.
Thêm chỉ mục vào tập dữ liệu để bạn có thể thấy hiệu ứng:
lines = tf.data.TextLineDataset(titanic_file)
counter = tf.data.experimental.Counter()

dataset = tf.data.Dataset.zip((counter, lines))
dataset = dataset.shuffle(buffer_size=100)
dataset = dataset.batch(20)
dataset
<BatchDataset element_spec=(TensorSpec(shape=(None,), dtype=tf.int64, name=None), TensorSpec(shape=(None,), dtype=tf.string, name=None))>
Vì kích thước vùng buffer_size là 100 và kích thước lô là 20, nên lô đầu tiên không chứa phần tử nào có chỉ số trên 120.
n,line_batch = next(iter(dataset))
print(n.numpy())
[ 52  94  22  70  63  96  56 102  38  16  27 104  89  43  41  68  42  61
 112   8]
Như với Dataset.batch thứ tự liên quan đến Dataset.repeat vấn đề.
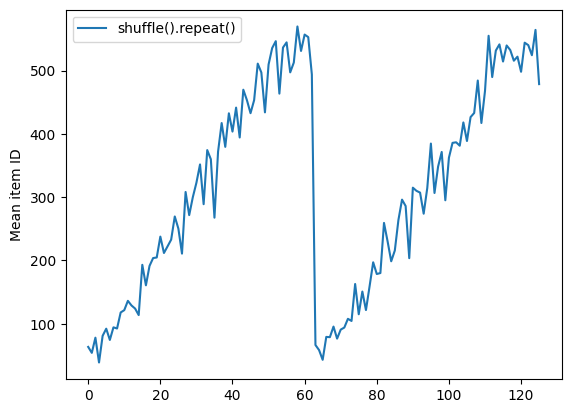
Dataset.shuffle không báo hiệu kết thúc một kỷ nguyên cho đến khi bộ đệm xáo trộn trống. Vì vậy, một lần xáo trộn được đặt trước một lần lặp lại sẽ hiển thị mọi phần tử của một kỷ nguyên trước khi chuyển sang kỷ nguyên tiếp theo:
dataset = tf.data.Dataset.zip((counter, lines))
shuffled = dataset.shuffle(buffer_size=100).batch(10).repeat(2)

print("Here are the item ID's near the epoch boundary:\n")
for n, line_batch in shuffled.skip(60).take(5):
  print(n.numpy())
Here are the item ID's near the epoch boundary:

[509 595 537 550 555 591 480 627 482 519]
[522 619 538 581 569 608 531 558 461 496]
[548 489 379 607 611 622 234 525]
[ 59  38   4  90  73  84  27  51 107  12]
[77 72 91 60  7 62 92 47 70 67]
shuffle_repeat = [n.numpy().mean() for n, line_batch in shuffled]
plt.plot(shuffle_repeat, label="shuffle().repeat()")
plt.ylabel("Mean item ID")
plt.legend()
<matplotlib.legend.Legend at 0x7f7e7061c650>
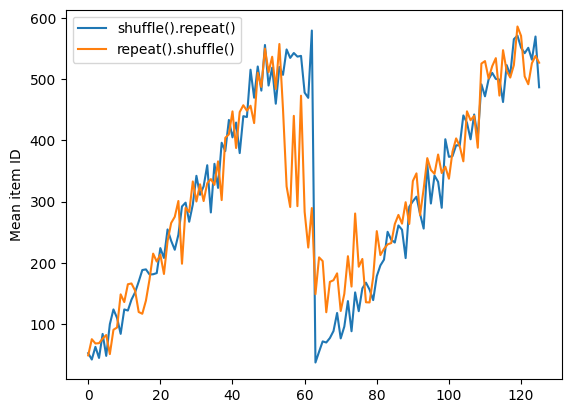
Nhưng một lần lặp lại trước khi xáo trộn sẽ trộn các ranh giới kỷ nguyên với nhau:
dataset = tf.data.Dataset.zip((counter, lines))
shuffled = dataset.repeat(2).shuffle(buffer_size=100).batch(10)

print("Here are the item ID's near the epoch boundary:\n")
for n, line_batch in shuffled.skip(55).take(15):
  print(n.numpy())
Here are the item ID's near the epoch boundary:

[  6   8 528 604  13 492 308 441 569 475]
[  5 626 615 568  20 554 520 454  10 607]
[510 542   0 363  32 446 395 588  35   4]
[  7  15  28  23  39 559 585  49 252 556]
[581 617  25  43  26 548  29 460  48  41]
[ 19  64  24 300 612 611  36  63  69  57]
[287 605  21 512 442  33  50  68 608  47]
[625  90  91 613  67  53 606 344  16  44]
[453 448  89  45 465   2  31 618 368 105]
[565   3 586 114  37 464  12 627  30 621]
[ 82 117  72  75  84  17 571 610  18 600]
[107 597 575  88 623  86 101  81 456 102]
[122  79  51  58  80  61 367  38 537 113]
[ 71  78 598 152 143 620 100 158 133 130]
[155 151 144 135 146 121  83  27 103 134]
repeat_shuffle = [n.numpy().mean() for n, line_batch in shuffled]

plt.plot(shuffle_repeat, label="shuffle().repeat()")
plt.plot(repeat_shuffle, label="repeat().shuffle()")
plt.ylabel("Mean item ID")
plt.legend()
<matplotlib.legend.Legend at 0x7f7e706013d0>
Tiền xử lý dữ liệu
Phép biến đổi Dataset.map(f) tạo ra một tập dữ liệu mới bằng cách áp dụng một hàm f đã cho cho từng phần tử của tập dữ liệu đầu vào. Nó dựa trên hàm map() thường được áp dụng cho danh sách (và các cấu trúc khác) trong các ngôn ngữ lập trình hàm. Hàm f nhận các đối tượng tf.Tensor đại diện cho một phần tử duy nhất trong đầu vào và trả về các đối tượng tf.Tensor sẽ đại diện cho một phần tử duy nhất trong tập dữ liệu mới. Việc triển khai nó sử dụng các phép toán TensorFlow tiêu chuẩn để chuyển đổi một phần tử này thành một phần tử khác.
Phần này bao gồm các ví dụ phổ biến về cách sử dụng Dataset.map() .
Giải mã dữ liệu hình ảnh và thay đổi kích thước
Khi đào tạo mạng nơ-ron trên dữ liệu hình ảnh trong thế giới thực, thông thường cần phải chuyển đổi các hình ảnh có kích thước khác nhau thành một kích thước chung, để chúng có thể được ghép thành một kích thước cố định.
Xây dựng lại tập dữ liệu tên tệp hoa:
list_ds = tf.data.Dataset.list_files(str(flowers_root/'*/*'))
Viết một hàm thao tác với các phần tử của tập dữ liệu.
# Reads an image from a file, decodes it into a dense tensor, and resizes it
# to a fixed shape.
def parse_image(filename):
  parts = tf.strings.split(filename, os.sep)
  label = parts[-2]

  image = tf.io.read_file(filename)
  image = tf.io.decode_jpeg(image)
  image = tf.image.convert_image_dtype(image, tf.float32)
  image = tf.image.resize(image, [128, 128])
  return image, label
Kiểm tra xem nó hoạt động.
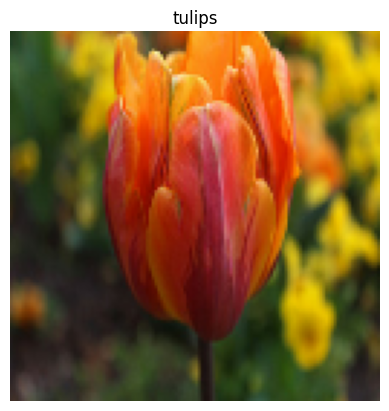
file_path = next(iter(list_ds))
image, label = parse_image(file_path)

def show(image, label):
  plt.figure()
  plt.imshow(image)
  plt.title(label.numpy().decode('utf-8'))
  plt.axis('off')

show(image, label)
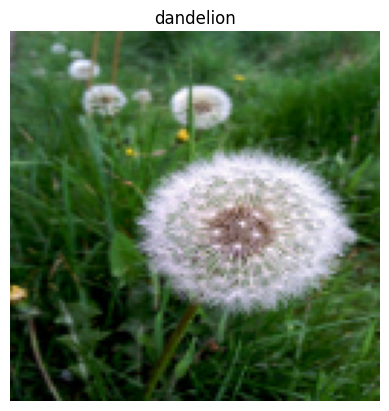
Ánh xạ nó qua tập dữ liệu.
images_ds = list_ds.map(parse_image)

for image, label in images_ds.take(2):
  show(image, label)

Áp dụng logic Python tùy ý
Vì lý do hiệu suất, hãy sử dụng các hoạt động TensorFlow để xử lý trước dữ liệu của bạn bất cứ khi nào có thể. Tuy nhiên, đôi khi sẽ hữu ích khi gọi các thư viện Python bên ngoài khi phân tích cú pháp dữ liệu đầu vào của bạn. Bạn có thể sử dụng phép tf.py_function() trong phép biến đổi Dataset.map() .
Ví dụ: nếu bạn muốn áp dụng một vòng quay ngẫu nhiên, mô-đun tf.image chỉ có tf.image.rot90 , không hữu ích lắm cho việc tăng cường hình ảnh.
Để chứng minh tf.py_function , hãy thử sử dụng hàm scipy.ndimage.rotate thay thế:
import scipy.ndimage as ndimage

def random_rotate_image(image):
  image = ndimage.rotate(image, np.random.uniform(-30, 30), reshape=False)
  return image
image, label = next(iter(images_ds))
image = random_rotate_image(image)
show(image, label)
Clipping input data to the valid range for imshow with RGB data ([0..1] for floats or [0..255] for integers).
Để sử dụng hàm này với Dataset.map , áp dụng các lưu ý tương tự như với Dataset.from_generator , bạn cần mô tả các hình dạng và kiểu trả về khi bạn áp dụng hàm:
def tf_random_rotate_image(image, label):
  im_shape = image.shape
  [image,] = tf.py_function(random_rotate_image, [image], [tf.float32])
  image.set_shape(im_shape)
  return image, label
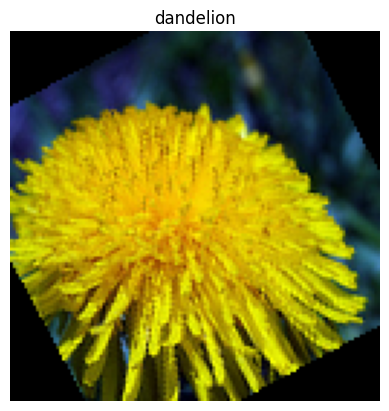
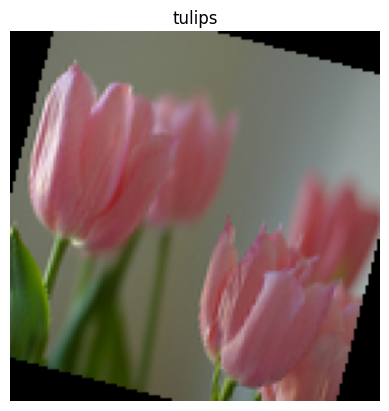
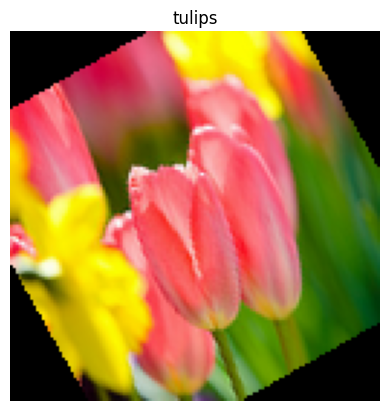
rot_ds = images_ds.map(tf_random_rotate_image)

for image, label in rot_ds.take(2):
  show(image, label)
Clipping input data to the valid range for imshow with RGB data ([0..1] for floats or [0..255] for integers).
Clipping input data to the valid range for imshow with RGB data ([0..1] for floats or [0..255] for integers).
Phân tích cú pháp thông báo bộ đệm giao thức tf.Example
Nhiều đường ống đầu vào trích xuất thông báo bộ đệm giao thức tf.train.Example từ định dạng TFRecord. Mỗi bản ghi tf.train.Example chứa một hoặc nhiều "tính năng" và đường dẫn đầu vào thường chuyển đổi các tính năng này thành tensor.
fsns_test_file = tf.keras.utils.get_file("fsns.tfrec", "https://storage.googleapis.com/download.tensorflow.org/data/fsns-20160927/testdata/fsns-00000-of-00001")
dataset = tf.data.TFRecordDataset(filenames = [fsns_test_file])
dataset
<TFRecordDatasetV2 element_spec=TensorSpec(shape=(), dtype=tf.string, name=None)>
Bạn có thể làm việc với các tf.train.Example bên ngoài tf.data.Dataset để hiểu dữ liệu:
raw_example = next(iter(dataset))
parsed = tf.train.Example.FromString(raw_example.numpy())

feature = parsed.features.feature
raw_img = feature['image/encoded'].bytes_list.value[0]
img = tf.image.decode_png(raw_img)
plt.imshow(img)
plt.axis('off')
_ = plt.title(feature["image/text"].bytes_list.value[0])

raw_example = next(iter(dataset))
def tf_parse(eg):
  example = tf.io.parse_example(
      eg[tf.newaxis], {
          'image/encoded': tf.io.FixedLenFeature(shape=(), dtype=tf.string),
          'image/text': tf.io.FixedLenFeature(shape=(), dtype=tf.string)
      })
  return example['image/encoded'][0], example['image/text'][0]
img, txt = tf_parse(raw_example)
print(txt.numpy())
print(repr(img.numpy()[:20]), "...")
b'Rue Perreyon'
b'\x89PNG\r\n\x1a\n\x00\x00\x00\rIHDR\x00\x00\x02X' ...
decoded = dataset.map(tf_parse)
decoded
<MapDataset element_spec=(TensorSpec(shape=(), dtype=tf.string, name=None), TensorSpec(shape=(), dtype=tf.string, name=None))>
image_batch, text_batch = next(iter(decoded.batch(10)))
image_batch.shape
TensorShape([10])
Cửa sổ chuỗi thời gian
Để biết ví dụ về chuỗi thời gian từ đầu đến cuối, hãy xem: Dự báo chuỗi thời gian .
Dữ liệu chuỗi thời gian thường được sắp xếp với trục thời gian nguyên vẹn.
Sử dụng Dataset.range đơn giản để chứng minh:
range_ds = tf.data.Dataset.range(100000)
Thông thường, các mô hình dựa trên loại dữ liệu này sẽ muốn có một lát thời gian liền kề.
Cách tiếp cận đơn giản nhất sẽ là hàng loạt dữ liệu:
Sử dụng batch
batches = range_ds.batch(10, drop_remainder=True)

for batch in batches.take(5):
  print(batch.numpy())
[0 1 2 3 4 5 6 7 8 9]
[10 11 12 13 14 15 16 17 18 19]
[20 21 22 23 24 25 26 27 28 29]
[30 31 32 33 34 35 36 37 38 39]
[40 41 42 43 44 45 46 47 48 49]
Hoặc để đưa ra các dự đoán dày đặc một bước trong tương lai, bạn có thể thay đổi các tính năng và nhãn từng bước một so với nhau:
def dense_1_step(batch):
  # Shift features and labels one step relative to each other.
  return batch[:-1], batch[1:]

predict_dense_1_step = batches.map(dense_1_step)

for features, label in predict_dense_1_step.take(3):
  print(features.numpy(), " => ", label.numpy())
[0 1 2 3 4 5 6 7 8]  =>  [1 2 3 4 5 6 7 8 9]
[10 11 12 13 14 15 16 17 18]  =>  [11 12 13 14 15 16 17 18 19]
[20 21 22 23 24 25 26 27 28]  =>  [21 22 23 24 25 26 27 28 29]
Để dự đoán toàn bộ cửa sổ thay vì một khoảng chênh lệch cố định, bạn có thể chia các lô thành hai phần:
batches = range_ds.batch(15, drop_remainder=True)

def label_next_5_steps(batch):
  return (batch[:-5],   # Inputs: All except the last 5 steps
          batch[-5:])   # Labels: The last 5 steps

predict_5_steps = batches.map(label_next_5_steps)

for features, label in predict_5_steps.take(3):
  print(features.numpy(), " => ", label.numpy())
[0 1 2 3 4 5 6 7 8 9]  =>  [10 11 12 13 14]
[15 16 17 18 19 20 21 22 23 24]  =>  [25 26 27 28 29]
[30 31 32 33 34 35 36 37 38 39]  =>  [40 41 42 43 44]
Để cho phép một số chồng chéo giữa các tính năng của một lô và các nhãn của lô khác, hãy sử dụng Dataset.zip :
feature_length = 10
label_length = 3

features = range_ds.batch(feature_length, drop_remainder=True)
labels = range_ds.batch(feature_length).skip(1).map(lambda labels: labels[:label_length])

predicted_steps = tf.data.Dataset.zip((features, labels))

for features, label in predicted_steps.take(5):
  print(features.numpy(), " => ", label.numpy())
[0 1 2 3 4 5 6 7 8 9]  =>  [10 11 12]
[10 11 12 13 14 15 16 17 18 19]  =>  [20 21 22]
[20 21 22 23 24 25 26 27 28 29]  =>  [30 31 32]
[30 31 32 33 34 35 36 37 38 39]  =>  [40 41 42]
[40 41 42 43 44 45 46 47 48 49]  =>  [50 51 52]
Sử dụng window
Trong khi sử dụng Dataset.batch hoạt động, có những tình huống mà bạn có thể cần kiểm soát tốt hơn. Phương thức Dataset.window cung cấp cho bạn quyền kiểm soát hoàn toàn, nhưng cần phải cẩn thận: nó trả về một Dataset của các Tập Datasets . Xem cấu trúc Dataset để biết thêm chi tiết.
window_size = 5

windows = range_ds.window(window_size, shift=1)
for sub_ds in windows.take(5):
  print(sub_ds)
<_VariantDataset element_spec=TensorSpec(shape=(), dtype=tf.int64, name=None)>
<_VariantDataset element_spec=TensorSpec(shape=(), dtype=tf.int64, name=None)>
<_VariantDataset element_spec=TensorSpec(shape=(), dtype=tf.int64, name=None)>
<_VariantDataset element_spec=TensorSpec(shape=(), dtype=tf.int64, name=None)>
<_VariantDataset element_spec=TensorSpec(shape=(), dtype=tf.int64, name=None)>
Phương thức Dataset.flat_map có thể lấy một tập dữ liệu của các tập dữ liệu và làm phẳng nó thành một tập dữ liệu duy nhất:
for x in windows.flat_map(lambda x: x).take(30):
   print(x.numpy(), end=' ')
0 1 2 3 4 1 2 3 4 5 2 3 4 5 6 3 4 5 6 7 4 5 6 7 8 5 6 7 8 9
Trong hầu hết các trường hợp, bạn sẽ muốn .batch tập dữ liệu trước:
def sub_to_batch(sub):
  return sub.batch(window_size, drop_remainder=True)

for example in windows.flat_map(sub_to_batch).take(5):
  print(example.numpy())
[0 1 2 3 4]
[1 2 3 4 5]
[2 3 4 5 6]
[3 4 5 6 7]
[4 5 6 7 8]
Bây giờ, bạn có thể thấy rằng đối số shift kiểm soát mức độ di chuyển của mỗi cửa sổ.
Kết hợp điều này lại với nhau, bạn có thể viết hàm này:
def make_window_dataset(ds, window_size=5, shift=1, stride=1):
  windows = ds.window(window_size, shift=shift, stride=stride)

  def sub_to_batch(sub):
    return sub.batch(window_size, drop_remainder=True)

  windows = windows.flat_map(sub_to_batch)
  return windows
ds = make_window_dataset(range_ds, window_size=10, shift = 5, stride=3)

for example in ds.take(10):
  print(example.numpy())
[ 0  3  6  9 12 15 18 21 24 27]
[ 5  8 11 14 17 20 23 26 29 32]
[10 13 16 19 22 25 28 31 34 37]
[15 18 21 24 27 30 33 36 39 42]
[20 23 26 29 32 35 38 41 44 47]
[25 28 31 34 37 40 43 46 49 52]
[30 33 36 39 42 45 48 51 54 57]
[35 38 41 44 47 50 53 56 59 62]
[40 43 46 49 52 55 58 61 64 67]
[45 48 51 54 57 60 63 66 69 72]
Sau đó, thật dễ dàng để trích xuất nhãn, như trước đây:
dense_labels_ds = ds.map(dense_1_step)

for inputs,labels in dense_labels_ds.take(3):
  print(inputs.numpy(), "=>", labels.numpy())
[ 0  3  6  9 12 15 18 21 24] => [ 3  6  9 12 15 18 21 24 27]
[ 5  8 11 14 17 20 23 26 29] => [ 8 11 14 17 20 23 26 29 32]
[10 13 16 19 22 25 28 31 34] => [13 16 19 22 25 28 31 34 37]
Lấy mẫu lại
Khi làm việc với tập dữ liệu rất mất cân bằng về lớp, bạn có thể muốn lấy mẫu lại tập dữ liệu. tf.data cung cấp hai phương pháp để thực hiện việc này. Tập dữ liệu gian lận thẻ tín dụng là một ví dụ điển hình cho loại vấn đề này.
zip_path = tf.keras.utils.get_file(
    origin='https://storage.googleapis.com/download.tensorflow.org/data/creditcard.zip',
    fname='creditcard.zip',
    extract=True)

csv_path = zip_path.replace('.zip', '.csv')
Downloading data from https://storage.googleapis.com/download.tensorflow.org/data/creditcard.zip
69156864/69155632 [==============================] - 2s 0us/step
69165056/69155632 [==============================] - 2s 0us/step
creditcard_ds = tf.data.experimental.make_csv_dataset(
    csv_path, batch_size=1024, label_name="Class",
    # Set the column types: 30 floats and an int.
    column_defaults=[float()]*30+[int()])
Bây giờ, hãy kiểm tra sự phân bố của các lớp, nó rất lệch:
def count(counts, batch):
  features, labels = batch
  class_1 = labels == 1
  class_1 = tf.cast(class_1, tf.int32)

  class_0 = labels == 0
  class_0 = tf.cast(class_0, tf.int32)

  counts['class_0'] += tf.reduce_sum(class_0)
  counts['class_1'] += tf.reduce_sum(class_1)

  return counts
counts = creditcard_ds.take(10).reduce(
    initial_state={'class_0': 0, 'class_1': 0},
    reduce_func = count)

counts = np.array([counts['class_0'].numpy(),
                   counts['class_1'].numpy()]).astype(np.float32)

fractions = counts/counts.sum()
print(fractions)
[0.9956 0.0044]
Một cách tiếp cận phổ biến để đào tạo với một tập dữ liệu không cân bằng là cân bằng nó. tf.data bao gồm một số phương pháp cho phép dòng công việc này:
Lấy mẫu tập dữ liệu
Một cách tiếp cận để lấy lại mẫu tập dữ liệu là sử dụng sample_from_datasets . Điều này áp dụng hơn khi bạn có một data.Dataset riêng biệt cho từng lớp.
Ở đây, chỉ cần sử dụng bộ lọc để tạo chúng từ dữ liệu gian lận thẻ tín dụng:
negative_ds = (
  creditcard_ds
    .unbatch()
    .filter(lambda features, label: label==0)
    .repeat())
positive_ds = (
  creditcard_ds
    .unbatch()
    .filter(lambda features, label: label==1)
    .repeat())
for features, label in positive_ds.batch(10).take(1):
  print(label.numpy())
[1 1 1 1 1 1 1 1 1 1]
Để sử dụng tf.data.Dataset.sample_from_datasets , hãy chuyển các tập dữ liệu và trọng số cho mỗi:
balanced_ds = tf.data.Dataset.sample_from_datasets(
    [negative_ds, positive_ds], [0.5, 0.5]).batch(10)
Bây giờ tập dữ liệu tạo ra các ví dụ về từng lớp với xác suất 50/50:
for features, labels in balanced_ds.take(10):
  print(labels.numpy())
[1 0 1 0 1 0 1 1 1 1]
[0 0 1 1 0 1 1 1 1 1]
[1 1 1 1 0 0 1 0 1 0]
[1 1 1 0 1 0 0 1 1 1]
[0 1 0 1 1 1 0 1 1 0]
[0 1 0 0 0 1 0 0 0 0]
[1 1 1 1 1 0 0 1 1 0]
[0 0 0 1 0 1 1 1 0 0]
[0 0 1 1 1 1 0 1 1 1]
[1 0 0 1 1 1 1 0 1 1]
Lấy lại mẫu từ chối
Một vấn đề với cách tiếp cận Dataset.sample_from_datasets ở trên là nó cần một tf.data.Dataset riêng cho mỗi lớp. Bạn có thể sử dụng Dataset.filter để tạo hai tập dữ liệu đó, nhưng điều đó dẫn đến tất cả dữ liệu được tải hai lần.
Phương thức data.Dataset.rejection_resample có thể được áp dụng cho tập dữ liệu để cân bằng lại nó, trong khi chỉ tải nó một lần. Các phần tử sẽ bị loại bỏ khỏi tập dữ liệu để đạt được sự cân bằng.
data.Dataset.rejection_resample nhận đối số class_func . class_func này được áp dụng cho từng phần tử tập dữ liệu và được sử dụng để xác định lớp mà một ví dụ thuộc về nhằm mục đích cân bằng.
Mục tiêu ở đây là cân bằng phân phối lable và các phần tử của creditcard_ds đã là các cặp (features, label) . Vì vậy, class_func chỉ cần trả về các nhãn đó:
def class_func(features, label):
  return label
Phương pháp lấy mẫu lại liên quan đến các ví dụ riêng lẻ, vì vậy trong trường hợp này, bạn phải unbatch nhóm dữ liệu trước khi áp dụng phương pháp đó.
Phương pháp cần có phân phối mục tiêu và tùy chọn ước tính phân phối ban đầu làm đầu vào.
resample_ds = (
    creditcard_ds
    .unbatch()
    .rejection_resample(class_func, target_dist=[0.5,0.5],
                        initial_dist=fractions)
    .batch(10))
WARNING:tensorflow:From /tmpfs/src/tf_docs_env/lib/python3.7/site-packages/tensorflow/python/data/ops/dataset_ops.py:5797: Print (from tensorflow.python.ops.logging_ops) is deprecated and will be removed after 2018-08-20.
Instructions for updating:
Use tf.print instead of tf.Print. Note that tf.print returns a no-output operator that directly prints the output. Outside of defuns or eager mode, this operator will not be executed unless it is directly specified in session.run or used as a control dependency for other operators. This is only a concern in graph mode. Below is an example of how to ensure tf.print executes in graph mode:
Phương thức rejection_resample trả về các cặp (class, example) trong đó class là đầu ra của class_func . Trong trường hợp này, example đã là một cặp (feature, label) , vì vậy hãy sử dụng map để thả bản sao bổ sung của các nhãn:
balanced_ds = resample_ds.map(lambda extra_label, features_and_label: features_and_label)
Bây giờ tập dữ liệu tạo ra các ví dụ về từng lớp với xác suất 50/50:
for features, labels in balanced_ds.take(10):
  print(labels.numpy())
Proportion of examples rejected by sampler is high: [0.995605469][0.995605469 0.00439453125][0 1]
Proportion of examples rejected by sampler is high: [0.995605469][0.995605469 0.00439453125][0 1]
Proportion of examples rejected by sampler is high: [0.995605469][0.995605469 0.00439453125][0 1]
Proportion of examples rejected by sampler is high: [0.995605469][0.995605469 0.00439453125][0 1]
Proportion of examples rejected by sampler is high: [0.995605469][0.995605469 0.00439453125][0 1]
Proportion of examples rejected by sampler is high: [0.995605469][0.995605469 0.00439453125][0 1]
Proportion of examples rejected by sampler is high: [0.995605469][0.995605469 0.00439453125][0 1]
Proportion of examples rejected by sampler is high: [0.995605469][0.995605469 0.00439453125][0 1]
Proportion of examples rejected by sampler is high: [0.995605469][0.995605469 0.00439453125][0 1]
Proportion of examples rejected by sampler is high: [0.995605469][0.995605469 0.00439453125][0 1]
[0 1 1 1 0 1 1 0 1 1]
[1 1 0 1 0 0 0 0 1 1]
[1 1 1 1 0 0 0 0 1 1]
[1 0 0 1 0 0 1 0 1 1]
[1 0 0 0 0 1 0 0 0 0]
[1 0 0 1 1 0 1 1 1 0]
[1 1 0 0 0 0 0 0 0 1]
[0 0 1 0 0 0 1 0 1 1]
[0 1 0 1 0 1 0 0 0 1]
[0 0 0 0 0 0 0 0 1 1]
Điểm kiểm tra lặp lại
Tensorflow hỗ trợ lấy các điểm kiểm tra để khi quá trình đào tạo của bạn khởi động lại, nó có thể khôi phục điểm kiểm tra mới nhất để khôi phục hầu hết tiến trình của nó. Ngoài việc kiểm tra các biến mô hình, bạn cũng có thể kiểm tra tiến trình của trình lặp tập dữ liệu. Điều này có thể hữu ích nếu bạn có một tập dữ liệu lớn và không muốn khởi động tập dữ liệu từ đầu mỗi lần khởi động lại. Tuy nhiên, lưu ý rằng các điểm kiểm tra của trình vòng lặp có thể lớn, vì các phép biến đổi như shuffle và prefetch yêu cầu các phần tử đệm bên trong trình vòng lặp.
Để bao gồm trình vòng lặp của bạn trong một điểm kiểm tra, hãy chuyển trình vòng lặp tới phương thức khởi tạo tf.train.Checkpoint .
range_ds = tf.data.Dataset.range(20)

iterator = iter(range_ds)
ckpt = tf.train.Checkpoint(step=tf.Variable(0), iterator=iterator)
manager = tf.train.CheckpointManager(ckpt, '/tmp/my_ckpt', max_to_keep=3)

print([next(iterator).numpy() for _ in range(5)])

save_path = manager.save()

print([next(iterator).numpy() for _ in range(5)])

ckpt.restore(manager.latest_checkpoint)

print([next(iterator).numpy() for _ in range(5)])
[0, 1, 2, 3, 4]
[5, 6, 7, 8, 9]
[5, 6, 7, 8, 9]
Sử dụng tf.data với tf.keras
API tf.keras đơn giản hóa nhiều khía cạnh của việc tạo và thực thi các mô hình học máy. Các .fit() và .evaluate() và .predict() của nó hỗ trợ các tập dữ liệu làm đầu vào. Đây là tập dữ liệu nhanh và thiết lập mô hình:
train, test = tf.keras.datasets.fashion_mnist.load_data()

images, labels = train
images = images/255.0
labels = labels.astype(np.int32)
fmnist_train_ds = tf.data.Dataset.from_tensor_slices((images, labels))
fmnist_train_ds = fmnist_train_ds.shuffle(5000).batch(32)

model = tf.keras.Sequential([
  tf.keras.layers.Flatten(),
  tf.keras.layers.Dense(10)
])

model.compile(optimizer='adam',
              loss=tf.keras.losses.SparseCategoricalCrossentropy(from_logits=True),
              metrics=['accuracy'])
Chuyển một tập dữ liệu về các cặp (feature, label) là tất cả những gì cần thiết cho Model.fit và Model.evaluate :
model.fit(fmnist_train_ds, epochs=2)
Epoch 1/2
1875/1875 [==============================] - 4s 2ms/step - loss: 0.5984 - accuracy: 0.7973
Epoch 2/2
1875/1875 [==============================] - 4s 2ms/step - loss: 0.4607 - accuracy: 0.8430
<keras.callbacks.History at 0x7f7e70283110>
Nếu bạn truyền một tập dữ liệu vô hạn, chẳng hạn bằng cách gọi Dataset.repeat() , bạn cũng chỉ cần truyền đối số steps_per_epoch :
model.fit(fmnist_train_ds.repeat(), epochs=2, steps_per_epoch=20)
Epoch 1/2
20/20 [==============================] - 0s 2ms/step - loss: 0.4574 - accuracy: 0.8672
Epoch 2/2
20/20 [==============================] - 0s 2ms/step - loss: 0.4216 - accuracy: 0.8562
<keras.callbacks.History at 0x7f7e144948d0>
Để đánh giá, bạn có thể vượt qua một số bước đánh giá:
loss, accuracy = model.evaluate(fmnist_train_ds)
print("Loss :", loss)
print("Accuracy :", accuracy)
1875/1875 [==============================] - 4s 2ms/step - loss: 0.4350 - accuracy: 0.8524
Loss : 0.4350026249885559
Accuracy : 0.8524333238601685
Đối với tập dữ liệu dài, hãy đặt số bước để đánh giá:
loss, accuracy = model.evaluate(fmnist_train_ds.repeat(), steps=10)
print("Loss :", loss)
print("Accuracy :", accuracy)
10/10 [==============================] - 0s 2ms/step - loss: 0.4345 - accuracy: 0.8687
Loss : 0.43447819352149963
Accuracy : 0.8687499761581421
Các nhãn không được yêu cầu khi gọi Model.predict .
predict_ds = tf.data.Dataset.from_tensor_slices(images).batch(32)
result = model.predict(predict_ds, steps = 10)
print(result.shape)
(320, 10)
Nhưng các nhãn sẽ bị bỏ qua nếu bạn chuyển tập dữ liệu có chứa chúng:
result = model.predict(fmnist_train_ds, steps = 10)
print(result.shape)
(320, 10)