 הצג באתר TensorFlow.org הצג באתר TensorFlow.org |  הפעל בגוגל קולאב הפעל בגוגל קולאב |  צפה במקור ב-GitHub צפה במקור ב-GitHub |  הורד מחברת הורד מחברת |
סקירה כללית
מדריך זה מדגים הגדלת נתונים: טכניקה להגדלת הגיוון של מערך האימונים שלך על ידי יישום טרנספורמציות אקראיות (אך מציאותיות), כגון סיבוב תמונה.
תלמד כיצד ליישם הגדלת נתונים בשתי דרכים:
- השתמש בשכבות העיבוד המקדים של Keras, כגון
tf.keras.layers.Resizing,tf.keras.layers.Rescaling,tf.keras.layers.RandomFlipו-tf.keras.layers.RandomRotation. - השתמש בשיטות
tf.image, כגוןtf.image.flip_left_right,tf.image.rgb_to_grayscale,tf.image.adjust_brightness,tf.image.central_cropו-tf.image.stateless_random*.
להכין
import matplotlib.pyplot as plt
import numpy as np
import tensorflow as tf
import tensorflow_datasets as tfds

from tensorflow.keras import layers
הורד מערך נתונים
מדריך זה משתמש במערך הנתונים tf_flowers . לנוחות, הורד את מערך הנתונים באמצעות TensorFlow Datasets . אם תרצה ללמוד על דרכים אחרות לייבא נתונים, עיין במדריך לטעינת תמונות .
(train_ds, val_ds, test_ds), metadata = tfds.load(
    'tf_flowers',
    split=['train[:80%]', 'train[80%:90%]', 'train[90%:]'],
    with_info=True,
    as_supervised=True,
)
למערך הנתונים של הפרחים יש חמש מחלקות.
num_classes = metadata.features['label'].num_classes
print(num_classes)
5
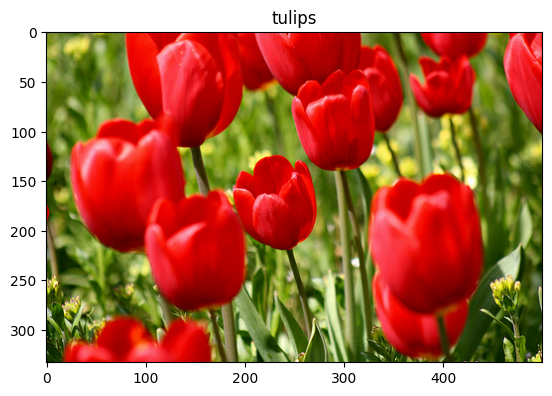
בוא נאחזר תמונה ממערך הנתונים ונשתמש בה כדי להדגים הגדלת נתונים.
get_label_name = metadata.features['label'].int2str

image, label = next(iter(train_ds))
_ = plt.imshow(image)
_ = plt.title(get_label_name(label))
2022-01-26 05:09:18.712477: W tensorflow/core/kernels/data/cache_dataset_ops.cc:768] The calling iterator did not fully read the dataset being cached. In order to avoid unexpected truncation of the dataset, the partially cached contents of the dataset will be discarded. This can happen if you have an input pipeline similar to `dataset.cache().take(k).repeat()`. You should use `dataset.take(k).cache().repeat()` instead.
השתמש בשכבות עיבוד מקדים של Keras
שינוי גודל ושינוי קנה מידה
אתה יכול להשתמש בשכבות העיבוד המקדים של Keras כדי לשנות את גודל התמונות שלך לצורה עקבית (עם tf.keras.layers.Resizing ), וכדי לשנות קנה מידה של ערכי פיקסלים (עם tf.keras.layers.Rescaling ).
IMG_SIZE = 180

resize_and_rescale = tf.keras.Sequential([
  layers.Resizing(IMG_SIZE, IMG_SIZE),
  layers.Rescaling(1./255)
])
אתה יכול לדמיין את התוצאה של החלת שכבות אלה על תמונה.
result = resize_and_rescale(image)
_ = plt.imshow(result)
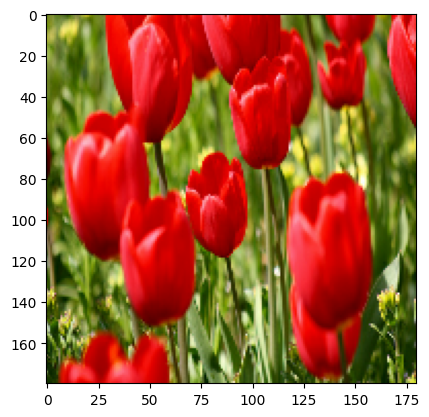
ודא שהפיקסלים נמצאים בטווח [0, 1] :
print("Min and max pixel values:", result.numpy().min(), result.numpy().max())
Min and max pixel values: 0.0 1.0
הגדלת נתונים
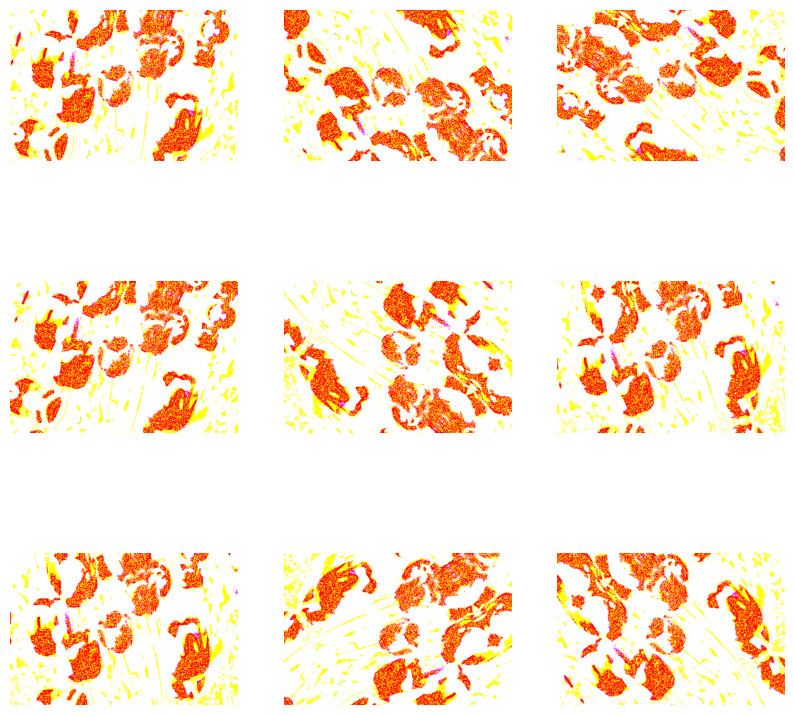
אתה יכול להשתמש בשכבות העיבוד המקדים של Keras גם להגדלת נתונים, כגון tf.keras.layers.RandomFlip ו- tf.keras.layers.RandomRotation .
בואו ניצור כמה שכבות עיבוד מקדים ונחיל אותן שוב ושוב על אותה תמונה.
data_augmentation = tf.keras.Sequential([
  layers.RandomFlip("horizontal_and_vertical"),
  layers.RandomRotation(0.2),
])
# Add the image to a batch.
image = tf.expand_dims(image, 0)
plt.figure(figsize=(10, 10))
for i in range(9):
  augmented_image = data_augmentation(image)
  ax = plt.subplot(3, 3, i + 1)
  plt.imshow(augmented_image[0])
  plt.axis("off")
WARNING:matplotlib.image:Clipping input data to the valid range for imshow with RGB data ([0..1] for floats or [0..255] for integers).
WARNING:matplotlib.image:Clipping input data to the valid range for imshow with RGB data ([0..1] for floats or [0..255] for integers).
WARNING:matplotlib.image:Clipping input data to the valid range for imshow with RGB data ([0..1] for floats or [0..255] for integers).
WARNING:matplotlib.image:Clipping input data to the valid range for imshow with RGB data ([0..1] for floats or [0..255] for integers).
WARNING:matplotlib.image:Clipping input data to the valid range for imshow with RGB data ([0..1] for floats or [0..255] for integers).
WARNING:matplotlib.image:Clipping input data to the valid range for imshow with RGB data ([0..1] for floats or [0..255] for integers).
WARNING:matplotlib.image:Clipping input data to the valid range for imshow with RGB data ([0..1] for floats or [0..255] for integers).
WARNING:matplotlib.image:Clipping input data to the valid range for imshow with RGB data ([0..1] for floats or [0..255] for integers).
WARNING:matplotlib.image:Clipping input data to the valid range for imshow with RGB data ([0..1] for floats or [0..255] for integers).
יש מגוון של שכבות עיבוד מקדים בהן תוכל להשתמש להגדלת נתונים כולל tf.keras.layers.RandomContrast , tf.keras.layers.RandomCrop , tf.keras.layers.RandomZoom ואחרים.
שתי אפשרויות להשתמש בשכבות העיבוד המקדים של Keras
ישנן שתי דרכים בהן תוכל להשתמש בשכבות העיבוד המקדים הללו, עם פשרות חשובות.
אפשרות 1: הפוך את שכבות העיבוד המקדים לחלק מהדגם שלך
model = tf.keras.Sequential([
  # Add the preprocessing layers you created earlier.
  resize_and_rescale,
  data_augmentation,
  layers.Conv2D(16, 3, padding='same', activation='relu'),
  layers.MaxPooling2D(),
  # Rest of your model.
])
ישנן שתי נקודות חשובות שכדאי לשים לב אליהן במקרה זה:
הגדלת הנתונים תפעל במכשיר, באופן סינכרוני עם שאר השכבות שלך, ותיהנה מהאצת GPU.
כאשר אתה מייצא את המודל שלך באמצעות
model.save, שכבות העיבוד המקדים יישמרו יחד עם שאר המודל שלך. אם תפרוס מאוחר יותר את המודל הזה, הוא יתקן תמונות אוטומטית (בהתאם לתצורת השכבות שלך). זה יכול לחסוך ממך את המאמץ של צורך ליישם מחדש את ההיגיון הזה בצד השרת.
אפשרות 2: החל את שכבות העיבוד המקדים על מערך הנתונים שלך
aug_ds = train_ds.map(
  lambda x, y: (resize_and_rescale(x, training=True), y))
עם גישה זו, אתה משתמש ב- Dataset.map כדי ליצור מערך נתונים שמניב קבוצות של תמונות מוגדלות. במקרה הזה:
- הגדלת הנתונים תתרחש באופן אסינכרוני במעבד, ואינה חוסמת. אתה יכול לחפוף את ההדרכה של הדגם שלך ב-GPU עם עיבוד מקדים של נתונים, באמצעות
Dataset.prefetch, המוצג להלן. - במקרה זה שכבות העיבוד המקדים לא ייוצאו עם המודל כאשר אתה קורא
Model.save. תצטרך לצרף אותם לדגם שלך לפני שתשמור אותו או ליישם אותם מחדש בצד השרת. לאחר האימון, ניתן לצרף את שכבות העיבוד המקדים לפני הייצוא.
תוכל למצוא דוגמה לאפשרות הראשונה במדריך סיווג תמונות . בואו נדגים כאן את האפשרות השנייה.
החל את שכבות העיבוד המקדים על מערכי הנתונים
הגדר את מערכי ההדרכה, האימות והבדיקה עם שכבות העיבוד המקדים של Keras שיצרת קודם לכן. כמו כן, תגדיר את מערכי הנתונים לביצועים, תוך שימוש בקריאה מקבילה ובשליפה מראש מאוחסנת כדי להניב אצוות מהדיסק מבלי שה-I/O ייחסמו. (למידע נוסף על ביצועי מערך נתונים במדריך ביצועים טובים יותר עם tf.data API .)
batch_size = 32
AUTOTUNE = tf.data.AUTOTUNE

def prepare(ds, shuffle=False, augment=False):
  # Resize and rescale all datasets.
  ds = ds.map(lambda x, y: (resize_and_rescale(x), y),
              num_parallel_calls=AUTOTUNE)

  if shuffle:
    ds = ds.shuffle(1000)

  # Batch all datasets.
  ds = ds.batch(batch_size)

  # Use data augmentation only on the training set.
  if augment:
    ds = ds.map(lambda x, y: (data_augmentation(x, training=True), y),
                num_parallel_calls=AUTOTUNE)

  # Use buffered prefetching on all datasets.
  return ds.prefetch(buffer_size=AUTOTUNE)
train_ds = prepare(train_ds, shuffle=True, augment=True)
val_ds = prepare(val_ds)
test_ds = prepare(test_ds)
לאמן דוגמנית
למען השלמות, כעת תכשיר מודל באמצעות מערכי הנתונים שהכנת זה עתה.
המודל Sequential מורכב משלושה בלוקים של קונבולציה ( tf.keras.layers.Conv2D ) עם שכבת בריכה מקסימלית ( tf.keras.layers.MaxPooling2D ) בכל אחד מהם. יש שכבה מחוברת לחלוטין ( tf.keras.layers.Dense ) עם 128 יחידות מעליה שמופעלת על ידי פונקציית הפעלה של ReLU ( 'relu' ). דגם זה לא כוונן לדיוק (המטרה היא להראות לך את המכניקה).
model = tf.keras.Sequential([
  layers.Conv2D(16, 3, padding='same', activation='relu'),
  layers.MaxPooling2D(),
  layers.Conv2D(32, 3, padding='same', activation='relu'),
  layers.MaxPooling2D(),
  layers.Conv2D(64, 3, padding='same', activation='relu'),
  layers.MaxPooling2D(),
  layers.Flatten(),
  layers.Dense(128, activation='relu'),
  layers.Dense(num_classes)
])
בחר tf.keras.optimizers.Adam Optimizer ו- tf.keras.losses.SparseCategoricalCrossentropy אובדן. כדי להציג את דיוק ההדרכה והאימות עבור כל עידן אימון, העבר את ארגומנט metrics אל Model.compile .
model.compile(optimizer='adam',
              loss=tf.keras.losses.SparseCategoricalCrossentropy(from_logits=True),
              metrics=['accuracy'])
התאמן לכמה תקופות:
epochs=5
history = model.fit(
  train_ds,
  validation_data=val_ds,
  epochs=epochs
)
Epoch 1/5
92/92 [==============================] - 13s 110ms/step - loss: 1.2768 - accuracy: 0.4622 - val_loss: 1.0929 - val_accuracy: 0.5640
Epoch 2/5
92/92 [==============================] - 3s 25ms/step - loss: 1.0579 - accuracy: 0.5749 - val_loss: 0.9711 - val_accuracy: 0.6349
Epoch 3/5
92/92 [==============================] - 3s 26ms/step - loss: 0.9677 - accuracy: 0.6291 - val_loss: 0.9764 - val_accuracy: 0.6431
Epoch 4/5
92/92 [==============================] - 3s 25ms/step - loss: 0.9150 - accuracy: 0.6468 - val_loss: 0.8906 - val_accuracy: 0.6431
Epoch 5/5
92/92 [==============================] - 3s 25ms/step - loss: 0.8636 - accuracy: 0.6604 - val_loss: 0.8233 - val_accuracy: 0.6730
loss, acc = model.evaluate(test_ds)
print("Accuracy", acc)
12/12 [==============================] - 5s 14ms/step - loss: 0.7922 - accuracy: 0.6948
Accuracy 0.6948229074478149
הגדלת נתונים בהתאמה אישית
אתה יכול גם ליצור שכבות מותאמות אישית להגדלת נתונים.
חלק זה של המדריך מציג שתי דרכים לעשות זאת:
- ראשית, תיצור שכבת
tf.keras.layers.Lambda. זוהי דרך טובה לכתוב קוד תמציתי. - לאחר מכן, תכתוב שכבה חדשה באמצעות סיווג משנה , מה שנותן לך יותר שליטה.
שתי השכבות יהפכו באקראי את הצבעים בתמונה, לפי סבירות מסוימת.
def random_invert_img(x, p=0.5):
  if  tf.random.uniform([]) < p:
    x = (255-x)
  else:
    x
  return x
def random_invert(factor=0.5):
  return layers.Lambda(lambda x: random_invert_img(x, factor))

random_invert = random_invert()
plt.figure(figsize=(10, 10))
for i in range(9):
  augmented_image = random_invert(image)
  ax = plt.subplot(3, 3, i + 1)
  plt.imshow(augmented_image[0].numpy().astype("uint8"))
  plt.axis("off")
2022-01-26 05:09:53.045204: W tensorflow/compiler/xla/service/gpu/llvm_gpu_backend/gpu_backend_lib.cc:399] target triple not found in the module
2022-01-26 05:09:53.045264: W tensorflow/compiler/xla/service/gpu/llvm_gpu_backend/gpu_backend_lib.cc:399] target triple not found in the module
2022-01-26 05:09:53.045312: W tensorflow/compiler/xla/service/gpu/llvm_gpu_backend/gpu_backend_lib.cc:399] target triple not found in the module
2022-01-26 05:09:53.045369: W tensorflow/compiler/xla/service/gpu/llvm_gpu_backend/gpu_backend_lib.cc:399] target triple not found in the module
2022-01-26 05:09:53.045418: W tensorflow/compiler/xla/service/gpu/llvm_gpu_backend/gpu_backend_lib.cc:399] target triple not found in the module
2022-01-26 05:09:53.045467: W tensorflow/compiler/xla/service/gpu/llvm_gpu_backend/gpu_backend_lib.cc:399] target triple not found in the module
2022-01-26 05:09:53.045511: W tensorflow/compiler/xla/service/gpu/llvm_gpu_backend/gpu_backend_lib.cc:399] target triple not found in the module
2022-01-26 05:09:53.047630: W tensorflow/compiler/xla/service/gpu/llvm_gpu_backend/gpu_backend_lib.cc:399] target triple not found in the module

לאחר מכן, יישם שכבה מותאמת אישית על ידי סיווג משנה :
class RandomInvert(layers.Layer):
  def __init__(self, factor=0.5, **kwargs):
    super().__init__(**kwargs)
    self.factor = factor

  def call(self, x):
    return random_invert_img(x)
_ = plt.imshow(RandomInvert()(image)[0])

ניתן להשתמש בשתי השכבות הללו כמתואר באפשרויות 1 ו-2 לעיל.
שימוש ב-tf.image
כלי העיבוד המקדים של Keras לעיל הם נוחים. אבל, לשליטה עדינה יותר, אתה יכול לכתוב צינורות או שכבות להגדלת נתונים משלך באמצעות tf.data ו- tf.image . (ייתכן שתרצה גם לבדוק את תמונת תוספות TensorFlow: פעולות ו- TensorFlow I/O: המרות מרחב צבע .)
מכיוון שמערך הנתונים של הפרחים הוגדר בעבר עם הגדלת נתונים, בואו נייבא אותו מחדש כדי להתחיל מחדש:
(train_ds, val_ds, test_ds), metadata = tfds.load(
    'tf_flowers',
    split=['train[:80%]', 'train[80%:90%]', 'train[90%:]'],
    with_info=True,
    as_supervised=True,
)
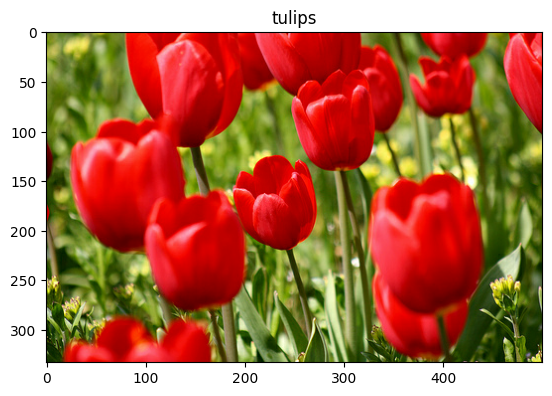
אחזר תמונה לעבודה איתה:
image, label = next(iter(train_ds))
_ = plt.imshow(image)
_ = plt.title(get_label_name(label))
2022-01-26 05:09:59.918847: W tensorflow/core/kernels/data/cache_dataset_ops.cc:768] The calling iterator did not fully read the dataset being cached. In order to avoid unexpected truncation of the dataset, the partially cached contents of the dataset will be discarded. This can happen if you have an input pipeline similar to `dataset.cache().take(k).repeat()`. You should use `dataset.take(k).cache().repeat()` instead.
בואו נשתמש בפונקציה הבאה כדי להמחיש ולהשוות את התמונות המקוריות והתמונות המוגדלות זו לצד זו:
def visualize(original, augmented):
  fig = plt.figure()
  plt.subplot(1,2,1)
  plt.title('Original image')
  plt.imshow(original)

  plt.subplot(1,2,2)
  plt.title('Augmented image')
  plt.imshow(augmented)
הגדלת נתונים
הפוך תמונה
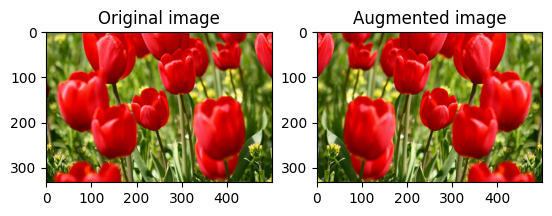
הפוך תמונה אנכית או אופקית עם tf.image.flip_left_right :
flipped = tf.image.flip_left_right(image)
visualize(image, flipped)
תמונה בגווני אפור
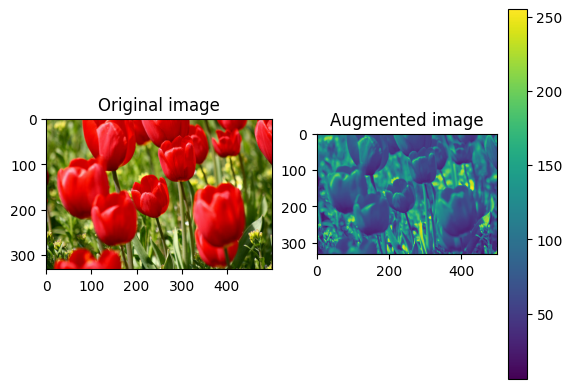
אתה יכול לגוון אפור תמונה עם tf.image.rgb_to_grayscale :
grayscaled = tf.image.rgb_to_grayscale(image)
visualize(image, tf.squeeze(grayscaled))
_ = plt.colorbar()
הרווי תמונה
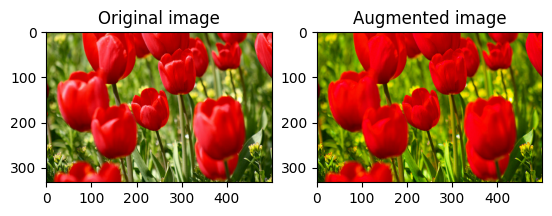
הרווי תמונה עם tf.image.adjust_saturation על ידי מתן גורם רוויה:
saturated = tf.image.adjust_saturation(image, 3)
visualize(image, saturated)
שנה בהירות התמונה
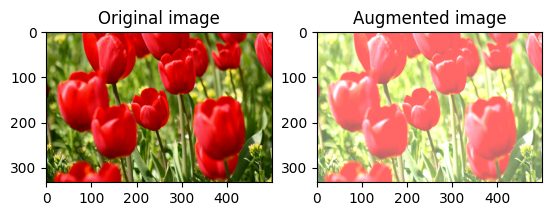
שנה את בהירות התמונה עם tf.image.adjust_brightness על ידי מתן מקדם בהירות:
bright = tf.image.adjust_brightness(image, 0.4)
visualize(image, bright)
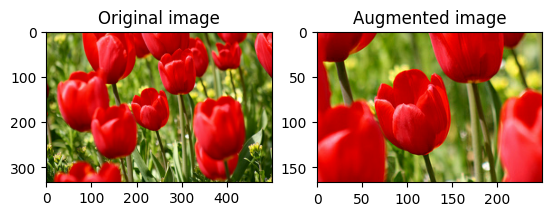
חיתוך תמונה במרכז
חתוך את התמונה מהמרכז עד לחלק התמונה שאתה רוצה באמצעות tf.image.central_crop :
cropped = tf.image.central_crop(image, central_fraction=0.5)
visualize(image, cropped)
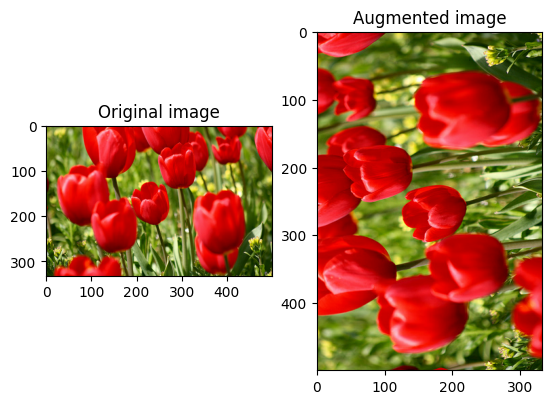
סובב תמונה
סובב תמונה ב-90 מעלות עם tf.image.rot90 :
rotated = tf.image.rot90(image)
visualize(image, rotated)
טרנספורמציות אקראיות
החלת טרנספורמציות אקראיות על התמונות יכולה לעזור להכליל ולהרחיב את מערך הנתונים. ה-API הנוכחי של tf.image מספק שמונה פעולות תמונה אקראיות כאלה (אופס):
-
tf.image.stateless_random_brightness -
tf.image.stateless_random_contrast -
tf.image.stateless_random_crop -
tf.image.stateless_random_flip_left_right -
tf.image.stateless_random_flip_up_down -
tf.image.stateless_random_hue -
tf.image.stateless_random_jpeg_quality -
tf.image.stateless_random_saturation
פעולות התמונות האקראיות הללו הן פונקציונליות בלבד: הפלט תלוי רק בקלט. זה הופך אותם לפשוטים לשימוש בצינורות קלט דטרמיניסטיים עם ביצועים גבוהים. הם דורשים הזנת ערך seed בכל שלב. בהינתן אותו seed , הם מחזירים את אותן תוצאות ללא תלות במספר הפעמים שהם נקראים.
בסעיפים הבאים, תוכל:
- עברו על דוגמאות לשימוש בפעולות תמונה אקראיות כדי להפוך תמונה.
- הדגימו כיצד להחיל טרנספורמציות אקראיות על מערך אימון.
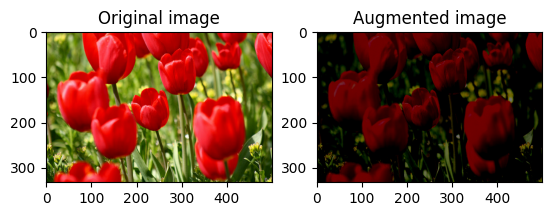
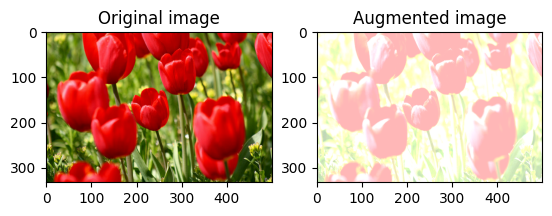
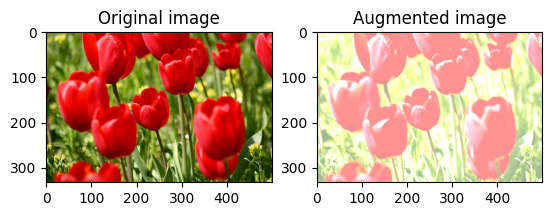
שנה את בהירות התמונה באופן אקראי
שנה באופן אקראי את בהירות image באמצעות tf.image.stateless_random_brightness על ידי מתן גורם בהירות seed . מקדם הבהירות נבחר באופן אקראי בטווח [-max_delta, max_delta) והוא קשור seed הנתון.
for i in range(3):
  seed = (i, 0)  # tuple of size (2,)
  stateless_random_brightness = tf.image.stateless_random_brightness(
      image, max_delta=0.95, seed=seed)
  visualize(image, stateless_random_brightness)
שנה באופן אקראי את ניגודיות התמונה
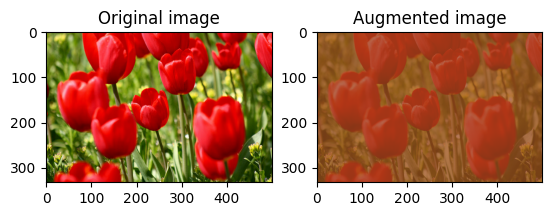
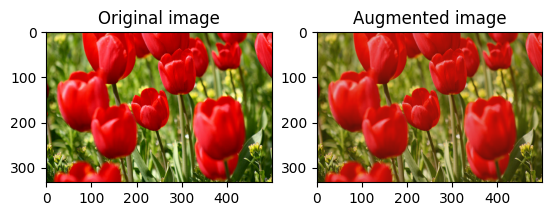
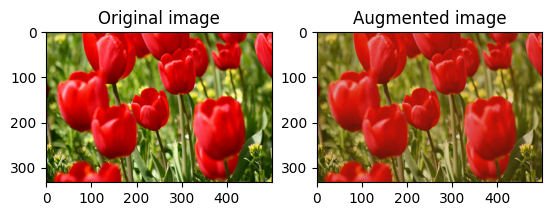
שנה באופן אקראי את הניגודיות של image באמצעות tf.image.stateless_random_contrast על ידי מתן טווח ניגודיות seed . טווח הניגודיות נבחר באופן אקראי במרווח [lower, upper] והוא משויך seed הנתון.
for i in range(3):
  seed = (i, 0)  # tuple of size (2,)
  stateless_random_contrast = tf.image.stateless_random_contrast(
      image, lower=0.1, upper=0.9, seed=seed)
  visualize(image, stateless_random_contrast)
חתוך תמונה באופן אקראי
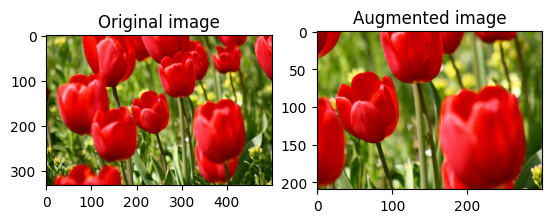
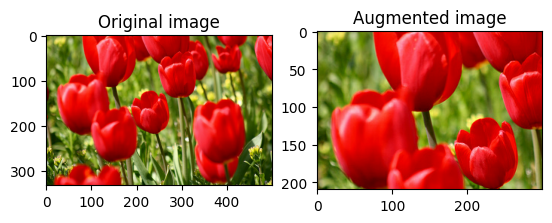
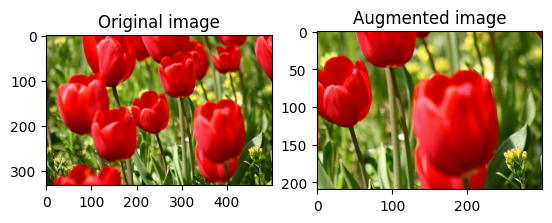
חתוך image באופן אקראי באמצעות tf.image.stateless_random_crop על ידי מתן size יעד seed . החלק שנחתך image נמצא בהיסט שנבחר באקראי והוא משויך seed הנתון.
for i in range(3):
  seed = (i, 0)  # tuple of size (2,)
  stateless_random_crop = tf.image.stateless_random_crop(
      image, size=[210, 300, 3], seed=seed)
  visualize(image, stateless_random_crop)
החל הגדלה על מערך נתונים
בוא נוריד תחילה את מערך הנתונים של התמונה למקרה שהם ישונו בסעיפים הקודמים.
(train_datasets, val_ds, test_ds), metadata = tfds.load(
    'tf_flowers',
    split=['train[:80%]', 'train[80%:90%]', 'train[90%:]'],
    with_info=True,
    as_supervised=True,
)
לאחר מכן, הגדר פונקציית עזר לשינוי גודל ושינוי קנה מידה של התמונות. פונקציה זו תשמש לאיחוד הגודל והקנה מידה של תמונות במערך הנתונים:
def resize_and_rescale(image, label):
  image = tf.cast(image, tf.float32)
  image = tf.image.resize(image, [IMG_SIZE, IMG_SIZE])
  image = (image / 255.0)
  return image, label
בואו נגדיר גם את פונקציית augment שיכולה להחיל את הטרנספורמציות האקראיות על התמונות. פונקציה זו תשמש במערך הנתונים בשלב הבא.
def augment(image_label, seed):
  image, label = image_label
  image, label = resize_and_rescale(image, label)
  image = tf.image.resize_with_crop_or_pad(image, IMG_SIZE + 6, IMG_SIZE + 6)
  # Make a new seed.
  new_seed = tf.random.experimental.stateless_split(seed, num=1)[0, :]
  # Random crop back to the original size.
  image = tf.image.stateless_random_crop(
      image, size=[IMG_SIZE, IMG_SIZE, 3], seed=seed)
  # Random brightness.
  image = tf.image.stateless_random_brightness(
      image, max_delta=0.5, seed=new_seed)
  image = tf.clip_by_value(image, 0, 1)
  return image, label
אפשרות 1: שימוש ב-tf.data.experimental.Counter
צור אובייקט tf.data.experimental.Counter (בואו נקרא לו counter ) ו- Dataset.zip את מערך הנתונים עם (counter, counter) . זה יבטיח שכל תמונה במערך הנתונים תקושר לערך ייחודי (של צורה (2,) ) המבוסס על counter אשר מאוחר יותר יוכל לעבור לפונקציית ה- augment כערך seed עבור טרנספורמציות אקראיות.
# Create a `Counter` object and `Dataset.zip` it together with the training set.
counter = tf.data.experimental.Counter()
train_ds = tf.data.Dataset.zip((train_datasets, (counter, counter)))
מפה את פונקציית augment למערך האימון:
train_ds = (
    train_ds
    .shuffle(1000)
    .map(augment, num_parallel_calls=AUTOTUNE)
    .batch(batch_size)
    .prefetch(AUTOTUNE)
)
val_ds = (
    val_ds
    .map(resize_and_rescale, num_parallel_calls=AUTOTUNE)
    .batch(batch_size)
    .prefetch(AUTOTUNE)
)
test_ds = (
    test_ds
    .map(resize_and_rescale, num_parallel_calls=AUTOTUNE)
    .batch(batch_size)
    .prefetch(AUTOTUNE)
)
אפשרות 2: שימוש ב-tf.random.Generator
- צור אובייקט
tf.random.Generatorעם ערךseed. קריאה לפונקציהmake_seedsבאותו אובייקט מחולל מחזירה תמיד ערךseedחדש וייחודי. - הגדר פונקציית עטיפה ש: 1) קוראת לפונקציה
make_seeds; ו-2) מעביר את ערך ה-seedהחדש שנוצר לפונקציהaugmentעבור טרנספורמציות אקראיות.
# Create a generator.
rng = tf.random.Generator.from_seed(123, alg='philox')
# Create a wrapper function for updating seeds.
def f(x, y):
  seed = rng.make_seeds(2)[0]
  image, label = augment((x, y), seed)
  return image, label
מפה את פונקציית העטיפה f למערך האימון, ואת הפונקציה resize_and_rescale - למערכות האימות והבדיקה:
train_ds = (
    train_datasets
    .shuffle(1000)
    .map(f, num_parallel_calls=AUTOTUNE)
    .batch(batch_size)
    .prefetch(AUTOTUNE)
)
val_ds = (
    val_ds
    .map(resize_and_rescale, num_parallel_calls=AUTOTUNE)
    .batch(batch_size)
    .prefetch(AUTOTUNE)
)
test_ds = (
    test_ds
    .map(resize_and_rescale, num_parallel_calls=AUTOTUNE)
    .batch(batch_size)
    .prefetch(AUTOTUNE)
)
כעת ניתן להשתמש במערכי נתונים אלה כדי לאמן מודל כפי שהוצג קודם לכן.
הצעדים הבאים
מדריך זה הדגים הגדלת נתונים באמצעות שכבות עיבוד מקדים של Keras ו- tf.image .
- כדי ללמוד כיצד לכלול שכבות עיבוד מקדים בתוך המודל שלך, עיין במדריך סיווג תמונה .
- אולי תעניין אותך גם ללמוד כיצד שכבות עיבוד מקדים יכולות לעזור לך לסווג טקסט, כפי שמוצג במדריך סיווג טקסט בסיסי .
- אתה יכול ללמוד עוד על
tf.dataבמדריך זה, ותוכל ללמוד כיצד להגדיר את צינורות הקלט שלך לביצועים כאן .
