
| | |  ดูแหล่งที่มาบน GitHub ดูแหล่งที่มาบน GitHub | |
บทช่วยสอนนี้แสดงวิธีการโหลดและประมวลผลชุดข้อมูลรูปภาพล่วงหน้าในสามวิธี:
- ขั้นแรก คุณจะใช้ยูทิลิตี้การประมวลผลล่วงหน้าของ Keras ระดับสูง (เช่น
tf.keras.utils.image_dataset_from_directory) และเลเยอร์ (เช่นtf.keras.layers.Rescaling) เพื่ออ่านไดเร็กทอรีของรูปภาพบนดิสก์ - ถัดไป คุณจะเขียนไปป์ไลน์อินพุตของคุณเองตั้งแต่ต้น โดยใช้ tf.data
- สุดท้าย คุณจะดาวน์โหลดชุดข้อมูลจาก แค็ตตาล็อก ขนาดใหญ่ที่มีอยู่ใน ชุดข้อมูล TensorFlow
ติดตั้ง
import numpy as np
import os
import PIL
import PIL.Image
import tensorflow as tf
import tensorflow_datasets as tfds
print(tf.__version__)
2.8.0-rc1
ดาวน์โหลดชุดข้อมูลดอกไม้
บทช่วยสอนนี้ใช้ชุดข้อมูลภาพถ่ายดอกไม้หลายพันภาพ ชุดข้อมูลดอกไม้ประกอบด้วยไดเร็กทอรีย่อยห้าไดเร็กทอรี หนึ่งไดเร็กทอรีต่อคลาส:
flowers_photos/
  daisy/
  dandelion/
  roses/
  sunflowers/
  tulips/
import pathlib
dataset_url = "https://storage.googleapis.com/download.tensorflow.org/example_images/flower_photos.tgz"
data_dir = tf.keras.utils.get_file(origin=dataset_url,
                                   fname='flower_photos',
                                   untar=True)
data_dir = pathlib.Path(data_dir)
หลังจากดาวน์โหลด (218MB) คุณควรมีสำเนาภาพถ่ายดอกไม้ที่พร้อมใช้งาน มีทั้งหมด 3,670 ภาพ:
image_count = len(list(data_dir.glob('*/*.jpg')))
print(image_count)
3670
แต่ละไดเร็กทอรีมีรูปภาพของดอกไม้ประเภทนั้น นี่คือดอกกุหลาบบางส่วน:
roses = list(data_dir.glob('roses/*'))
PIL.Image.open(str(roses[0]))

roses = list(data_dir.glob('roses/*'))
PIL.Image.open(str(roses[1]))

โหลดข้อมูลโดยใช้ยูทิลิตี้ Keras
มาโหลดอิมเมจเหล่านี้จากดิสก์โดยใช้ยูทิลิตี้ tf.keras.utils.image_dataset_from_directory ที่เป็นประโยชน์
สร้างชุดข้อมูล
กำหนดพารามิเตอร์บางอย่างสำหรับตัวโหลด:
batch_size = 32
img_height = 180
img_width = 180
แนวทางปฏิบัติที่ดีในการใช้การแยกการตรวจสอบความถูกต้องเมื่อพัฒนาแบบจำลองของคุณ คุณจะใช้รูปภาพ 80% สำหรับการฝึกอบรมและ 20% สำหรับการตรวจสอบ
train_ds = tf.keras.utils.image_dataset_from_directory(
  data_dir,
  validation_split=0.2,
  subset="training",
  seed=123,
  image_size=(img_height, img_width),
  batch_size=batch_size)
Found 3670 files belonging to 5 classes.
Using 2936 files for training.
val_ds = tf.keras.utils.image_dataset_from_directory(
  data_dir,
  validation_split=0.2,
  subset="validation",
  seed=123,
  image_size=(img_height, img_width),
  batch_size=batch_size)
Found 3670 files belonging to 5 classes.
Using 734 files for validation.
คุณสามารถค้นหาชื่อคลาสได้ในแอตทริบิวต์ class_names บนชุดข้อมูลเหล่านี้
class_names = train_ds.class_names
print(class_names)
['daisy', 'dandelion', 'roses', 'sunflowers', 'tulips']
เห็นภาพข้อมูล
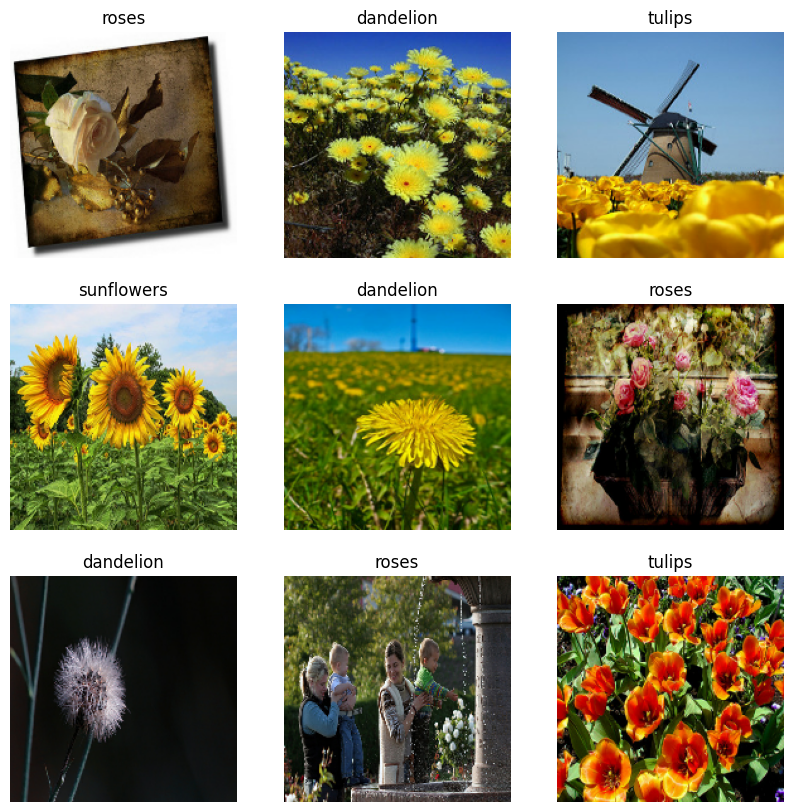
นี่คือภาพเก้าภาพแรกจากชุดข้อมูลการฝึก
import matplotlib.pyplot as plt

plt.figure(figsize=(10, 10))
for images, labels in train_ds.take(1):
  for i in range(9):
    ax = plt.subplot(3, 3, i + 1)
    plt.imshow(images[i].numpy().astype("uint8"))
    plt.title(class_names[labels[i]])
    plt.axis("off")
คุณสามารถฝึกโมเดลโดยใช้ชุดข้อมูลเหล่านี้ได้โดยส่งต่อไปยัง model.fit (แสดงในบทช่วยสอนนี้ในภายหลัง) หากต้องการ คุณยังสามารถวนซ้ำชุดข้อมูลด้วยตนเองและเรียกค้นชุดรูปภาพ:
for image_batch, labels_batch in train_ds:
  print(image_batch.shape)
  print(labels_batch.shape)
  break
(32, 180, 180, 3)
(32,)
image_batch คือเทนเซอร์ของรูปร่าง (32, 180, 180, 3) นี่คือชุดรูปภาพขนาด 180x180x3 จำนวน 32 รูป (ขนาดสุดท้ายหมายถึงช่องสี RGB) label_batch คือเทนเซอร์ของรูปร่าง (32,) ซึ่งเป็นป้ายกำกับที่สอดคล้องกับรูปภาพ 32 รูป
คุณสามารถเรียก .numpy() บนเทนเซอร์ตัวใดตัวหนึ่งเพื่อแปลงเป็น numpy.ndarray
สร้างมาตรฐานข้อมูล
ค่าช่อง RGB อยู่ในช่วง [0, 255] ไม่เหมาะสำหรับโครงข่ายประสาทเทียม โดยทั่วไป คุณควรพยายามทำให้ค่าอินพุตของคุณมีขนาดเล็ก
ที่นี่ คุณจะกำหนดค่ามาตรฐานให้อยู่ในช่วง [0, 1] โดยใช้ tf.keras.layers.Rescaling :
normalization_layer = tf.keras.layers.Rescaling(1./255)
มีสองวิธีในการใช้เลเยอร์นี้ คุณสามารถใช้กับชุดข้อมูลได้โดยเรียก Dataset.map :
normalized_ds = train_ds.map(lambda x, y: (normalization_layer(x), y))
image_batch, labels_batch = next(iter(normalized_ds))
first_image = image_batch[0]
# Notice the pixel values are now in `[0,1]`.
print(np.min(first_image), np.max(first_image))
0.0 0.96902645ตัวยึดตำแหน่ง22
หรือคุณสามารถรวมเลเยอร์ไว้ในข้อกำหนดของโมเดลเพื่อลดความซับซ้อนในการปรับใช้ คุณจะใช้แนวทางที่สองที่นี่
กำหนดค่าชุดข้อมูลสำหรับประสิทธิภาพ
ตรวจสอบให้แน่ใจว่าได้ใช้การดึงข้อมูลล่วงหน้าแบบบัฟเฟอร์ เพื่อให้คุณสามารถส่งข้อมูลจากดิสก์โดยไม่ต้องให้ I/O ถูกบล็อก นี่เป็นวิธีสำคัญสองวิธีที่คุณควรใช้เมื่อโหลดข้อมูล:
-
Dataset.cacheเก็บภาพไว้ในหน่วยความจำหลังจากที่โหลดออกจากดิสก์ในช่วงยุคแรก เพื่อให้แน่ใจว่าชุดข้อมูลจะไม่กลายเป็นคอขวดขณะฝึกโมเดลของคุณ หากชุดข้อมูลของคุณใหญ่เกินไปที่จะใส่ลงในหน่วยความจำ คุณสามารถใช้วิธีนี้เพื่อสร้างแคชบนดิสก์ที่มีประสิทธิภาพ -
Dataset.prefetchทับซ้อนการประมวลผลข้อมูลล่วงหน้าและการดำเนินการโมเดลขณะฝึก
ผู้อ่านที่สนใจสามารถเรียนรู้เพิ่มเติมเกี่ยวกับทั้งสองวิธี รวมถึงวิธีการแคชข้อมูลไปยังดิสก์ในส่วนการ ดึงข้อมูลล่วงหน้า ของประสิทธิภาพที่ ดีขึ้นด้วยคู่มือ tf.data API
AUTOTUNE = tf.data.AUTOTUNE

train_ds = train_ds.cache().prefetch(buffer_size=AUTOTUNE)
val_ds = val_ds.cache().prefetch(buffer_size=AUTOTUNE)
ฝึกนางแบบ
เพื่อความสมบูรณ์ คุณจะแสดงวิธีฝึกโมเดลอย่างง่ายโดยใช้ชุดข้อมูลที่คุณเพิ่งจัดเตรียม
โมเดล Sequential ประกอบด้วยบล็อกการบิดสามบล็อก ( tf.keras.layers.Conv2D ) ที่มีเลเยอร์การรวมสูงสุด ( tf.keras.layers.MaxPooling2D ) ในแต่ละอัน มีเลเยอร์ที่เชื่อมต่ออย่างสมบูรณ์ ( tf.keras.layers.Dense ) โดยมี 128 ยูนิตอยู่ด้านบนซึ่งเปิดใช้งานโดยฟังก์ชันการเปิดใช้งาน ReLU ( 'relu' ) โมเดลนี้ยังไม่ได้ปรับแต่งเลย เป้าหมายคือเพื่อแสดงให้คุณเห็นกลไกโดยใช้ชุดข้อมูลที่คุณเพิ่งสร้างขึ้น หากต้องการเรียนรู้เพิ่มเติมเกี่ยวกับการจัดประเภทรูปภาพ โปรดไปที่บทแนะนำการ จัดประเภทรูปภาพ
num_classes = 5

model = tf.keras.Sequential([
  tf.keras.layers.Rescaling(1./255),
  tf.keras.layers.Conv2D(32, 3, activation='relu'),
  tf.keras.layers.MaxPooling2D(),
  tf.keras.layers.Conv2D(32, 3, activation='relu'),
  tf.keras.layers.MaxPooling2D(),
  tf.keras.layers.Conv2D(32, 3, activation='relu'),
  tf.keras.layers.MaxPooling2D(),
  tf.keras.layers.Flatten(),
  tf.keras.layers.Dense(128, activation='relu'),
  tf.keras.layers.Dense(num_classes)
])
เลือก tf.keras.optimizers.Adam Optimizer และ tf.keras.losses.SparseCategoricalCrossentropy loss function ในการดูการฝึกอบรมและการตรวจสอบความถูกต้องสำหรับช่วงการฝึกแต่ละครั้ง ให้ส่งอาร์กิวเมนต์ metrics ไปที่ Model.compile
model.compile(
  optimizer='adam',
  loss=tf.losses.SparseCategoricalCrossentropy(from_logits=True),
  metrics=['accuracy'])
model.fit(
  train_ds,
  validation_data=val_ds,
  epochs=3
)
Epoch 1/3
92/92 [==============================] - 4s 21ms/step - loss: 1.3091 - accuracy: 0.4281 - val_loss: 1.0982 - val_accuracy: 0.5599
Epoch 2/3
92/92 [==============================] - 1s 12ms/step - loss: 1.0196 - accuracy: 0.5879 - val_loss: 0.9572 - val_accuracy: 0.6213
Epoch 3/3
92/92 [==============================] - 1s 12ms/step - loss: 0.8455 - accuracy: 0.6775 - val_loss: 0.8839 - val_accuracy: 0.6512
<keras.callbacks.History at 0x7ff10c168850>
คุณอาจสังเกตเห็นว่าความแม่นยำในการตรวจสอบความถูกต้องนั้นต่ำเมื่อเทียบกับความแม่นยำในการฝึก ซึ่งบ่งชี้ว่าแบบจำลองของคุณมีมากเกินไป คุณสามารถเรียนรู้เพิ่มเติมเกี่ยวกับการใส่มากเกินไปและวิธีลดขนาดได้ในบทช่วย สอน นี้
การใช้ tf.data เพื่อการควบคุมที่ละเอียดยิ่งขึ้น
ยูทิลิตีการประมวลผลล่วงหน้าของ Keras— tf.keras.utils.image_dataset_from_directory — เป็นวิธีที่สะดวกในการสร้าง tf.data.Dataset จากไดเร็กทอรีของรูปภาพ
เพื่อการควบคุมเกรนที่ละเอียดยิ่งขึ้น คุณสามารถเขียนอินพุตไปป์ไลน์ของคุณเองโดยใช้ tf.data ส่วนนี้แสดงวิธีการดำเนินการดังกล่าว โดยเริ่มจากเส้นทางของไฟล์จากไฟล์ TGZ ที่คุณดาวน์โหลดมาก่อนหน้านี้
list_ds = tf.data.Dataset.list_files(str(data_dir/'*/*'), shuffle=False)
list_ds = list_ds.shuffle(image_count, reshuffle_each_iteration=False)
for f in list_ds.take(5):
  print(f.numpy())
b'/home/kbuilder/.keras/datasets/flower_photos/roses/14267691818_301aceda07.jpg'
b'/home/kbuilder/.keras/datasets/flower_photos/daisy/2641151167_3bf1349606_m.jpg'
b'/home/kbuilder/.keras/datasets/flower_photos/sunflowers/6495554833_86eb8faa8e_n.jpg'
b'/home/kbuilder/.keras/datasets/flower_photos/tulips/4578030672_e6aefd45af.jpg'
b'/home/kbuilder/.keras/datasets/flower_photos/dandelion/144686365_d7e96941ee_n.jpg'
โครงสร้างแบบต้นไม้ของไฟล์สามารถใช้เพื่อคอมไพล์รายการ class_names
class_names = np.array(sorted([item.name for item in data_dir.glob('*') if item.name != "LICENSE.txt"]))
print(class_names)
['daisy' 'dandelion' 'roses' 'sunflowers' 'tulips']ตัวยึดตำแหน่ง32
แยกชุดข้อมูลออกเป็นชุดการฝึกและการตรวจสอบ:
val_size = int(image_count * 0.2)
train_ds = list_ds.skip(val_size)
val_ds = list_ds.take(val_size)
คุณสามารถพิมพ์ความยาวของชุดข้อมูลแต่ละชุดได้ดังนี้:
print(tf.data.experimental.cardinality(train_ds).numpy())
print(tf.data.experimental.cardinality(val_ds).numpy())
2936
734
เขียนฟังก์ชันสั้น ๆ ที่แปลงพาธของไฟล์เป็นคู่ (img, label) :
def get_label(file_path):
  # Convert the path to a list of path components
  parts = tf.strings.split(file_path, os.path.sep)
  # The second to last is the class-directory
  one_hot = parts[-2] == class_names
  # Integer encode the label
  return tf.argmax(one_hot)
def decode_img(img):
  # Convert the compressed string to a 3D uint8 tensor
  img = tf.io.decode_jpeg(img, channels=3)
  # Resize the image to the desired size
  return tf.image.resize(img, [img_height, img_width])
def process_path(file_path):
  label = get_label(file_path)
  # Load the raw data from the file as a string
  img = tf.io.read_file(file_path)
  img = decode_img(img)
  return img, label
ใช้ Dataset.map เพื่อสร้างชุดข้อมูลของ image, label :
# Set `num_parallel_calls` so multiple images are loaded/processed in parallel.
train_ds = train_ds.map(process_path, num_parallel_calls=AUTOTUNE)
val_ds = val_ds.map(process_path, num_parallel_calls=AUTOTUNE)
for image, label in train_ds.take(1):
  print("Image shape: ", image.numpy().shape)
  print("Label: ", label.numpy())
Image shape:  (180, 180, 3)
Label:  1
กำหนดค่าชุดข้อมูลสำหรับประสิทธิภาพ
ในการฝึกโมเดลด้วยชุดข้อมูลนี้ คุณจะต้องการข้อมูล:
- ที่จะสับเปลี่ยนกันอย่างดี
- ที่จะแบทช์
- แบทช์ที่จะสามารถใช้ได้โดยเร็วที่สุด
คุณเพิ่มฟีเจอร์เหล่านี้ได้โดยใช้ tf.data API สำหรับรายละเอียดเพิ่มเติม ไปที่คู่มือ ประสิทธิภาพไปป์ไลน์อินพุต
def configure_for_performance(ds):
  ds = ds.cache()
  ds = ds.shuffle(buffer_size=1000)
  ds = ds.batch(batch_size)
  ds = ds.prefetch(buffer_size=AUTOTUNE)
  return ds

train_ds = configure_for_performance(train_ds)
val_ds = configure_for_performance(val_ds)
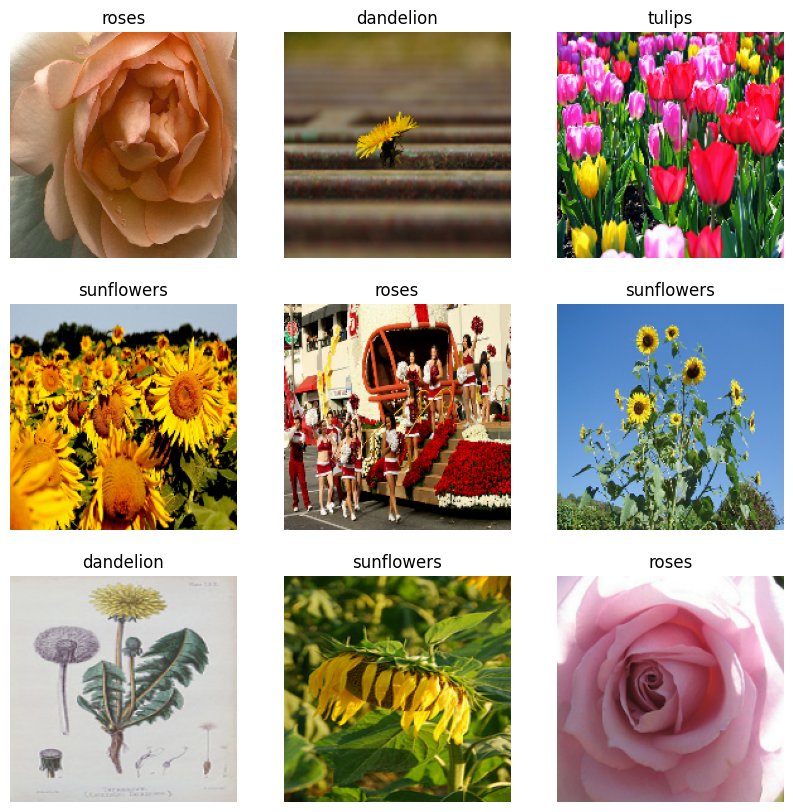
เห็นภาพข้อมูล
คุณสามารถแสดงภาพชุดข้อมูลนี้เหมือนกับที่คุณสร้างไว้ก่อนหน้านี้:
image_batch, label_batch = next(iter(train_ds))

plt.figure(figsize=(10, 10))
for i in range(9):
  ax = plt.subplot(3, 3, i + 1)
  plt.imshow(image_batch[i].numpy().astype("uint8"))
  label = label_batch[i]
  plt.title(class_names[label])
  plt.axis("off")
2022-01-26 06:29:45.209901: W tensorflow/core/kernels/data/cache_dataset_ops.cc:768] The calling iterator did not fully read the dataset being cached. In order to avoid unexpected truncation of the dataset, the partially cached contents of the dataset will be discarded. This can happen if you have an input pipeline similar to `dataset.cache().take(k).repeat()`. You should use `dataset.take(k).cache().repeat()` instead.
ฝึกโมเดลต่อไป
ตอนนี้คุณได้สร้าง tf.data.Dataset ที่คล้ายกันด้วยตนเองกับชุดที่สร้างโดย tf.keras.utils.image_dataset_from_directory ด้านบนแล้ว คุณสามารถฝึกโมเดลต่อได้ เช่นเดียวกับเมื่อก่อน คุณจะต้องฝึกเพียงไม่กี่ช่วงเพื่อให้เวลาทำงานสั้นลง
model.fit(
  train_ds,
  validation_data=val_ds,
  epochs=3
)
Epoch 1/3
92/92 [==============================] - 3s 21ms/step - loss: 0.7305 - accuracy: 0.7245 - val_loss: 0.7311 - val_accuracy: 0.7139
Epoch 2/3
92/92 [==============================] - 1s 13ms/step - loss: 0.5279 - accuracy: 0.8069 - val_loss: 0.7021 - val_accuracy: 0.7316
Epoch 3/3
92/92 [==============================] - 1s 13ms/step - loss: 0.3739 - accuracy: 0.8644 - val_loss: 0.8266 - val_accuracy: 0.6948
<keras.callbacks.History at 0x7ff0ee071f10>
ตัวยึดตำแหน่ง46
การใช้ชุดข้อมูล TensorFlow
จนถึงตอนนี้ บทช่วยสอนนี้เน้นไปที่การโหลดข้อมูลออกจากดิสก์ คุณยังสามารถค้นหาชุดข้อมูลที่จะใช้โดยการสำรวจ แคตตาล็อก ขนาดใหญ่ของชุดข้อมูลที่ดาวน์โหลดง่ายได้ที่ TensorFlow Datasets
เนื่องจากคุณได้โหลดชุดข้อมูล Flowers ออกจากดิสก์ก่อนหน้านี้ ตอนนี้เรามานำเข้าด้วยชุดข้อมูล TensorFlow กัน
ดาวน์โหลด ชุดข้อมูล Flowers โดยใช้ชุดข้อมูล TensorFlow:
(train_ds, val_ds, test_ds), metadata = tfds.load(
    'tf_flowers',
    split=['train[:80%]', 'train[80%:90%]', 'train[90%:]'],
    with_info=True,
    as_supervised=True,
)
ชุดข้อมูลดอกไม้มีห้าคลาส:
num_classes = metadata.features['label'].num_classes
print(num_classes)
5
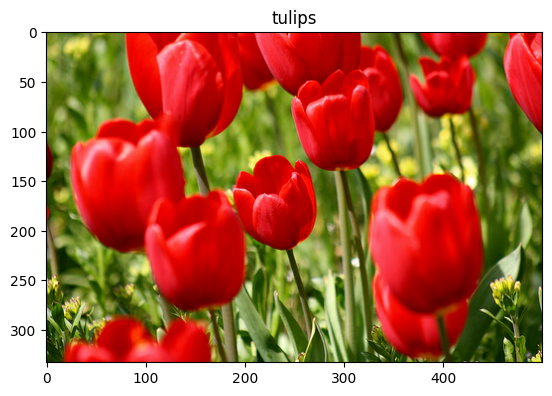
ดึงภาพจากชุดข้อมูล:
get_label_name = metadata.features['label'].int2str

image, label = next(iter(train_ds))
_ = plt.imshow(image)
_ = plt.title(get_label_name(label))
2022-01-26 06:29:54.281352: W tensorflow/core/kernels/data/cache_dataset_ops.cc:768] The calling iterator did not fully read the dataset being cached. In order to avoid unexpected truncation of the dataset, the partially cached contents of the dataset will be discarded. This can happen if you have an input pipeline similar to `dataset.cache().take(k).repeat()`. You should use `dataset.take(k).cache().repeat()` instead.ตัวยึดตำแหน่ง51
เช่นเคย อย่าลืมแบทช์ สับเปลี่ยน และกำหนดค่าการฝึก การตรวจสอบ และชุดทดสอบเพื่อประสิทธิภาพ:
train_ds = configure_for_performance(train_ds)
val_ds = configure_for_performance(val_ds)
test_ds = configure_for_performance(test_ds)
คุณสามารถค้นหาตัวอย่างที่สมบูรณ์ของการทำงานกับชุดข้อมูล Flowers และชุดข้อมูล TensorFlow ได้โดยไปที่บทแนะนำ การเสริมข้อมูล
ขั้นตอนถัดไป
บทช่วยสอนนี้แสดงวิธีโหลดอิมเมจจากดิสก์สองวิธี ขั้นแรก คุณได้เรียนรู้วิธีโหลดและประมวลผลชุดข้อมูลภาพล่วงหน้าโดยใช้เลเยอร์และยูทิลิตี้ของ Keras ที่ประมวลผลล่วงหน้า ต่อไป คุณได้เรียนรู้วิธีเขียนอินพุตไปป์ไลน์ตั้งแต่ต้นโดยใช้ tf.data สุดท้าย คุณได้เรียนรู้วิธีดาวน์โหลดชุดข้อมูลจากชุดข้อมูล TensorFlow
สำหรับขั้นตอนต่อไปของคุณ:
- คุณสามารถเรียนรู้ วิธีเพิ่มการเสริมข้อมูล
- หากต้องการเรียนรู้เพิ่มเติมเกี่ยวกับ
tf.dataคุณสามารถไปที่ tf.data: คู่มือไปป์ไลน์การป้อนข้อมูล Build TensorFlow