| | |  ดูแหล่งที่มาบน GitHub ดูแหล่งที่มาบน GitHub | |
ภาพรวม
ในการมองเห็นด้วยคอมพิวเตอร์ พื้นที่สีที่เลือกอาจมีประสิทธิภาพของแบบจำลองอย่างมีนัยสำคัญ ในขณะที่ RGB เป็นพื้นที่สีส่วนใหญ่ที่พบบ่อยในสถานการณ์ manay รูปแบบการดำเนินการที่ดีกว่าเมื่อเปลี่ยนสีช่องว่างทางเลือกเช่น YUV , YCbCr , XYZ (CIE) ฯลฯ
tensorflow-io แพคเกจให้รายการของ API แปลงพื้นที่สีที่สามารถนำมาใช้ในการเตรียมความพร้อมและเพิ่มข้อมูลภาพ
ติดตั้ง
ติดตั้งแพ็คเกจที่จำเป็น และรีสตาร์ทรันไทม์
pip install -q tensorflow-io
ดาวน์โหลดภาพตัวอย่าง
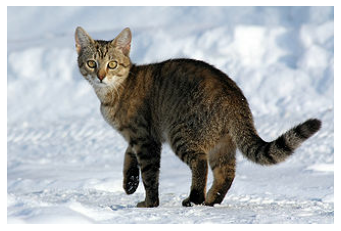
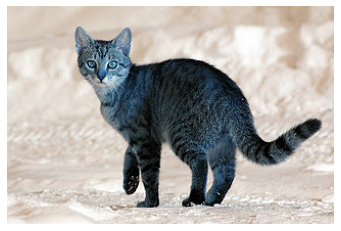
ตัวอย่างภาพที่ใช้ในการกวดวิชานี้เป็น แมวในหิมะ แม้ว่ามันจะถูกแทนที่ด้วยภาพ JPEG ใด ๆ
ต่อไปนี้จะดาวน์โหลดภาพและบันทึกลงดิสก์ท้องถิ่น sample.jpg :
curl -o sample.jpg -L https://storage.googleapis.com/download.tensorflow.org/example_images/320px-Felis_catus-cat_on_snow.jpgls -ls sample.jpg
% Total    % Received % Xferd  Average Speed   Time    Time     Time  Current
                                 Dload  Upload   Total   Spent    Left  Speed
100 17858  100 17858    0     0   235k      0 --:--:-- --:--:-- --:--:--  235k
20 -rw-rw-r-- 1 kbuilder kokoro 17858 Oct 27 16:33 sample.jpg
การใช้งาน
อ่านไฟล์ภาพ
อ่านและถอดรหัสภาพเป็น uint8 Tensor ของรูปร่าง (213, 320, 3)
import tensorflow as tf
import tensorflow_io as tfio

image = tf.image.decode_jpeg(tf.io.read_file('sample.jpg'))

print(image.shape, image.dtype)
(213, 320, 3) <dtype: 'uint8'>
รูปภาพสามารถแสดงได้โดย:
import matplotlib.pyplot as plt

plt.figure()
plt.imshow(image)
plt.axis('off')
plt.show()
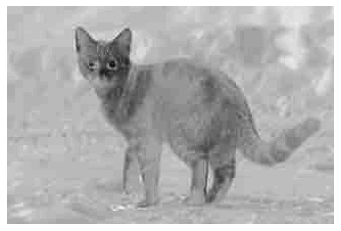
แปลง RGB เป็นระดับสีเทา
RGB ภาพสามารถแปลงเป็น Grayscale เพื่อลดช่อง 3 ต่อ 1 โดยมี tfio.experimental.color.rgb_to_grayscale :
grayscale = tfio.experimental.color.rgb_to_grayscale(image)

print(grayscale.shape, grayscale.dtype)

# use tf.squeeze to remove last channel for plt.imshow to display:
plt.figure()
plt.imshow(tf.squeeze(grayscale, axis=-1), cmap='gray')
plt.axis('off')
plt.show()
(213, 320, 1) <dtype: 'uint8'>
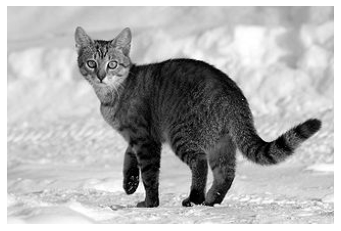
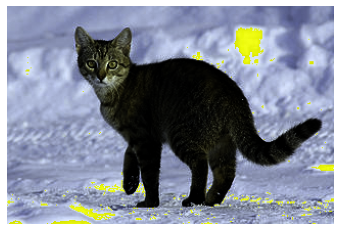
แปลง RGB เป็น BGR
บางซอฟต์แวร์ภาพและกล้อง manufacturors อาจจะชอบ BGR ซึ่งสามารถได้รับผ่าน tfio.experimental.color.rgb_to_bgr :
bgr = tfio.experimental.color.rgb_to_bgr(image)

print(bgr.shape, bgr.dtype)

plt.figure()
plt.imshow(bgr)
plt.axis('off')
plt.show()
(213, 320, 3) <dtype: 'uint8'>
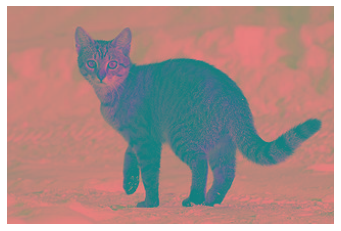
แปลง RGB เป็น CIE XYZ
CIE XYZ (หรือ CIE 1931 XYZ เป็นพื้นที่สีทั่วไปที่ใช้ในโปรแกรมการประมวลผลภาพจำนวนมาก. ต่อไปนี้คือการแปลงจาก RGB เพื่อ CIE XYZ ผ่าน tfio.experimental.color.rgb_to_xyz . หมายเหตุ: tfio.experimental.color.rgb_to_xyz ถือว่าการป้อนข้อมูลจุดลอย ในช่วง [0, 1] เพิ่มเติมเพื่อการประมวลผลก่อนเป็นสิ่งจำเป็น:
# convert to float32
image_float32 = tf.cast(image, tf.float32) / 255.0

xyz_float32 = tfio.experimental.color.rgb_to_xyz(image_float32)

# convert back uint8
xyz = tf.cast(xyz_float32 * 255.0, tf.uint8)

print(xyz.shape, xyz.dtype)

plt.figure()
plt.imshow(xyz)
plt.axis('off')
plt.show()
(213, 320, 3) <dtype: 'uint8'>
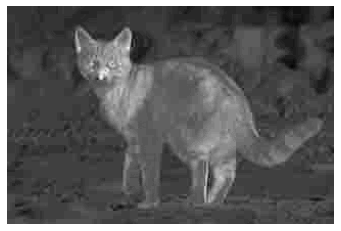
แปลง RGB เป็น YCbCr
สุดท้าย YCbCr เป็นพื้นที่สีเริ่มต้นในระบบวิดีโอจำนวนมาก แปลงไป YCbCr สามารถทำได้ผ่าน tfio.experimental.color.rgb_to_ycbcr :
ycbcr = tfio.experimental.color.rgb_to_ycbcr(image)

print(ycbcr.shape, ycbcr.dtype)

plt.figure()
plt.imshow(ycbcr, cmap='gray')
plt.axis('off')
plt.show()
(213, 320, 3) <dtype: 'uint8'>
อะไรคือสิ่งที่น่าสนใจมากขึ้น แต่เป็นที่ YCbCr อาจจะแตกออกเป็น Y' (ลู) Cb (สีฟ้าเข้มของสีที่แตกต่างกัน) และ Cr (สีแดงเข้มของสีที่แตกต่างกัน) ส่วนประกอบกับแต่ละองค์ประกอบการดำเนินการข้อมูลที่มีความหมาย perceptually:
y, cb, cr = ycbcr[:,:,0], ycbcr[:,:,1], ycbcr[:,:,2]

# Y' component
plt.figure()
plt.imshow(y, cmap='gray')
plt.axis('off')
plt.show()

# Cb component
plt.figure()
plt.imshow(cb, cmap='gray')
plt.axis('off')
plt.show()

# Cr component
plt.figure()
plt.imshow(cr, cmap='gray')
plt.axis('off')
plt.show()